Tag Builder: Overview
Tag Builder types
The tag builder features enable you to create new tags which will be saved on the TrendMiner server. Each created tag can be used as any other historian tag inside the TrendMiner environment.
Formula: To create new tags based on simple mathematics and functions using existing tags.
Aggregation: To create moving window functions over individual tags based on certain operators. Using aggregation tags you can get the minimum or maximum value for a tag in the specified time window or average out the signal over a time window to smooth out noisy data.
Prediction: To generate a new tag based on a multi-variable linear regression analysis. Ideal feature to create a soft sensor by combining different influencing tags.
Data import: To import external data as a TrendMiner tag. Now only csv-files are supported for loading in data, using standard coding UTF-8.
Custom calculations: To create new TrendMiner tags based on a custom developed Python script.
Tag Builder Workflow
Opening the Tag Builder Menu will show you all available options as listed in the previous section. From here you can choose with which tag type to proceed with for further actions.
Open the Tag Builder Menu.
Click on the "+ Create new"-button for your tag builder type of choice. A new sub menu will be shown based on the selected tag type.
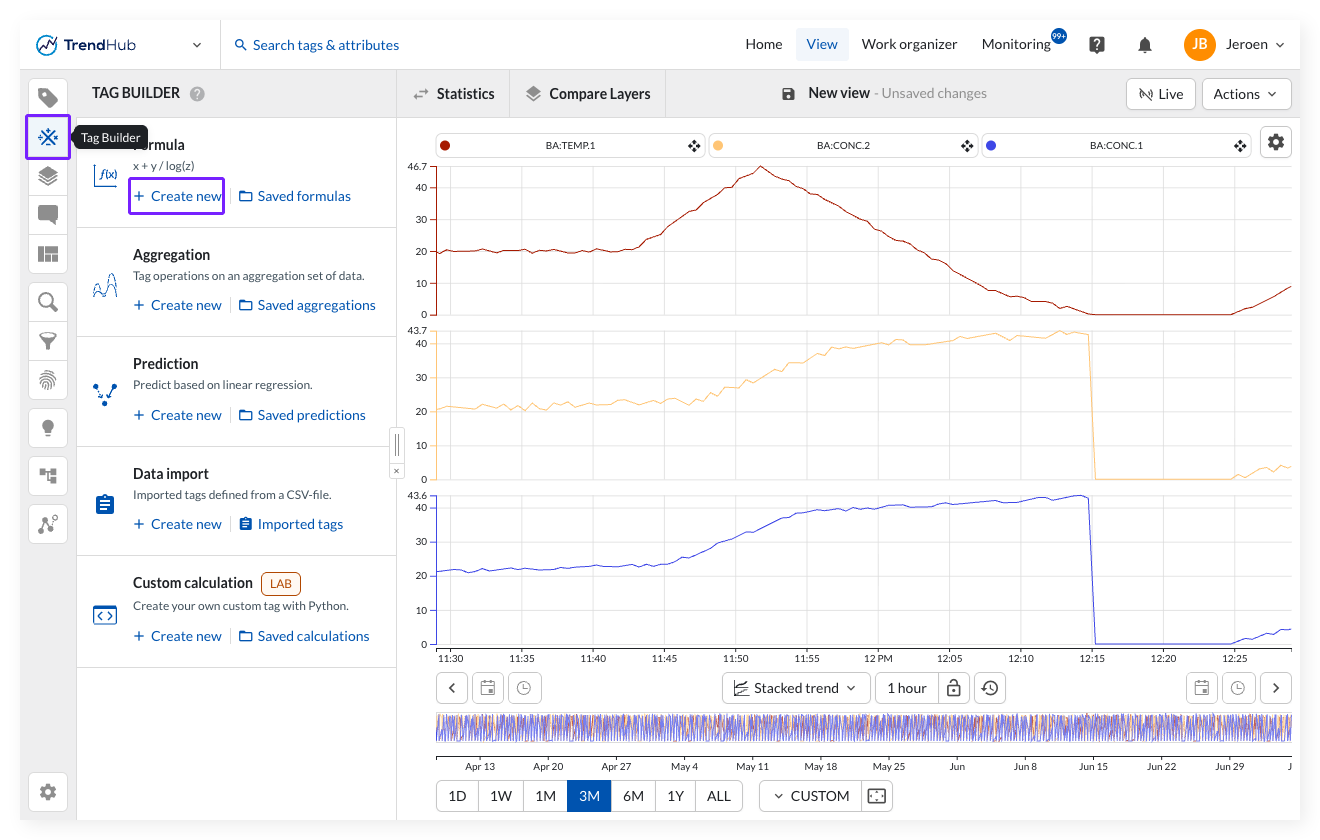
Fill out the required fields. More information about the specific fields can be found on the respective page of each tag type as linked in the previous section.
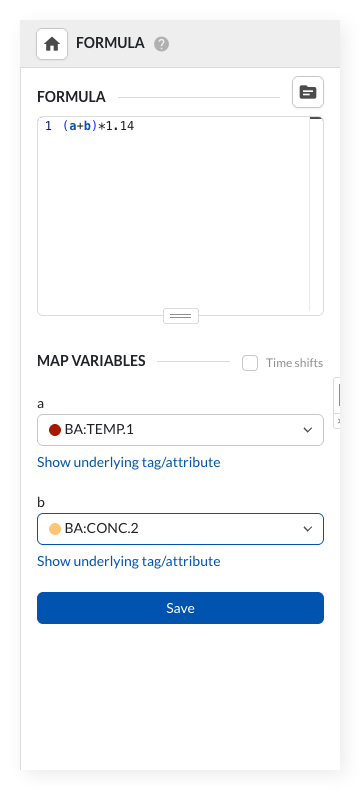
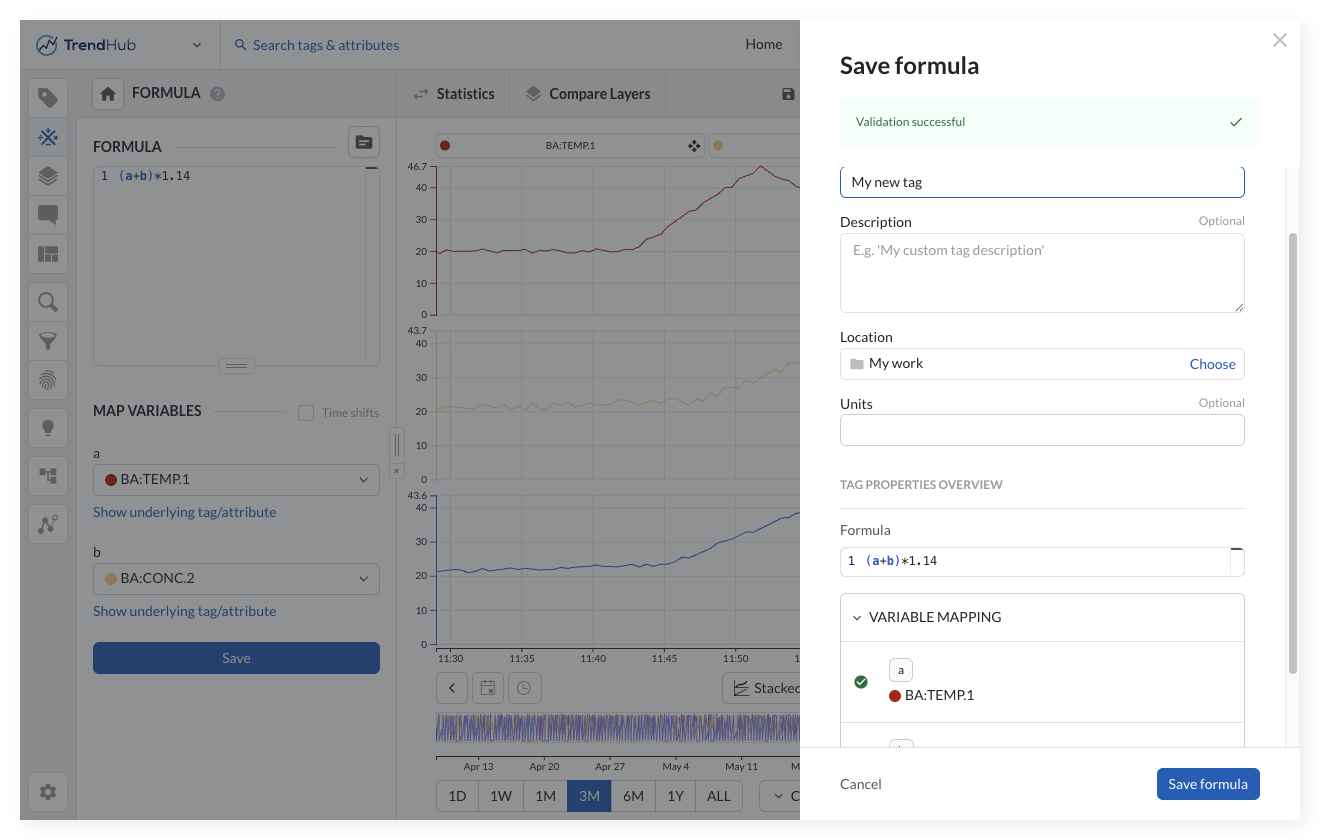
Click the "save"-button. A new side-panel appears on the right side of your screen. As soon as the panel opens, TrendMiner runs a series of validation checks. See the section about Saving and validation for the messages you may encounter and how to resolve them.
In the "tag details"-section you need to fill out:
Name: The name of the tag you want to create. The tag you created will be searchable with this name.
Note
Rules of limitations are applied so consider your tag name before committing the save, see below.
Description (optional): The description of your tag.
Location: The folder of your Work Organizer where you want to save the tag.
Units (optional): The unit of measurement of your tag.
The "tag properties overview" - sections shows a summary of how the calculated tag is set up.
Click on the "save Formula/Aggregation/..."-button in the side-panel. The created tags will be added to your screen automatically and a summary (tag definitions) will be shown in the tag builder menu.
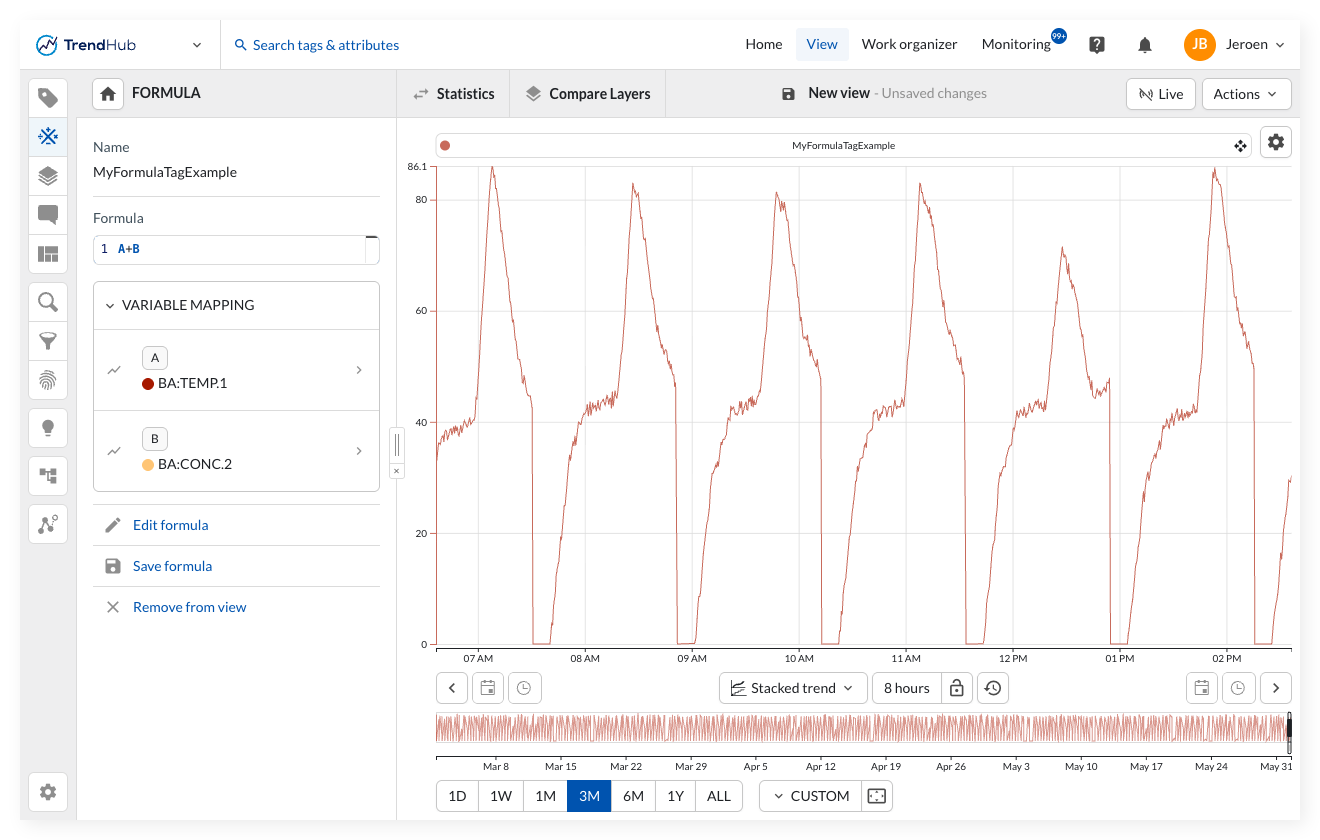
Any created tag can be added to your screen via the tag browser as with any other tag in TrendMiner.
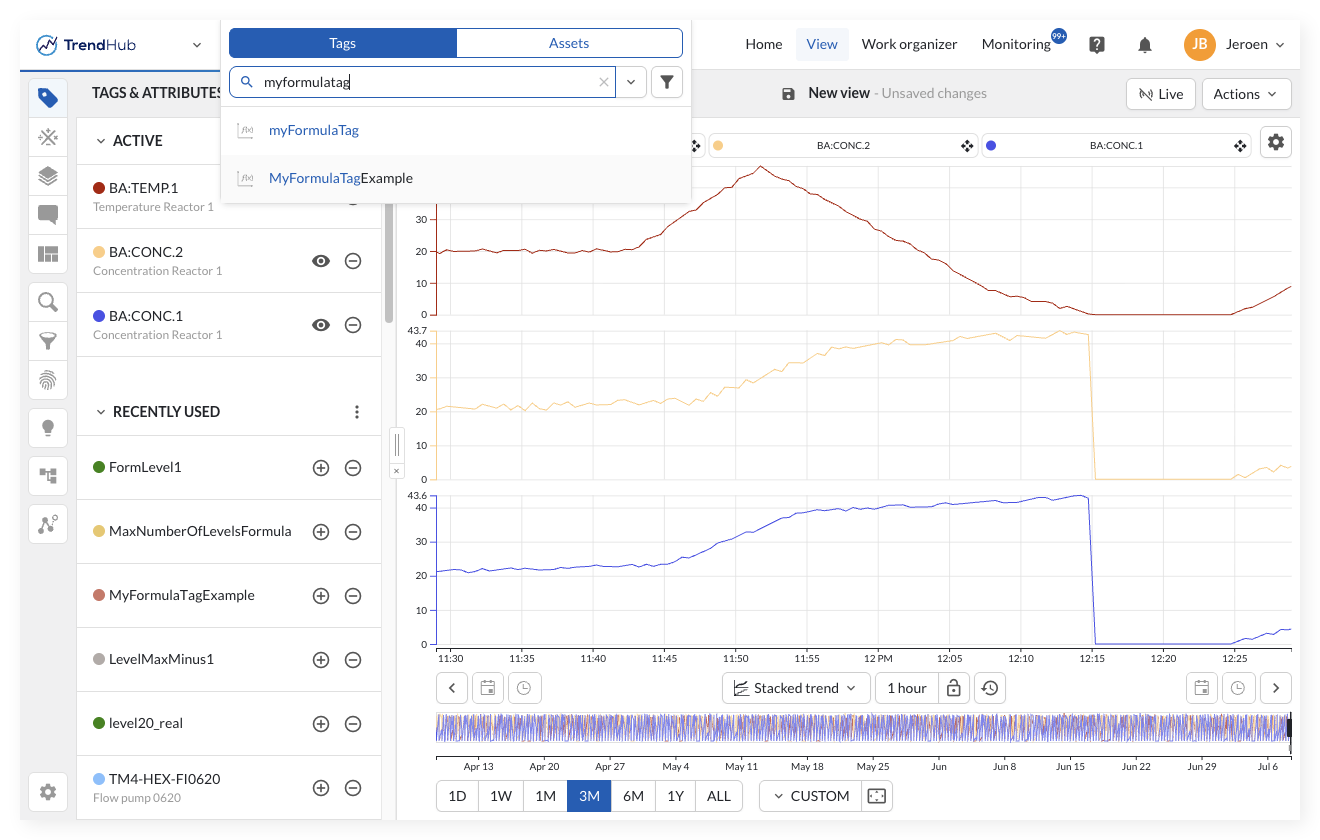
Once added to the focus chart, the complete definition of the tag can be consulted by clicking the source in the tag details. The tag dependency panel shows how the tag has been constructed and allows to browse through the details of all underlying tags. See this article to learn more about the tag dependency browser.
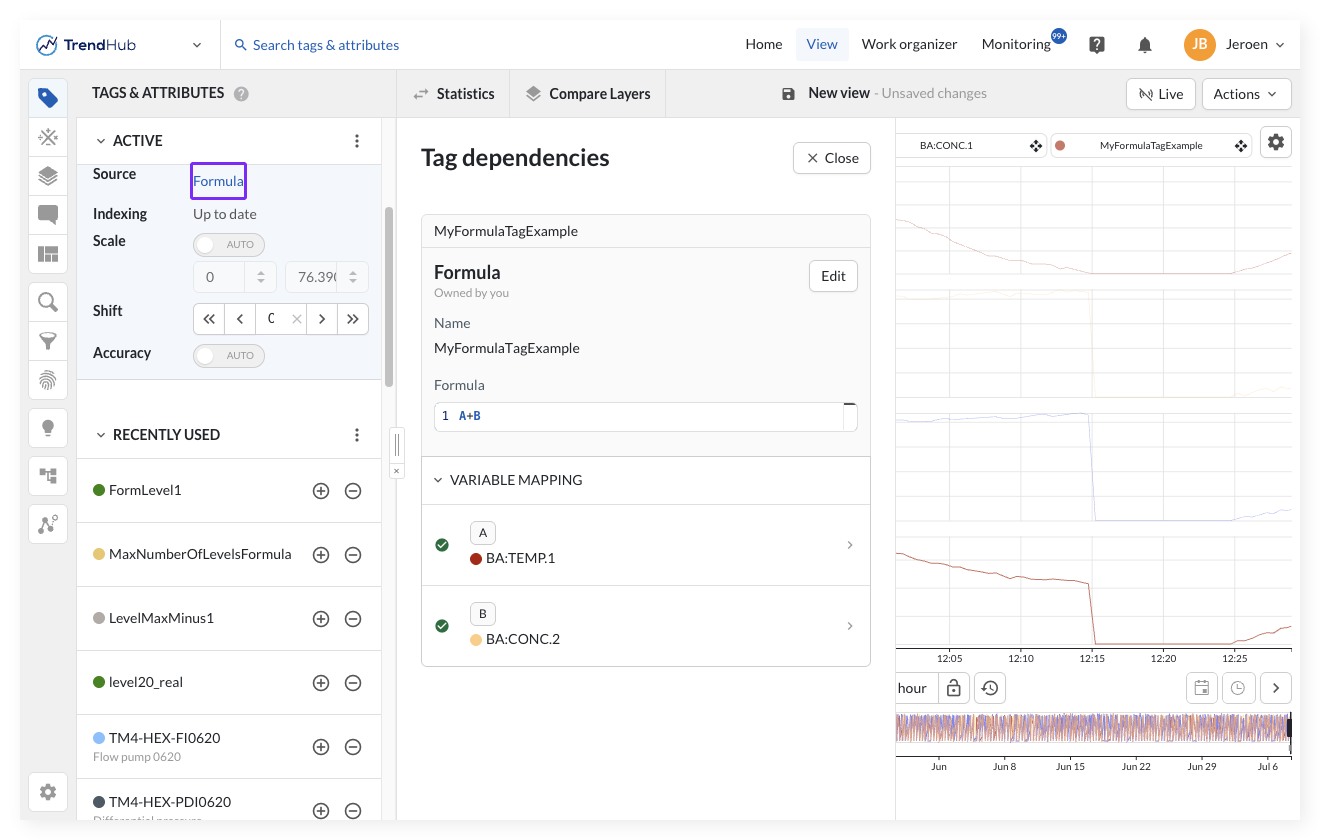
Owners of a created tag also have the new tag available via the work organizer. This allows the owner to easily edit or copy the tag.
Unlike other saved items in TrendMiner, created tags are always visible to all other users. Created tags are searchable and accessible via the tag browser to all other users within TrendMiner.
Note
Users can only access these tags under the condition that they have permission to all the underlying (historian) tags used inside the created tag.
Once added to the chart, the complete definition of the tag can be consulted by clicking the source link in the tag details. The tag dependency panel shows how the tag has been constructed and allows to browse through the details of all underlying tags.
Although tags are automatically accessible, it is still possible to share a calculated tag with other users via the Work Organizer. The added benefit of sharing tags via the work organizer is that other users will be able to open the tag in the tag builder menu, and/or edit the tag based on the provided permissions.
Open the Tag Builder Menu.
Click on the "Saved Formula/Aggregation/..."-button.
Select your desired tag from the side-panel, showing the work organizer, that appears on the right side of your screen.
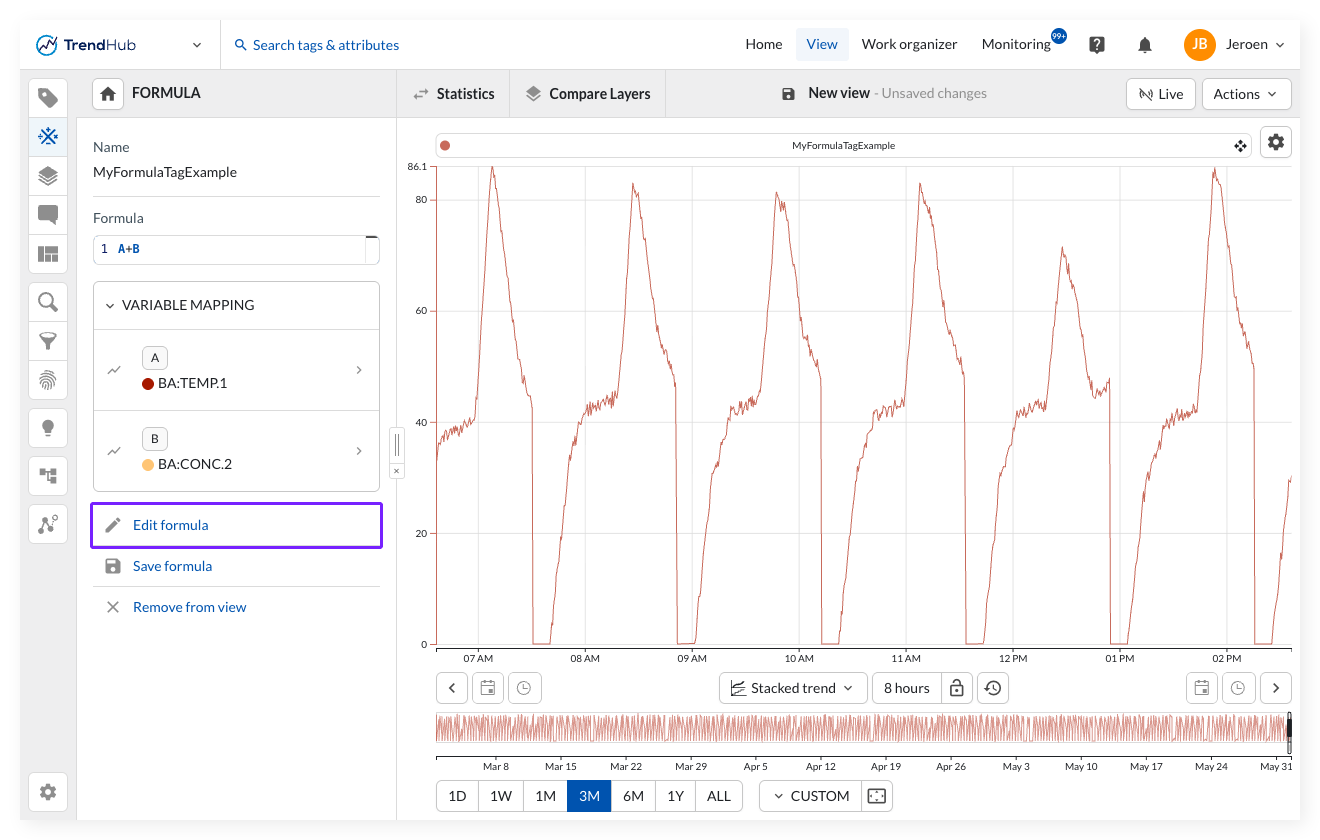
A summary of the tag details (= tag definitions) will be shown in the menu on the left including options to:
Edit your tag
Save your tag.
Add/Remove your tag from the current view.
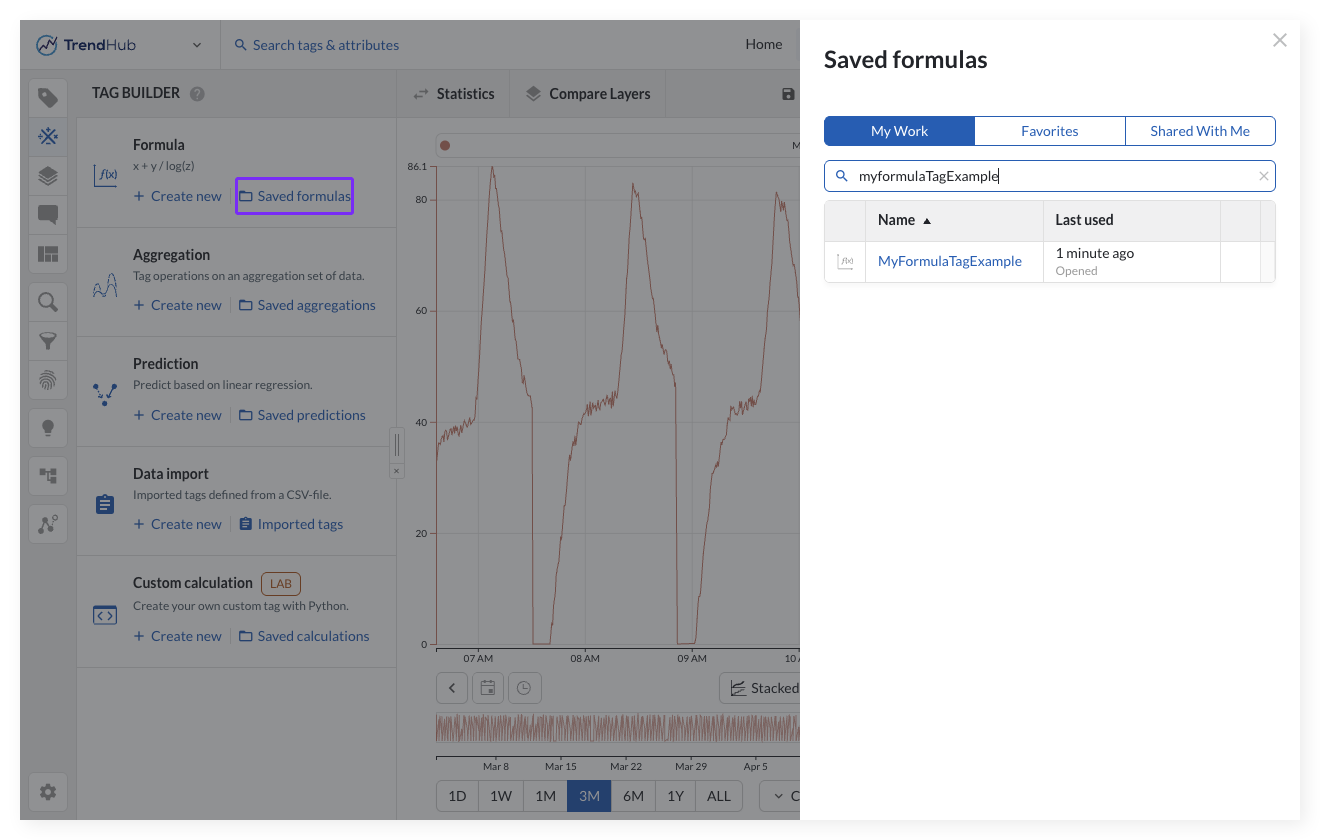
Alternatively, you can open the Work Organizer and select any of your saved tags instead. This option can also be used by other users when the tag definition is shared with another user.
Note
This option is only available for owners of the tag or users with whom the tag is shared. Other users can see the details of the tag by clicking the Source link in the tag details.
There are 2 options to edit a tag. You can either open the tag details by accessing the tag through the respective saved item, or by clicking Edit in the tag dependency browser.
Editing by directly accessing the saved item
Follow the steps shown in the section above
Choose the "Edit tag" option.
Edit the tag through the tag dependency browser
Once added to the focus chart, the complete definition of a tag can be consulted by clicking the source in the tag details. The tag dependency browser shows how the tag has been constructed and allows to browse through the details of all underlying tags. See this article to learn more about the tag dependency browser. When you have the rights to modify a calculated tag, an Edit button appears at the top right of the tag definition in the dependency browser. Clicking Edit will immediately open the edit form of the respective tag builder tag.
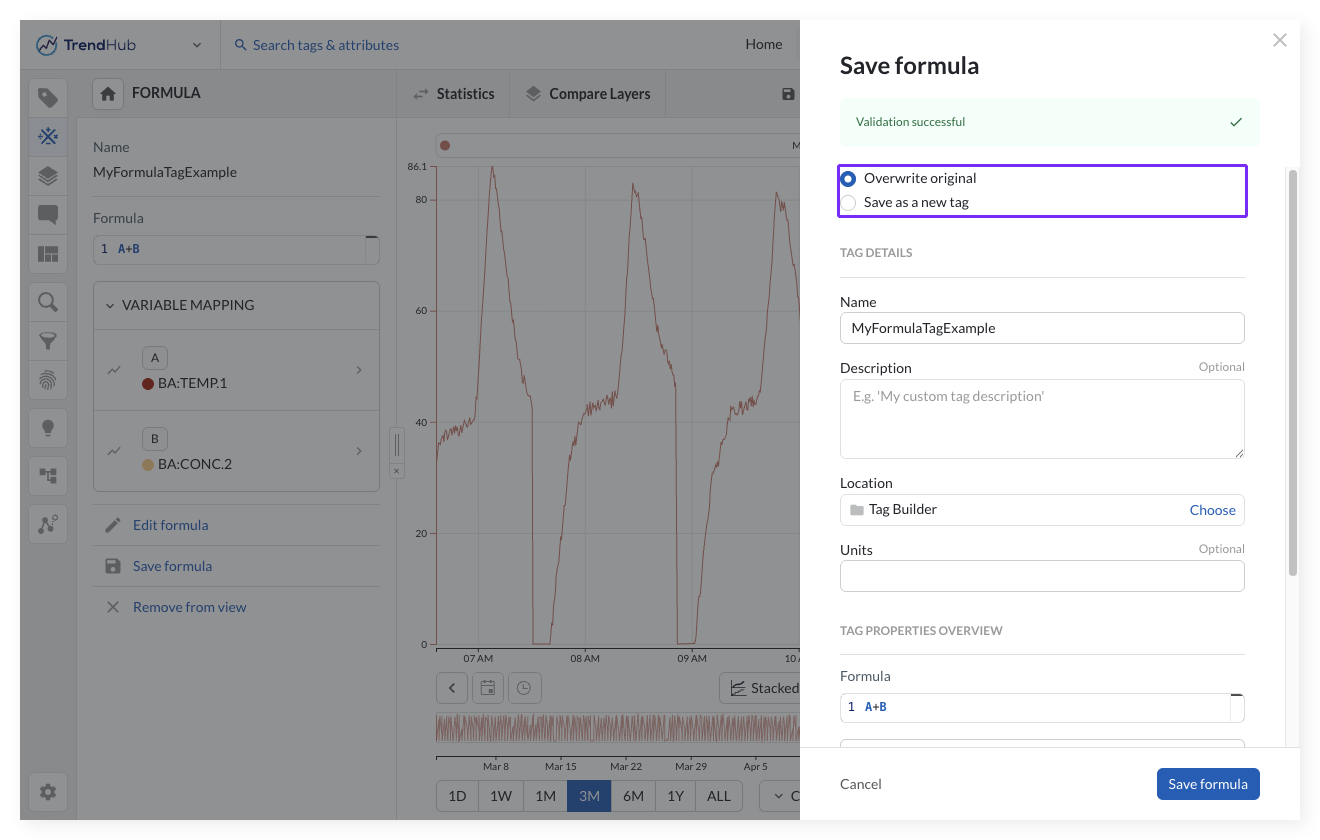
Once you made the desired changes, you can either overwrite the original tag or save the changes as a new tag
When you save or update a calculated tag, TrendMiner runs a series of validation checks in the save panel on the right side of the screen, including the levels and node limits, circular dependencies, and the impact on other calculated tags that depend on this one.
If validation fails, an error message describes what is wrong. Depending on the scenario, the Save, Overwrite original, and Save as a new tag buttons stay disabled until the issue is resolved.
Validation errors
The validation can fail because of the following reasons:
Maximum number of nodes exceeded (maximum is 120 nodes)
Maximum number of levels exceeded (maximum is 20 levels)
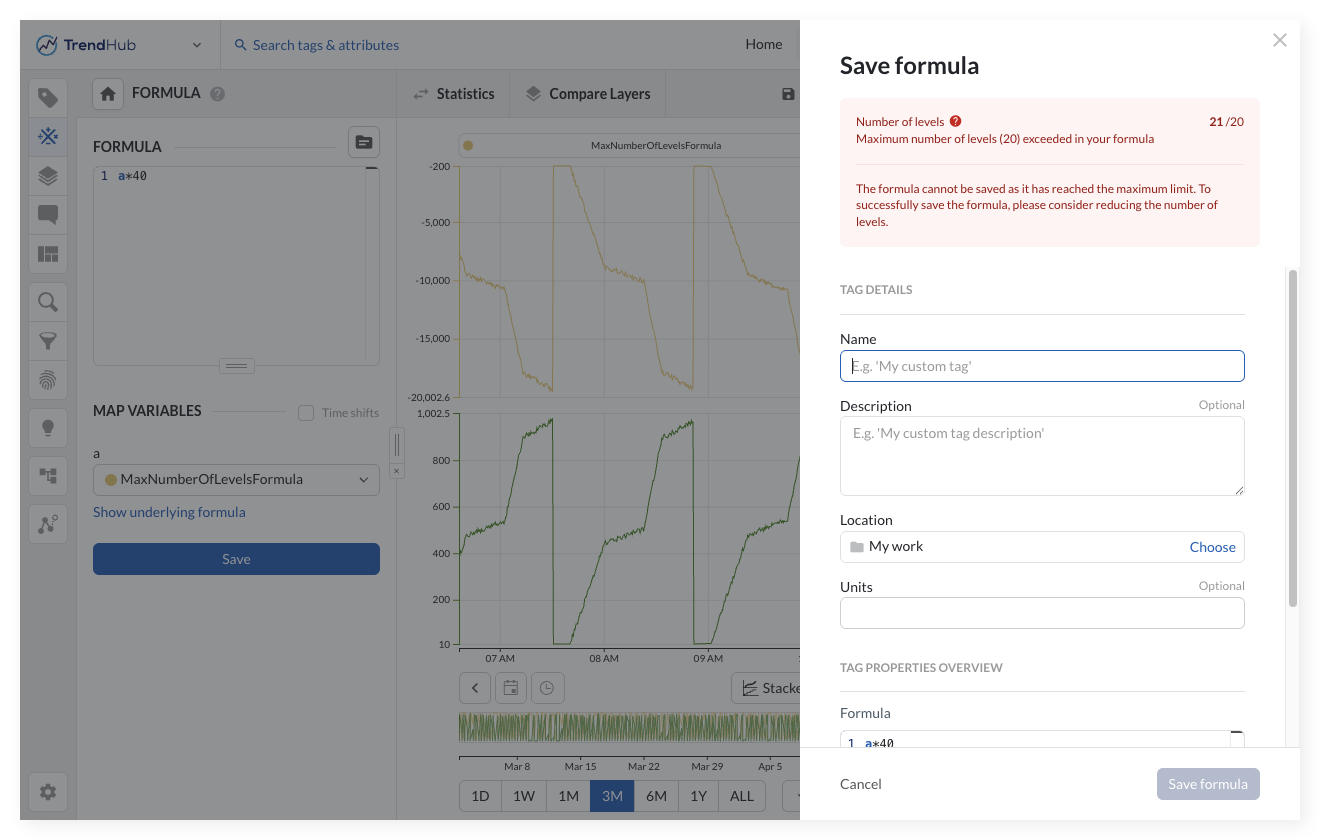
A circular dependency has been detected, which means you are trying to use a calculated tag as a variable in its own dependency tree, causing a conflicting loop. This can only happen when you are modifying an existing tag.
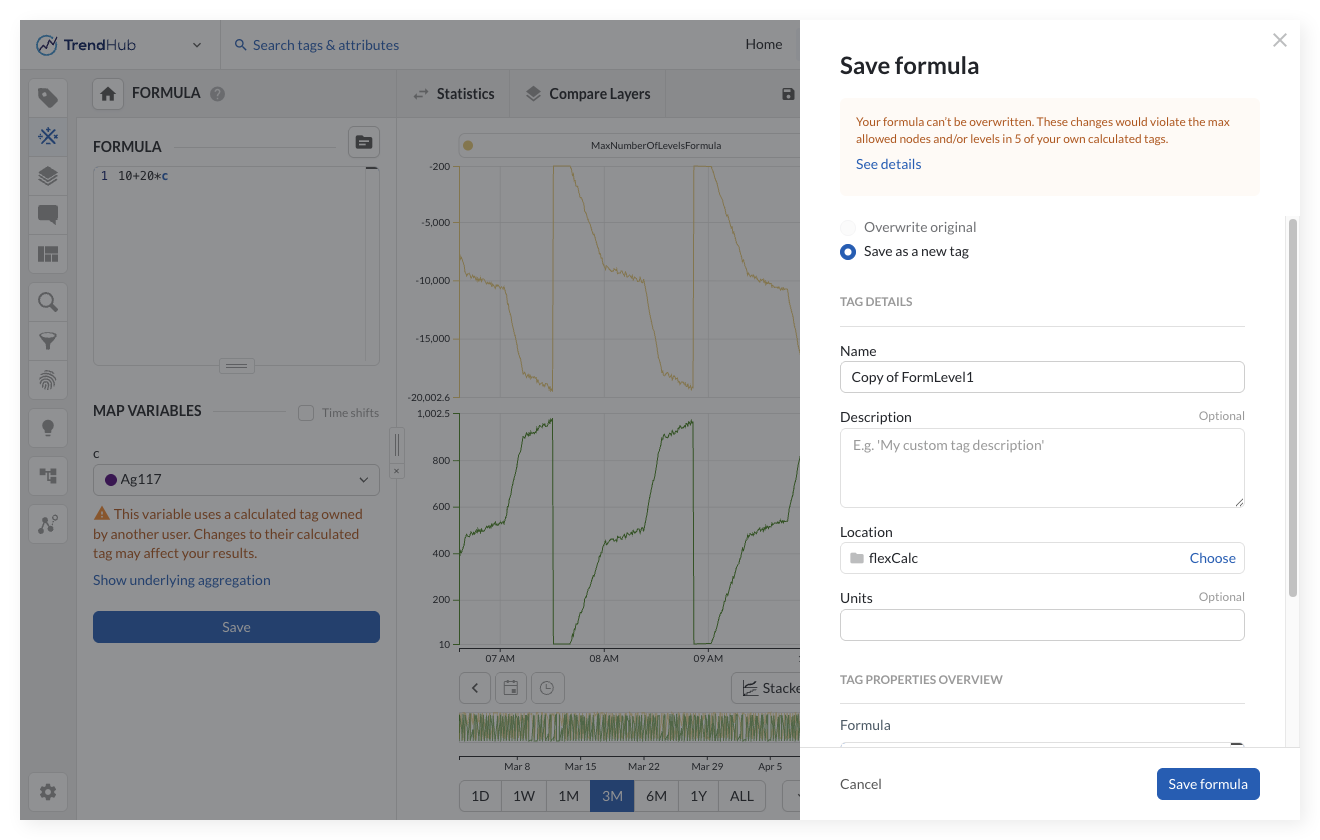
Breaking changes detected in other calculated tags. By making the desired modifications, depending calculated tags will breach the node and/or level limit. This can only happen when you are modifying an existing tag. When breaking changes are detected, the calculated tag can still be saved as a new tag
Recommended threshold warning
When a calculated tag reaches 60 nodes, the save panel shows a node counter with the following warning message:
The formula has reached the recommended threshold of 60 nodes. Complex formulas may be hard to visualize or cause performance issues.
The warning is informational and is meant to help you decide whether to simplify the tag before saving. The tag can still be saved. However, when plotting small periods (i.e. < 5 hours for an index resolution of 1 minute), data is pulled directly from the historian. When the calculated tag consists of more than 60 nodes, plotting this tag on short periods can cause visualizations and/or performance issues.
Follow the steps from the "Showing tag details"-section.
Choose the "Save tag" option. A side-panel appears where you have the option to:
Overwrite the original tag.
Save the changes as a new tag.
Open the Work Organizer.
Search for the saved item you want to delete.
Select the checkbox of the items you want to delete.
Click "Actions" > "Delete item(s)" at the top of the page.
Note
Please read the limitations on naming and deleting tags carefully at the bottom of this page before proceeding.
You can only access ( i.e. add those tags to your active session) tag builder tags under the condition that you have permission to the underlying (historian) tags used inside the created tag.
Permissions to the definition of the work item itself adhere to the same behaviour as described in the collaboration topics.
Limitations when combining different (calculated) tags
When you build calculated tags on top of other calculated tags, TrendMiner enforces two limits to keep performance predictable: a limit on the number of nesting levels and a limit on the total number of nodes in the calculation tree.
Maximum nesting levels: 20. A calculated tag can reference other calculated tags up to 20 levels deep.
Maximum nodes per calculated tag: 120. This counts every element across the full tree, including the formula itself.
Note
In releases up to and including 2026.R1.0, nesting was limited to 2 levels. From 2026.R2.0 onwards, the limit has been raised to support more complex calculation trees.
Understanding levels and nodes
A level is counted when one calculated tag references another tag, creating a dependency chain. Tags from a connected database and imported tags are counted as level-0 tags.
Examples of nesting:
Tag A , Tag B and Tag C are tags of a connected time series database
Formula1 = A + B==> Level 1 tagFormula2 = Formula1 + C==> Level 2 tagRunning average of Formula2==> Level 3 tag
A node is any individual element in the calculation structure. The formula itself also counts as one node.
The schematic below show how the node count is calculated.
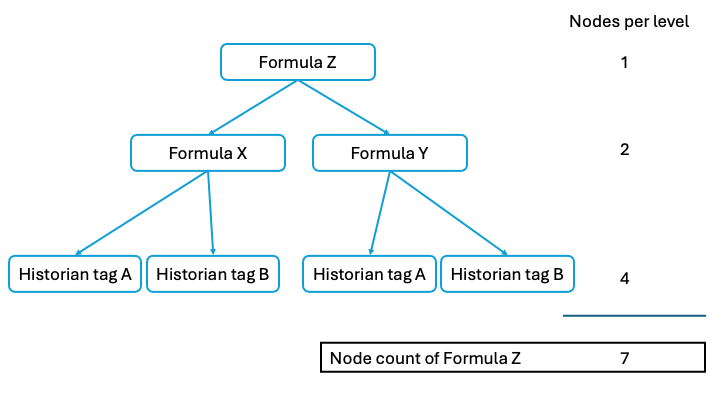
The third row explains why splitting a calculation across multiple calculated tags consumes more nodes than keeping the math inside one formula.
Deleting calculations tags will only soft delete them. Soft deleted tags will not be available anymore to users, but the tag name is still reserved and cannot be re-used.
Changing the tag name will break existing searches where that tag is being used, as the searches will still be mapped to the old name.