Sharing work item resources
In TrendMiner, items and folders can be shared either from the Work Organizer or directly from the item itself. Sharing allows you to grant others permissions to perform specific actions on work items and folders.
You can share any item you own, which includes all items located in your home folder. Your home folder can be found within the Work Organizer under the tab labeled My Work.
Sharing is also available to users with Manage permission. This allows you to share individual items, entire folders, or any resource within a folder that has been shared with you with Manage permission.
When sharing an item, you assign either Read , Write or Manage permission. These permissions unlock specific actions that can be performed on the item.
Permissions not only determine which actions can be performed on an item but also grant access to underlying items. For more information on how permissions impact access to related items, refer to the chapter on Item permission relations.
Ownership
At the core of the work item permission model is ownership. Ownership grants you the Owner permission, which allows the highest level of actions on an item.
In the Work Organizer, as the Owner or a user with Manage permission, you can share either a single resource or multiple resources at once.
Share a work item or folder
Select the work item or folder you want to share.
Open the Actions menu and choose Share.

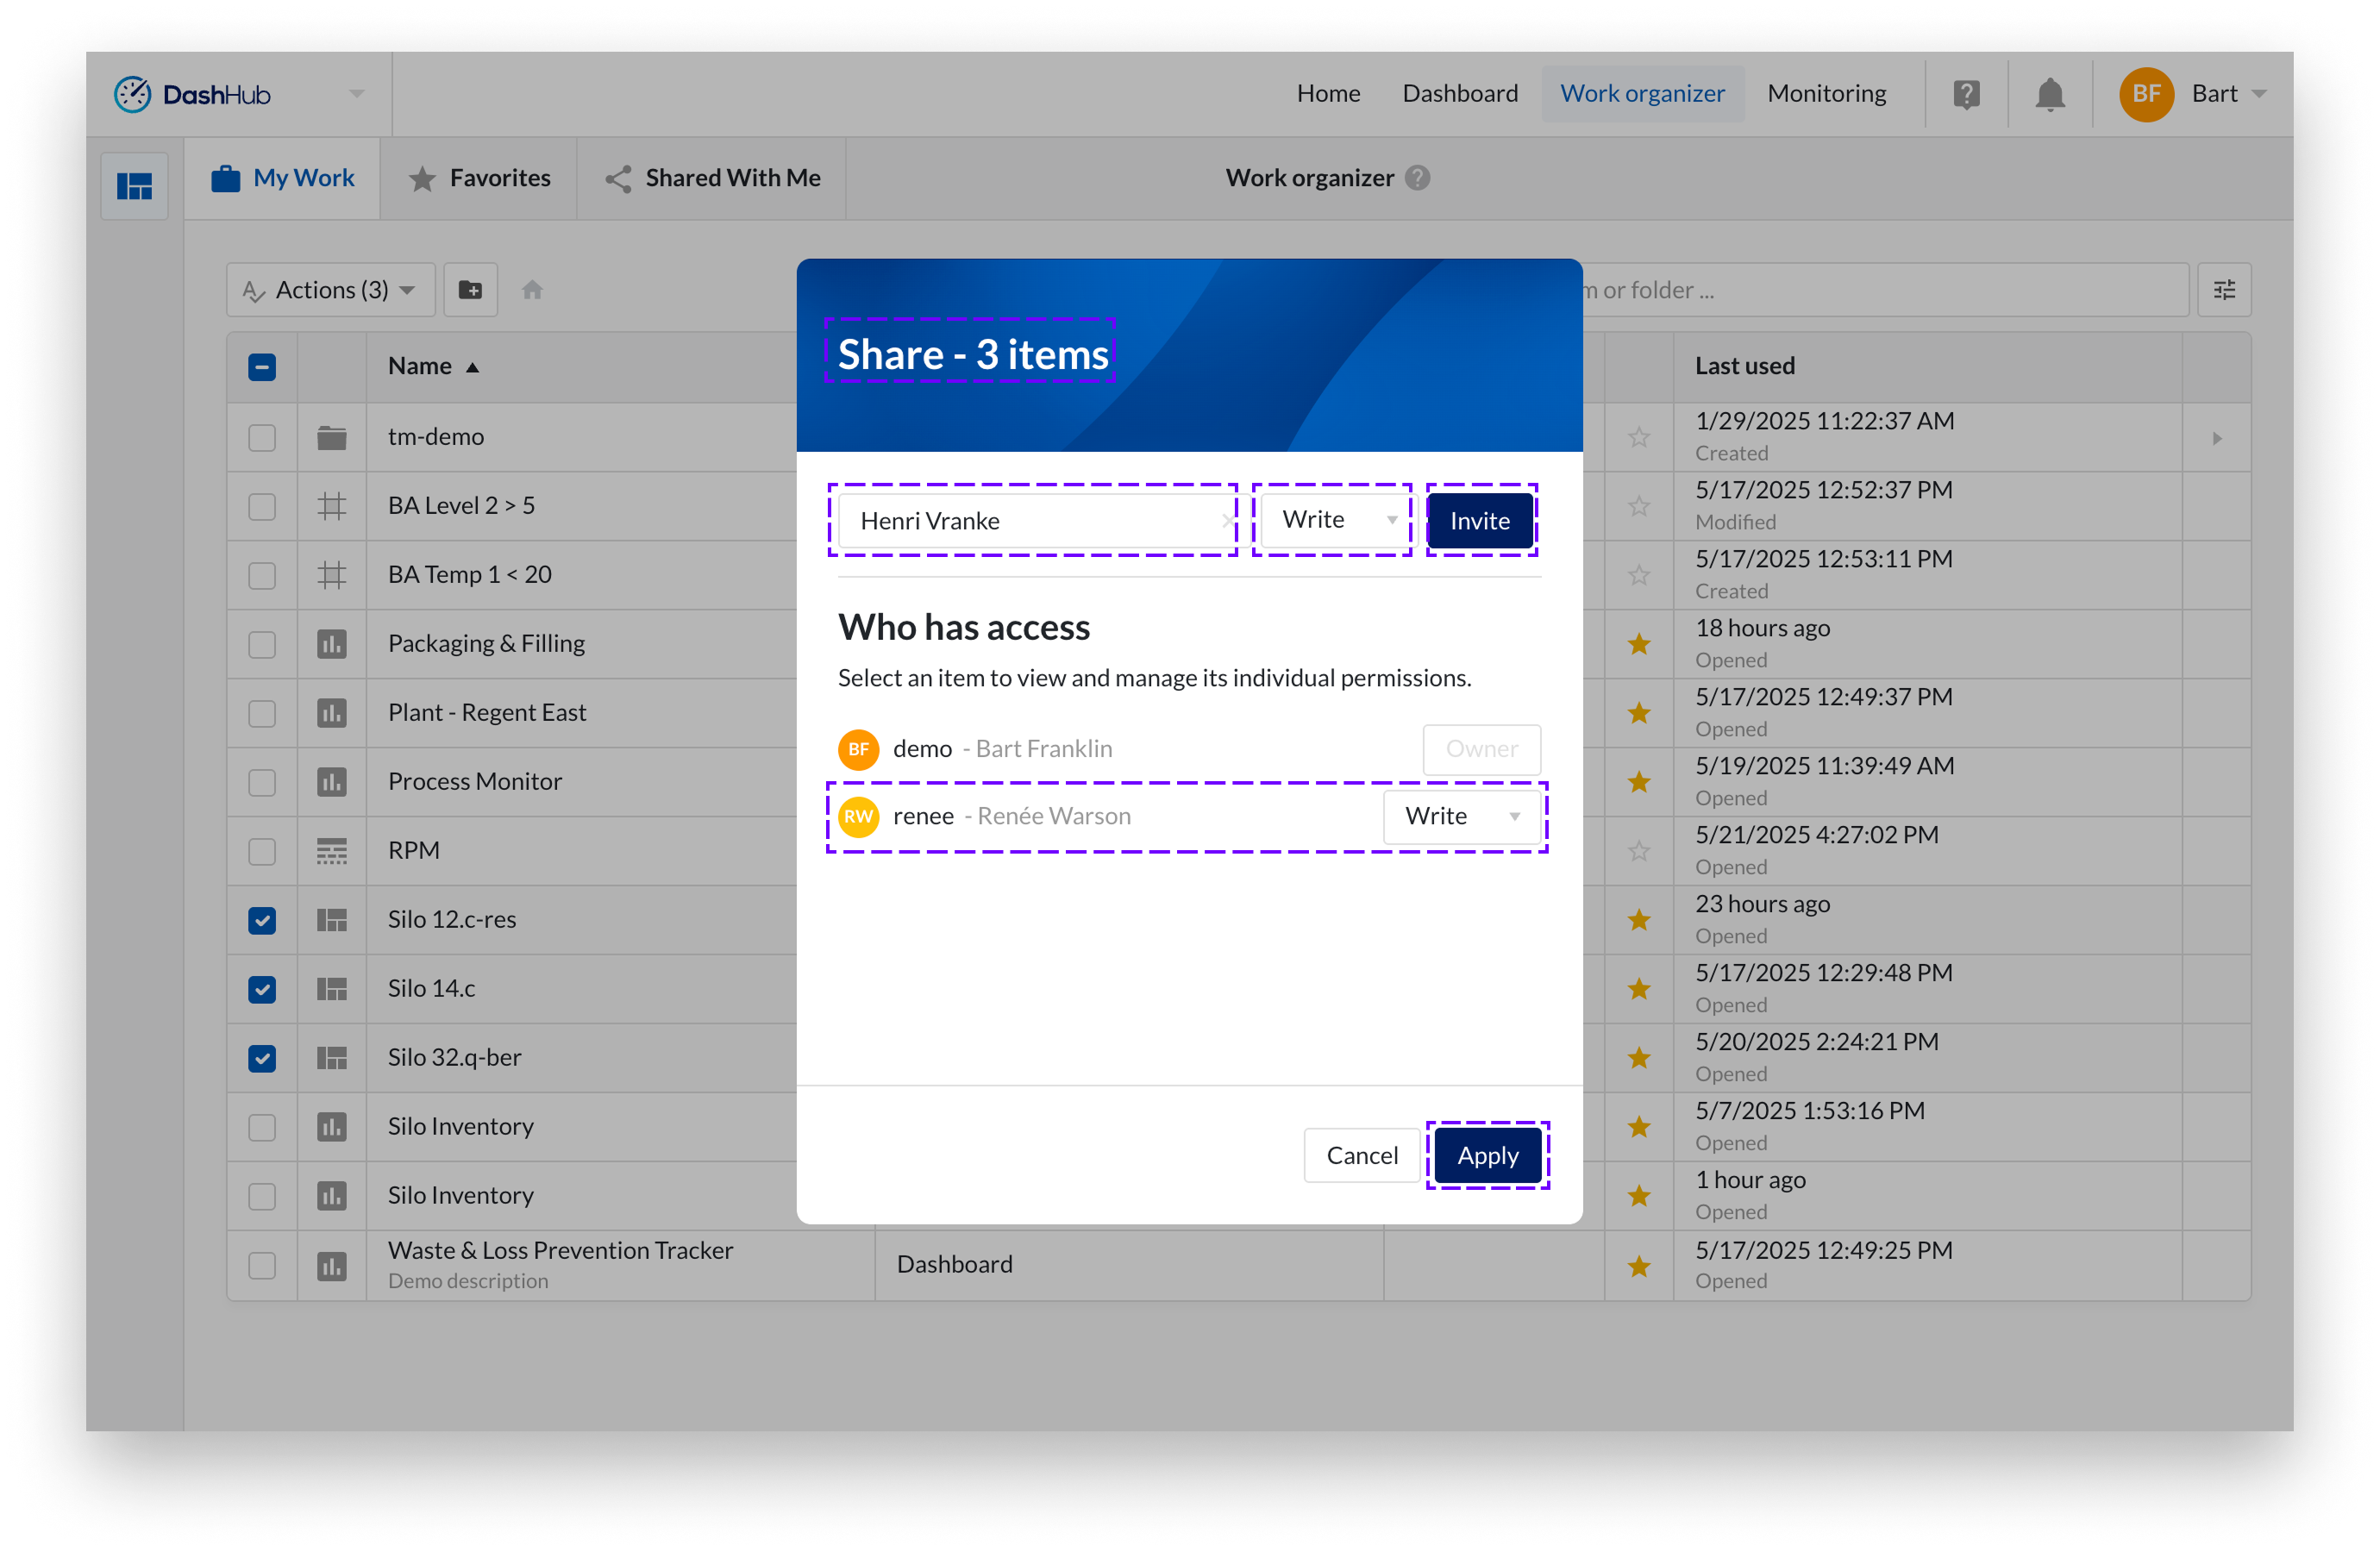
The Share modal will appear.

Search for and select the user or entire user group you want to grant permission to.
Choose the appropriate permission level (Read , Write or manage) from the dropdown.
Click Invite.
The selected user or user group will now appear in the list of subjects with granted permissions.
You can change a subjects permission level or remove them from the list using the dropdown next to their name.
Changes are only applied once you click Apply.
You will see a toast message: “Success, permission applied successfully.”
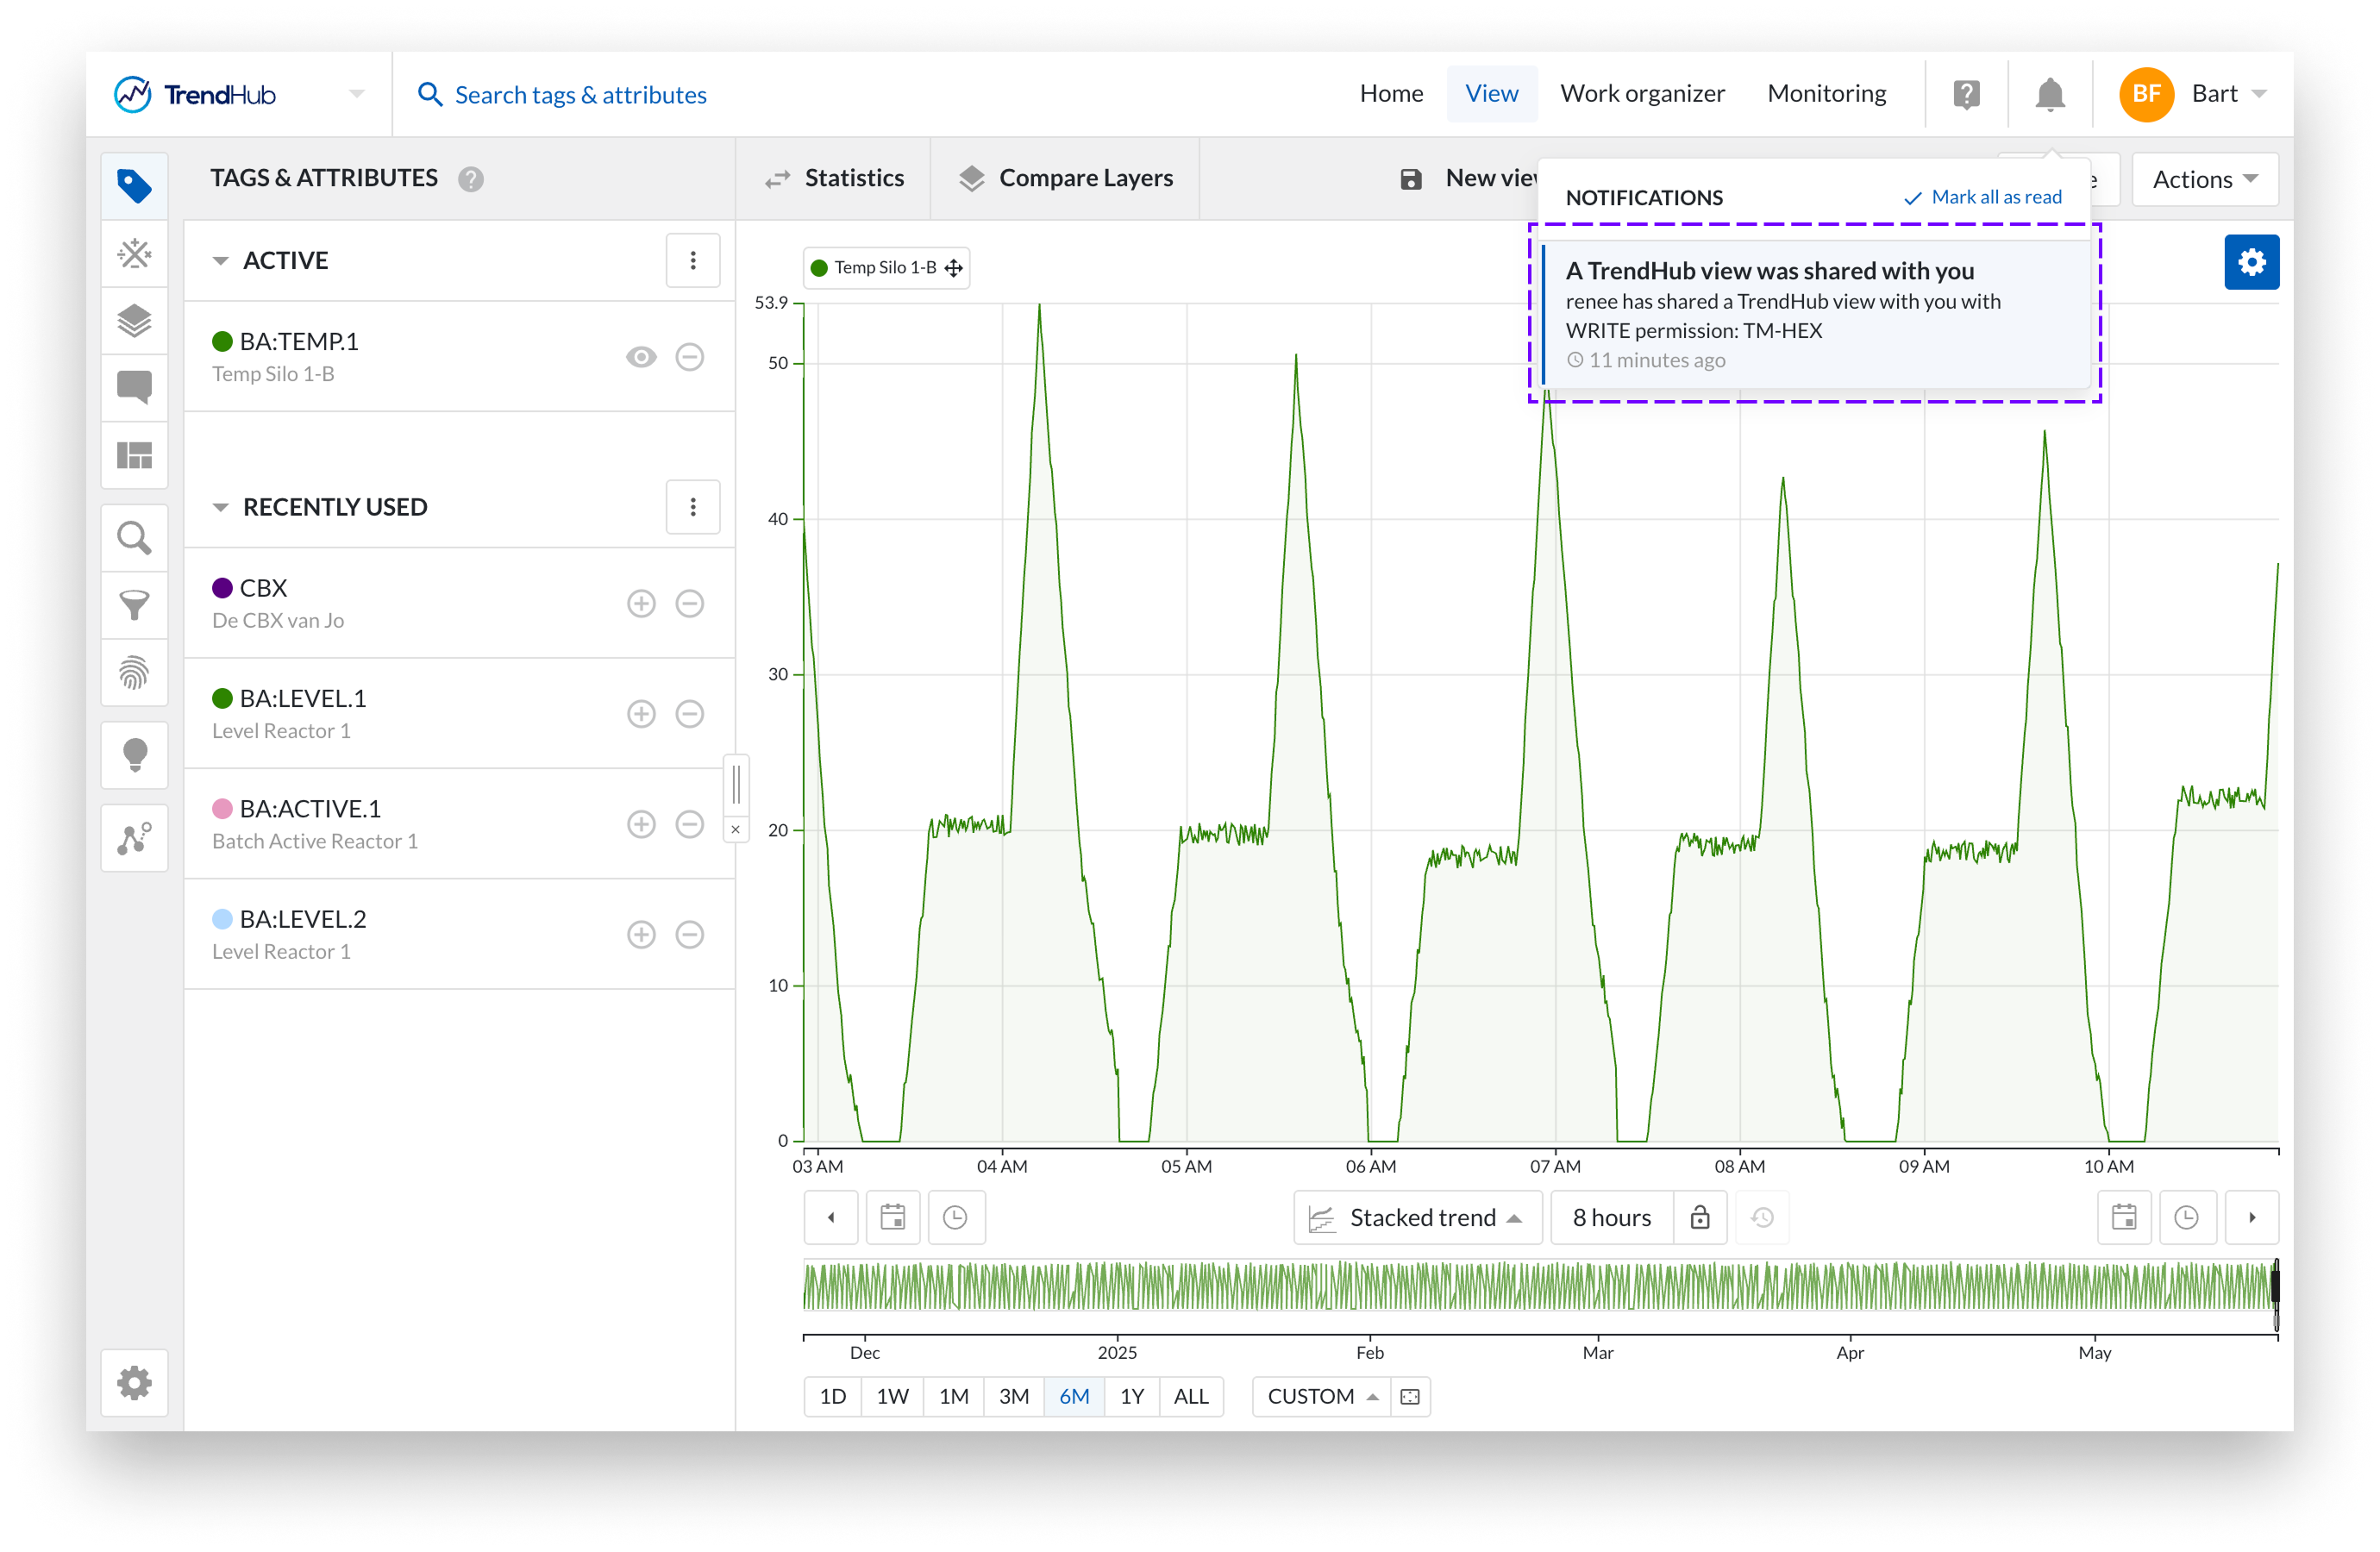
The user(s) you shared your resource with receive(s) a clickable notification.
Share multiple resources
In addition to sharing a single item or folder, you can also share multiple items or folders at once. The procedure is slightly different in this case. Since it's not possible to display all existing permissions per resource in the list, the list initially appears empty. You can add users or user groups and assign the permission level you want to grant.
When you click Apply, the list is processed. For each item, we check whether the permission does not yet exist or whether you are assigning a higher permission than currently granted. In those cases, the permission is added to the individual items and folders. We always preserve the highest applicable permission.
So, for example, if you assign Read permission to a user for a work item via the multi-share flow, but that same user already has Write permission on that item from a previous individual share, the Write permission will remain in effect for that item.
Select the resources you want to share.
Open the Actions menu and choose Share items.
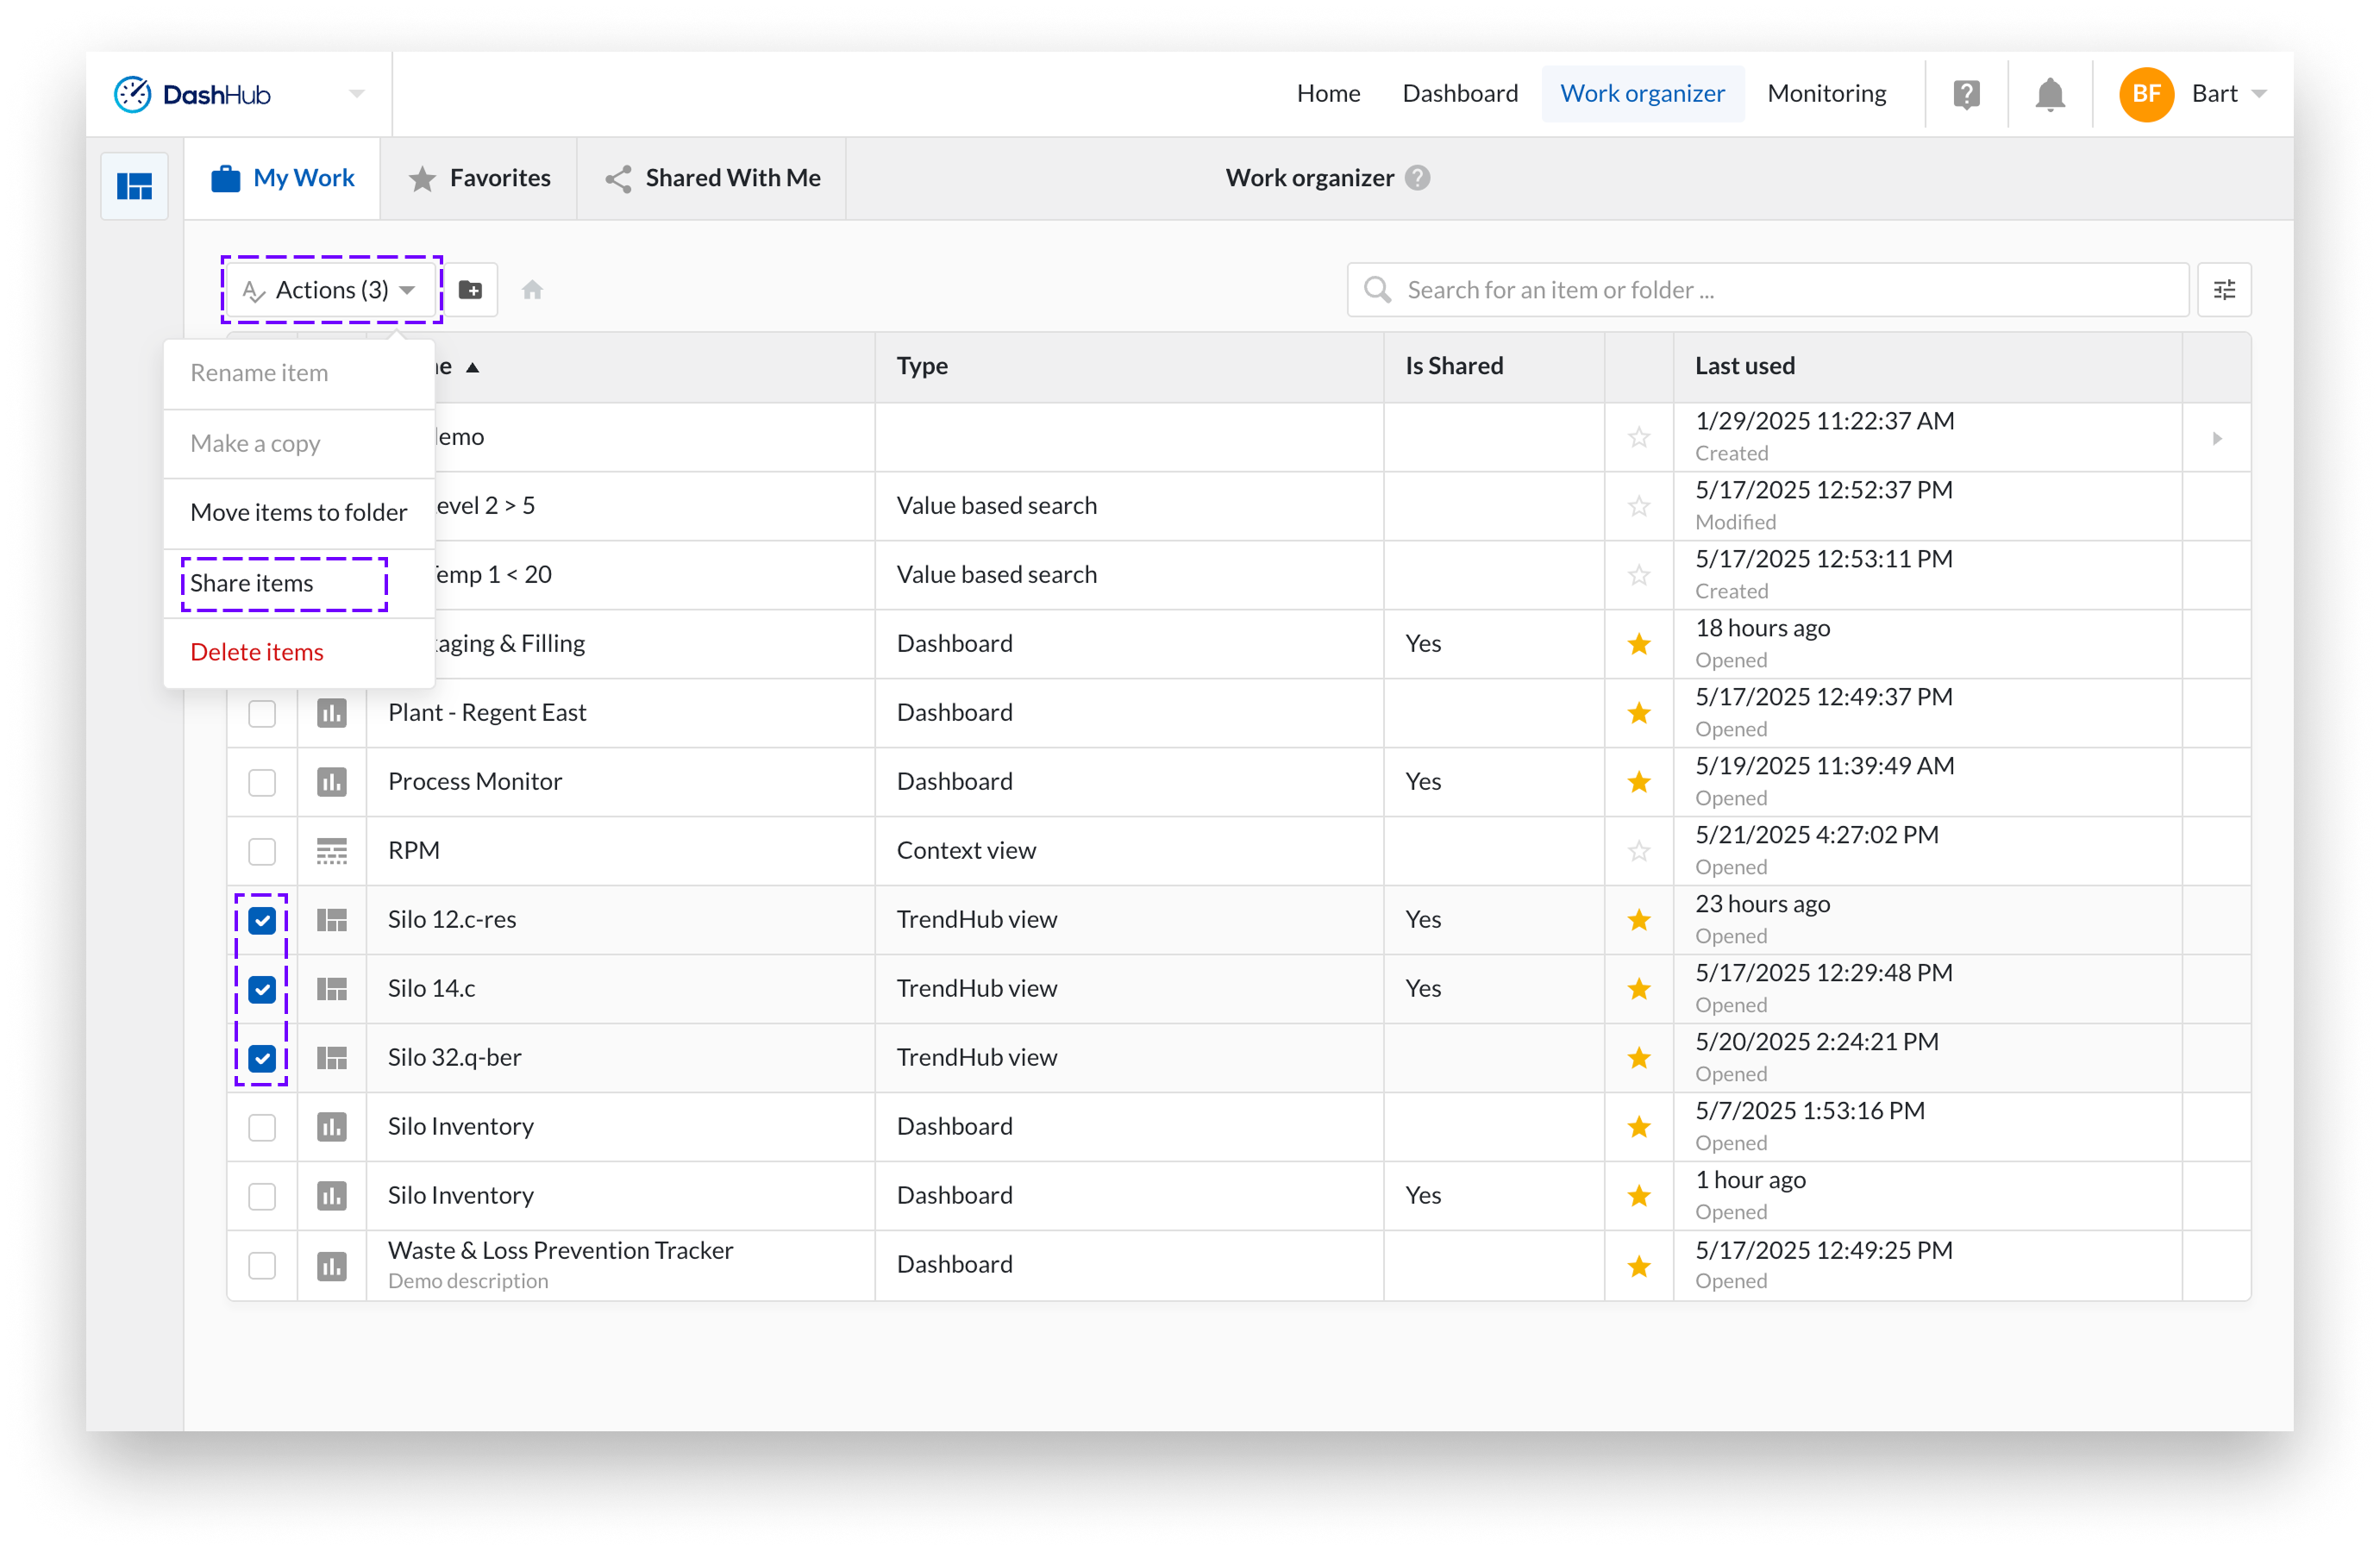
The Share multiple resources modal will appear.
Follow the same steps as when sharing a single work item from Work Organizer.
Sharing with Everyone
Although it is possible to share work items or folders with Everyone, only Read permission can be granted in this case.
If a permission entry has been added to grant Read access to Everyone, but you have also added a separate permission entry granting Write or Manage permission to a specific user, then that user will have Write or Manage permission. This follows the principle that the highest applicable work item permission is applied.
For most work item types, you can also share items directly from within the individual item itself.
Open the Actions menu and choose Share.
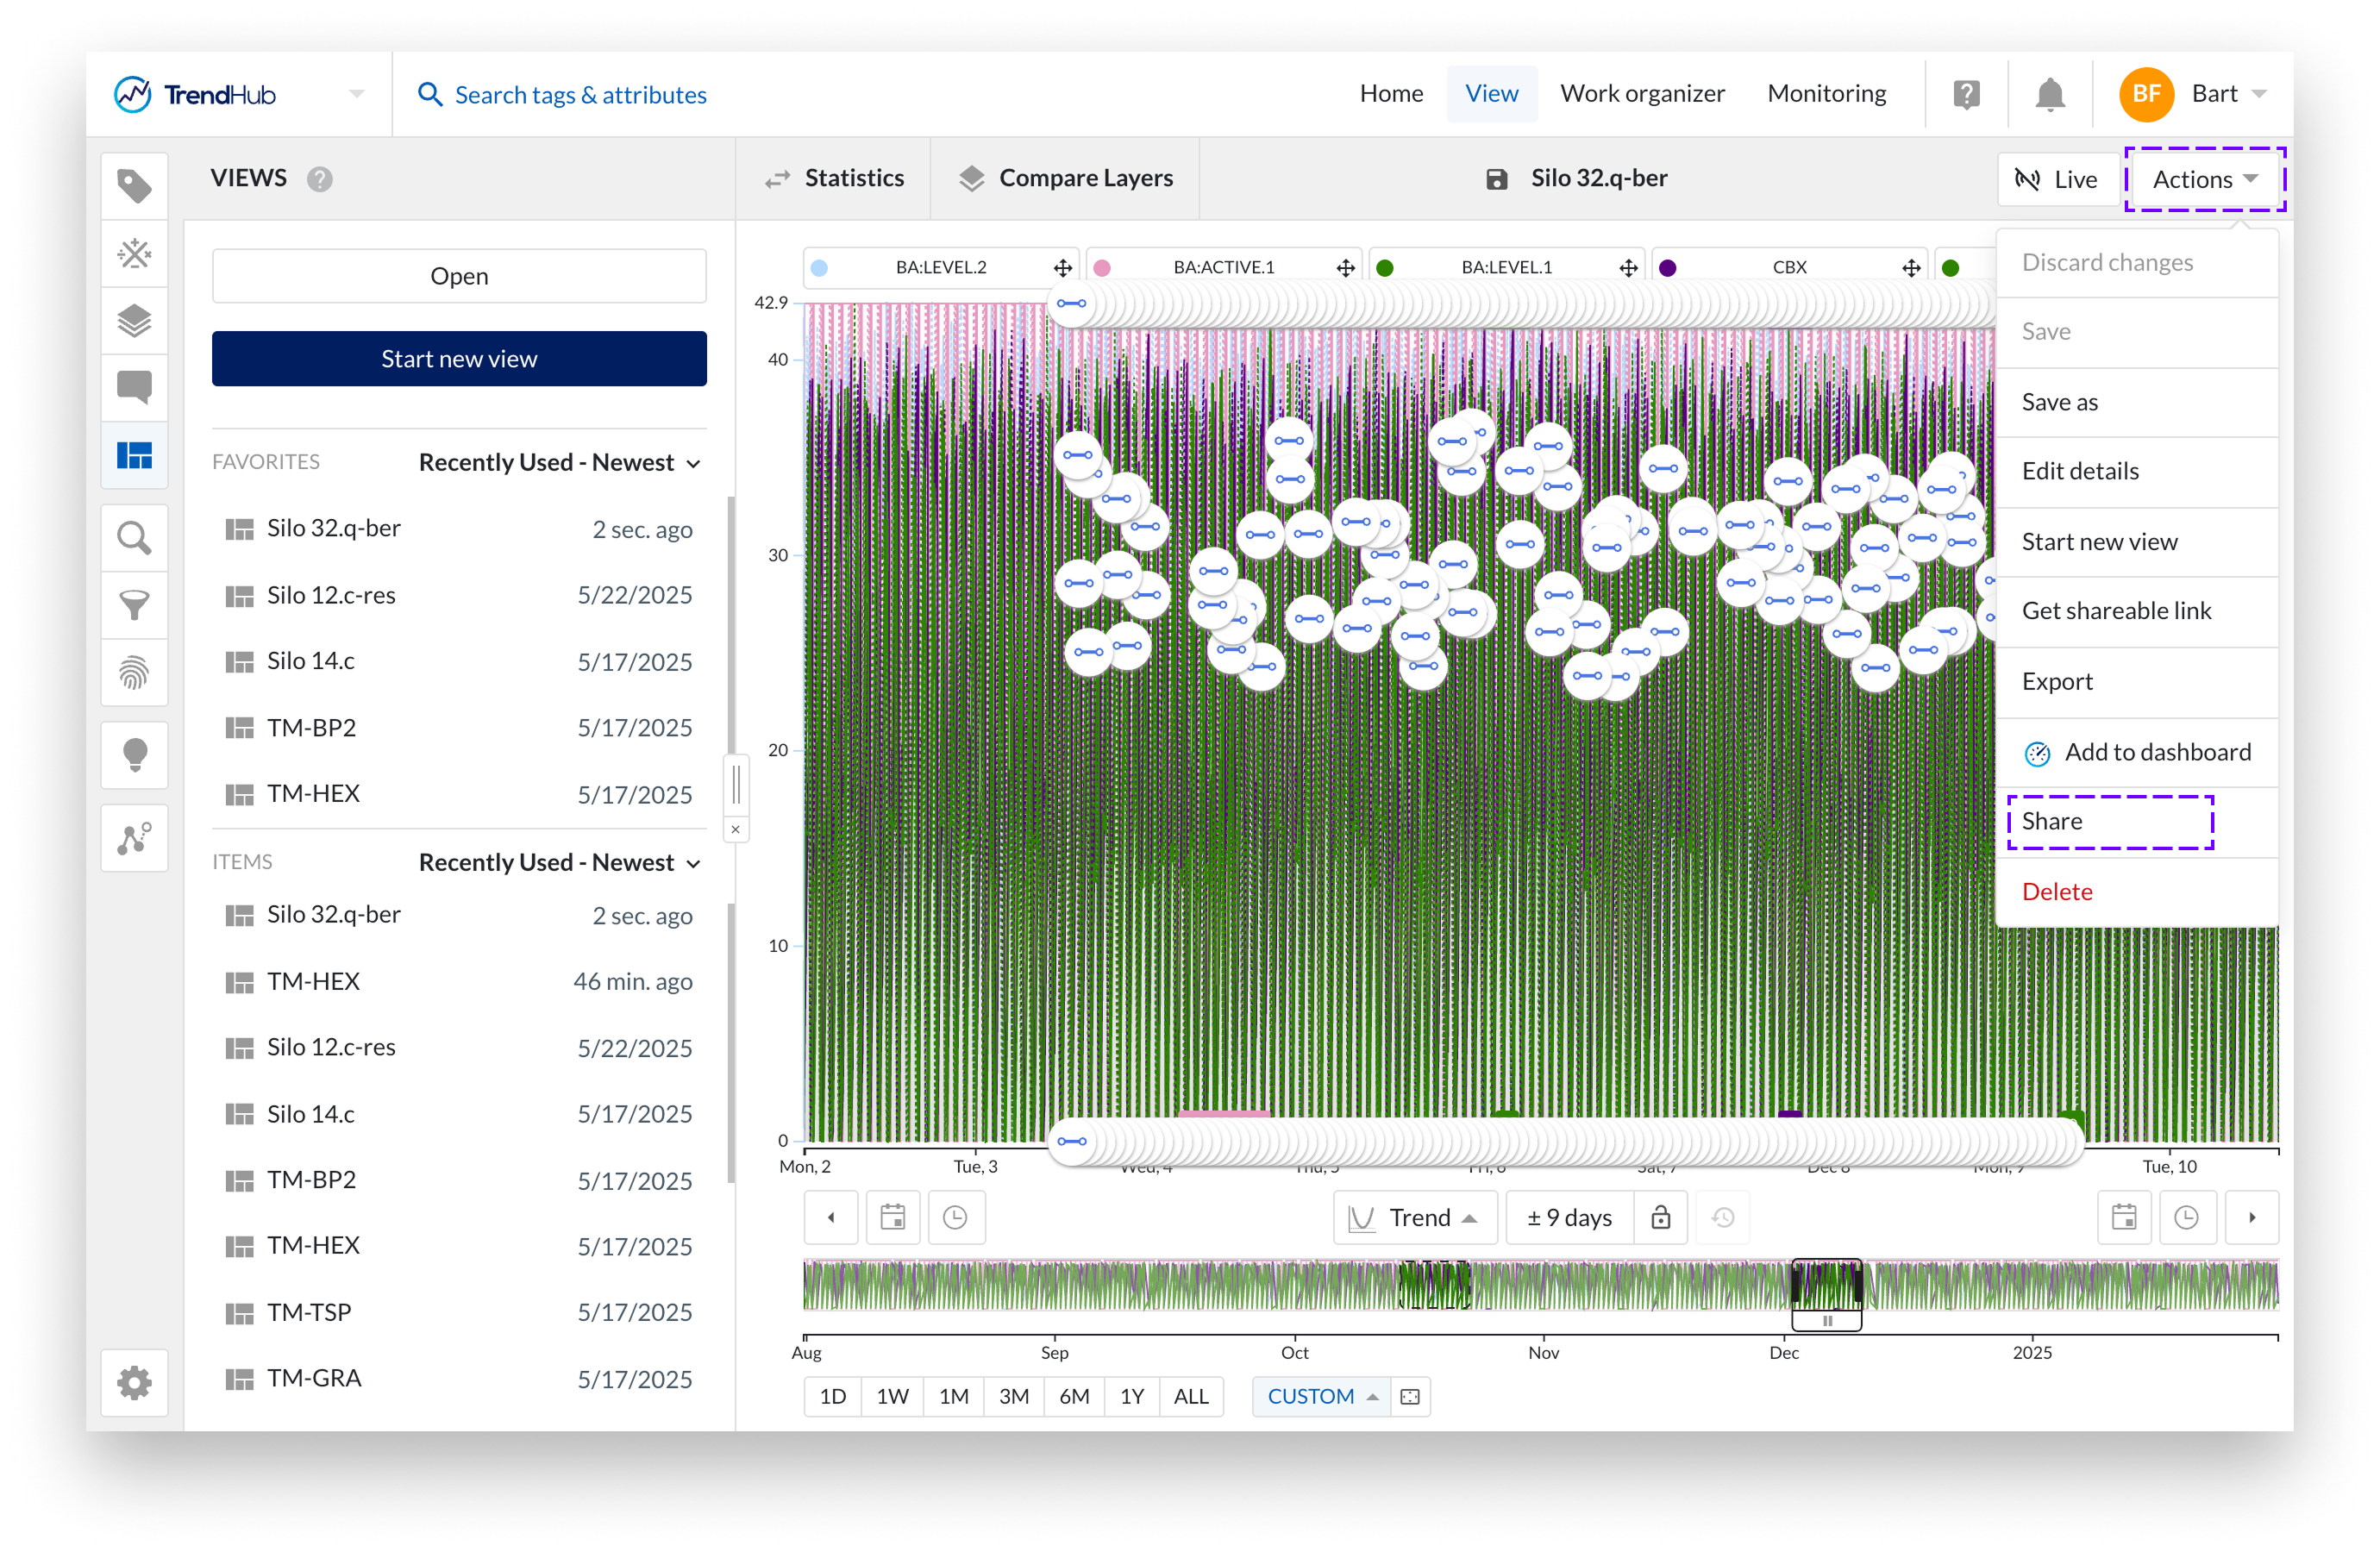
Follow the same steps as when sharing a single work item from Work Organizer.
In addition to individual work items, folders can also be shared. This allows users and user groups to access entire folder structures, including subfolders and the items they contain. The level of access depends on the permission type assigned to the folder.
Share with Read
When a folder is shared with Read permission, the user can browse through the folder and all its subfolders. They can open all work items for which they have read access and can use browsing, searching, and filtering functions to explore the folder structure.
However, they cannot perform any actions on the folders or items themselves. This means folders cannot be renamed, deleted, or moved, and item details cannot be changed. Read access provides a purely view-only experience across the folder and its subfolders.
Share with Write
When a folder is shared with Write permission, the user has write permission on all items inside the folder and its subfolders. They can open and edit these work items and use them as needed. Browsing, searching, and filtering are also available in this permission level.
With write permission, the user can not delete or move folders or items, rename folders, or modify resource details. Write access focuses on editing the content within the folder while keeping the overall folder structure intact.
Share with Manage
When a folder is shared with Manage permission, the user gains full control over the folder and its contents. They can rename, delete, and move both folders and items, as well as manage permissions by sharing or unsharing folders and items.
This level of access enables complete management of the folder hierarchy. However, caution is required: a user with manage permission on a folder can also delete that folder itself, including all subfolders and work items contained within it.