Monitoring and alert overview
You can use TrendMiner to automatically monitor 24/7 for specific conditions and patterns in the background.
Our mantra is: everything you search for, can also be monitored.
Therefore, every saved search and fingerprint can be operationalized by setting it up as a monitor. Every 2 minutes, TrendMiner will run the search or fingerprint comparison on live data. In case a new result is found, the event will be registered, and every enabled action will be executed.
Searches, and by extension monitors, are executed against indexed data. To learn more about indexing and the implication on searches and monitors, please refer to this article.
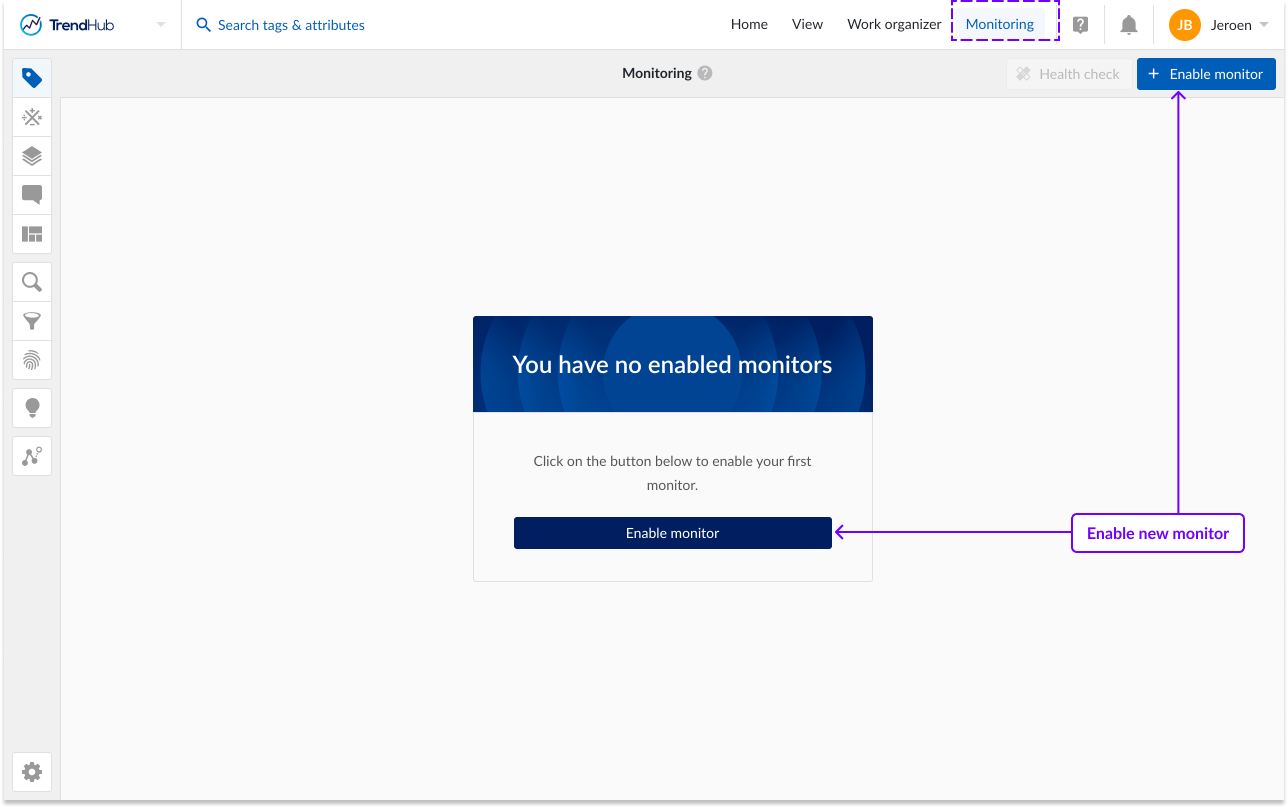
An overview of all enabled monitors is available from any hub, by clicking on the Monitoring tab in the top menu bar.
When you are new to TrendMiner, this screen contains little information. A call to action is shown to enable your first monitor. In a later stage, additional monitors can be set up by clicking the "Enable monitor" button. Please visit this article to learn how to enable monitors.
Important
By default, a user is allowed to have 10 enabled monitors. This limit can be increased. Please contact your Customer Success Manager at TrendMiner, either through your administrator or project manager. The request will be assessed based on the current license and number of users.
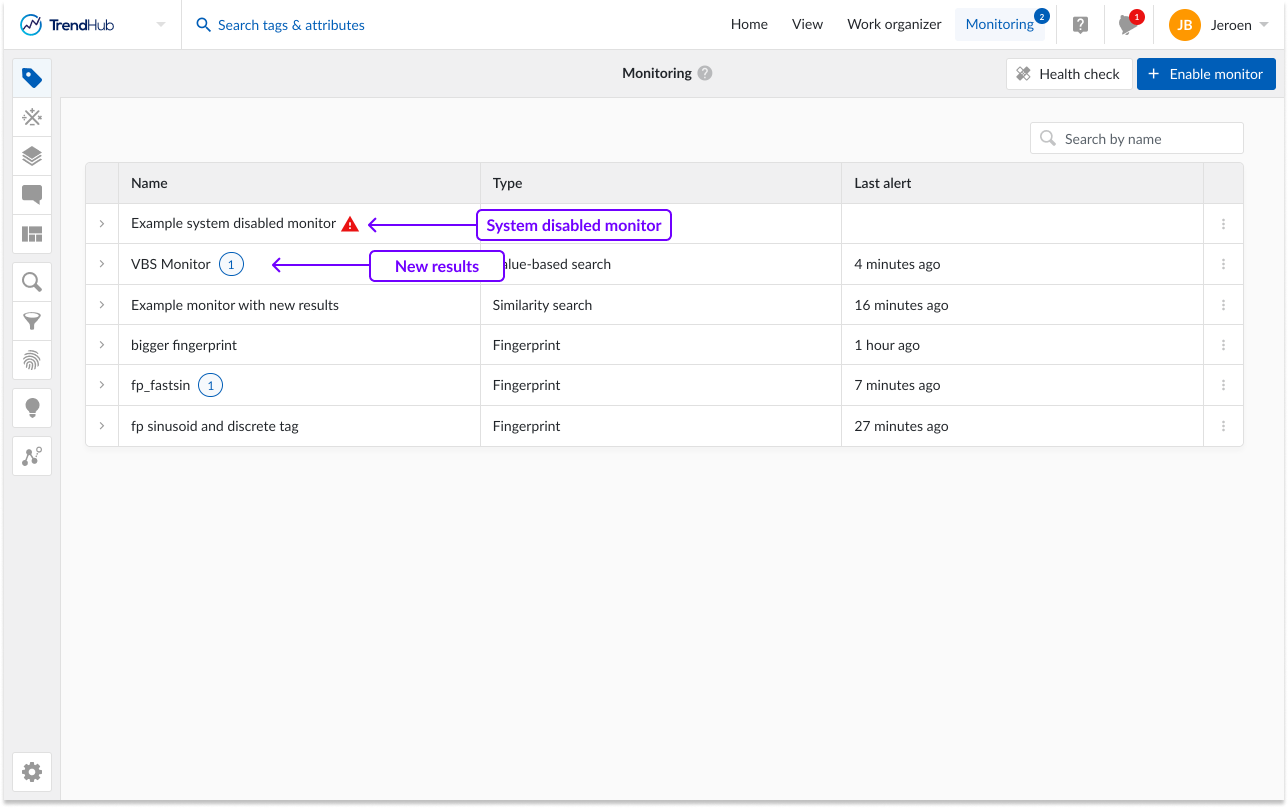
Once a monitor has been setup, a table will be displayed, containing all enabled monitors. The overview provides the following information:
Name of the monitor (which is equal to the name of the search or fingerprint).
Indication if the monitors is based on a fingerprint or search and which type of search.
Indication when the most recent event happened.
Indication of the number of new results.
Indication if a monitor is disabled by the system.
When the monitoring tab is open, it will refresh every minute to make sure you have an up to date view of all monitor results.
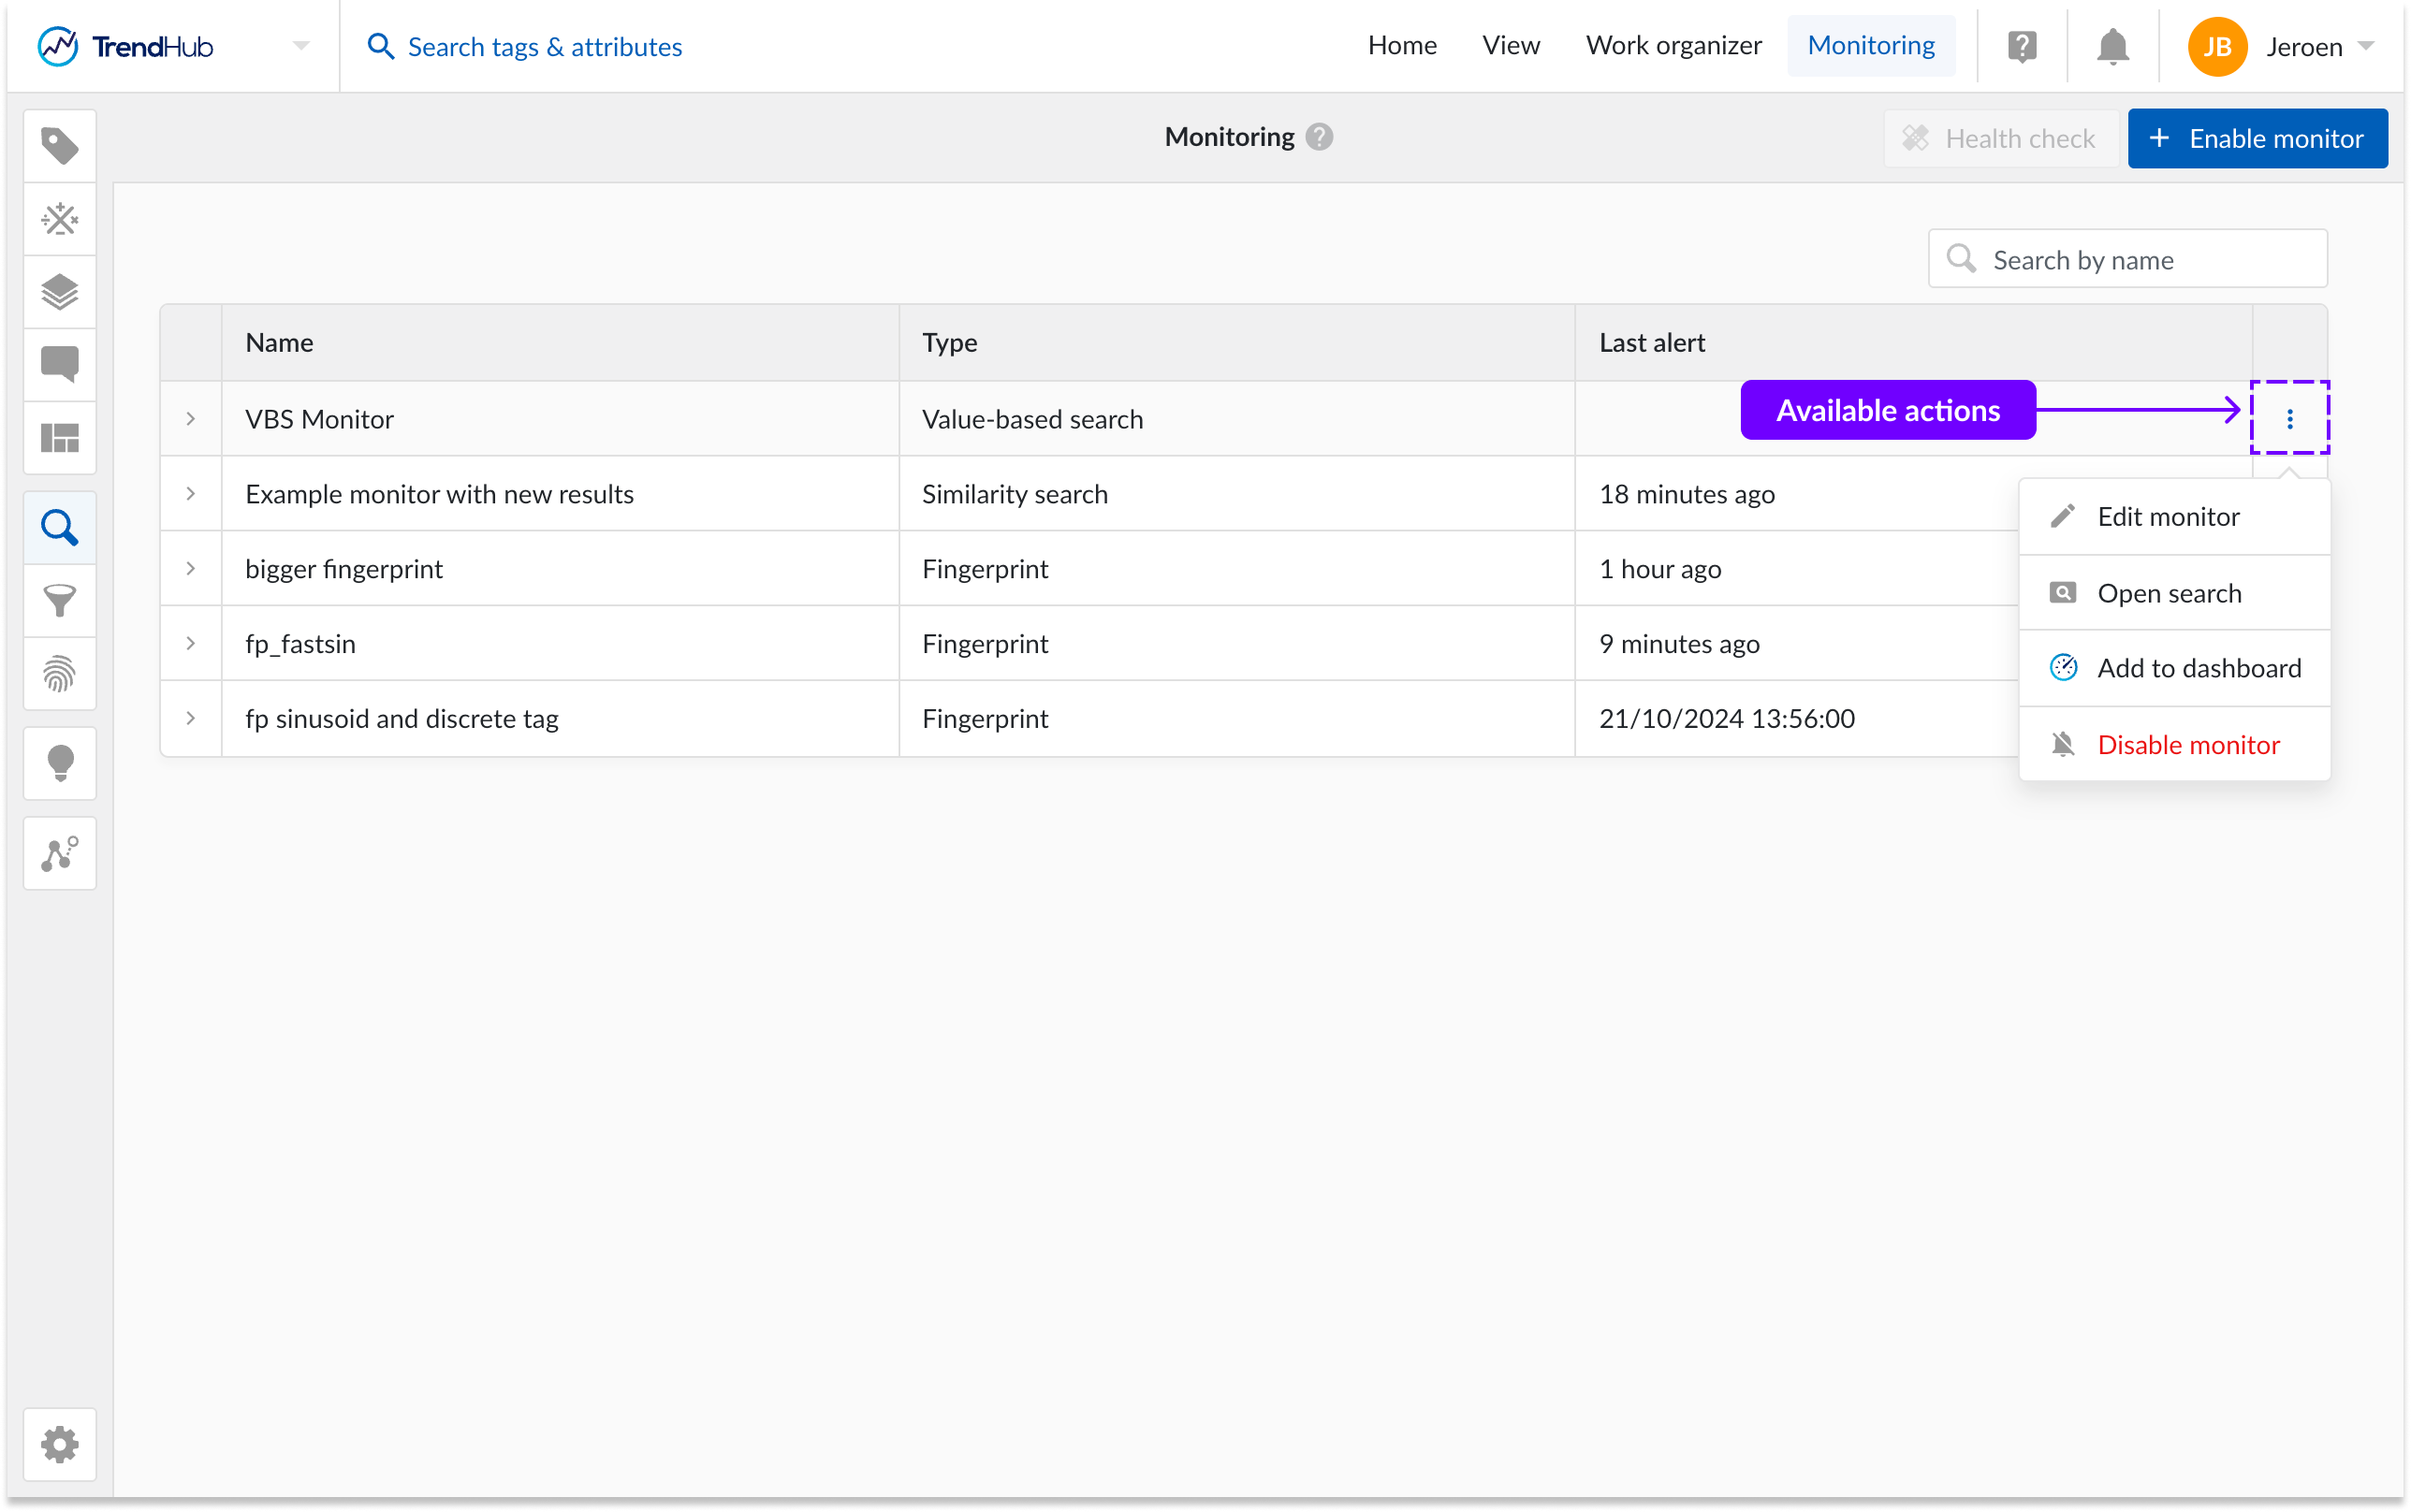
In the options drop down, shown in the last column, you can find the following actions:
Edit monitor: this action will open a panel where you can modify and save the actions connected to this monitor.
Open search/fingerprint: when clicking this action, you will be directed to the search or fingerprint detail panel.
Add to dashboard: This option is only available for monitors based on value based or area searches. When clicking this button, you can choose to add the selected monitor as a tile to a new or existing dashboard. You will automatically be redirected to the corresponding dashboard.
Disable monitor: after clicking this action the monitor will be disabled. It will no longer be visible on the monitoring and alert overview page. When re-enabling a specific monitor, the previously defined settings will be restored automatically.
Note
Editing a monitor opens the set-up panel of a monitor where you can modify the actions connected to this monitor. If you want to modify the conditions for which the monitors need to check, you need to modify the underlying search or fingerprint.
Note
Each search or fingerprint can only be connected to 1 monitor.
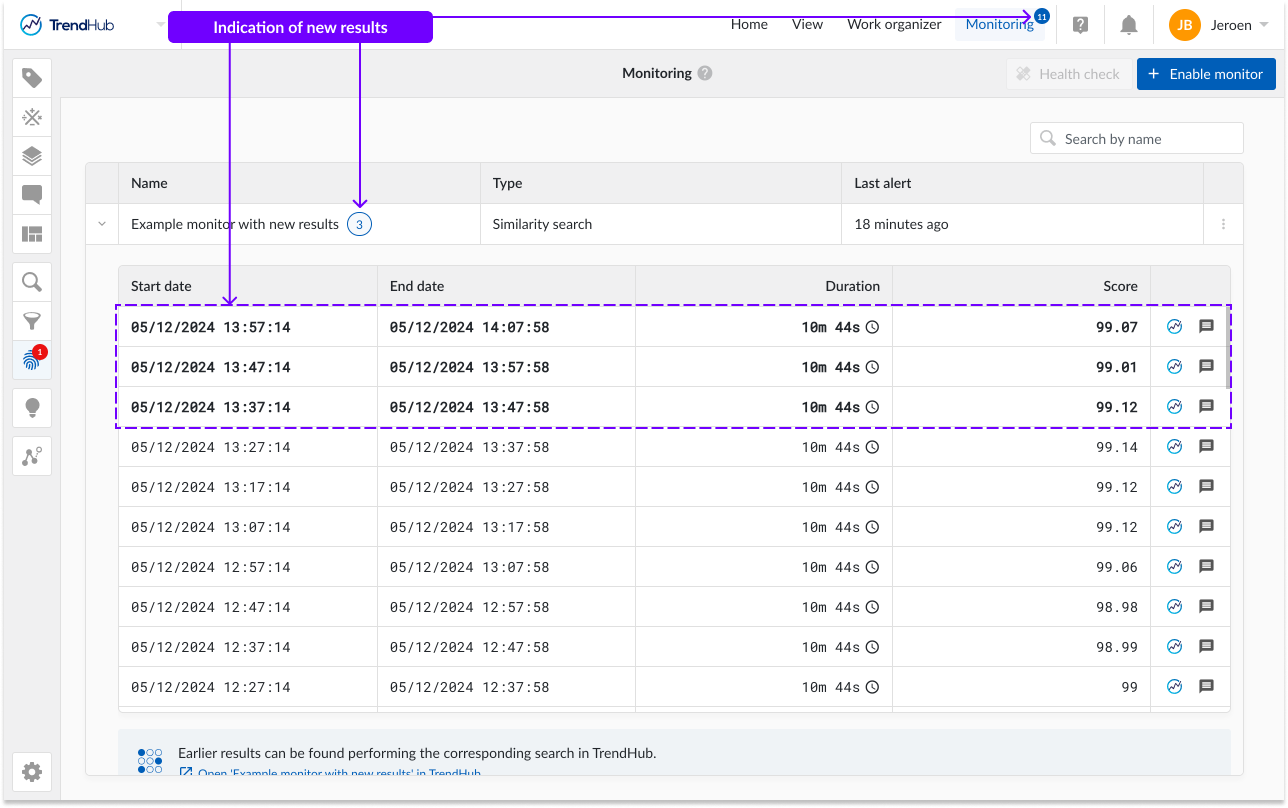
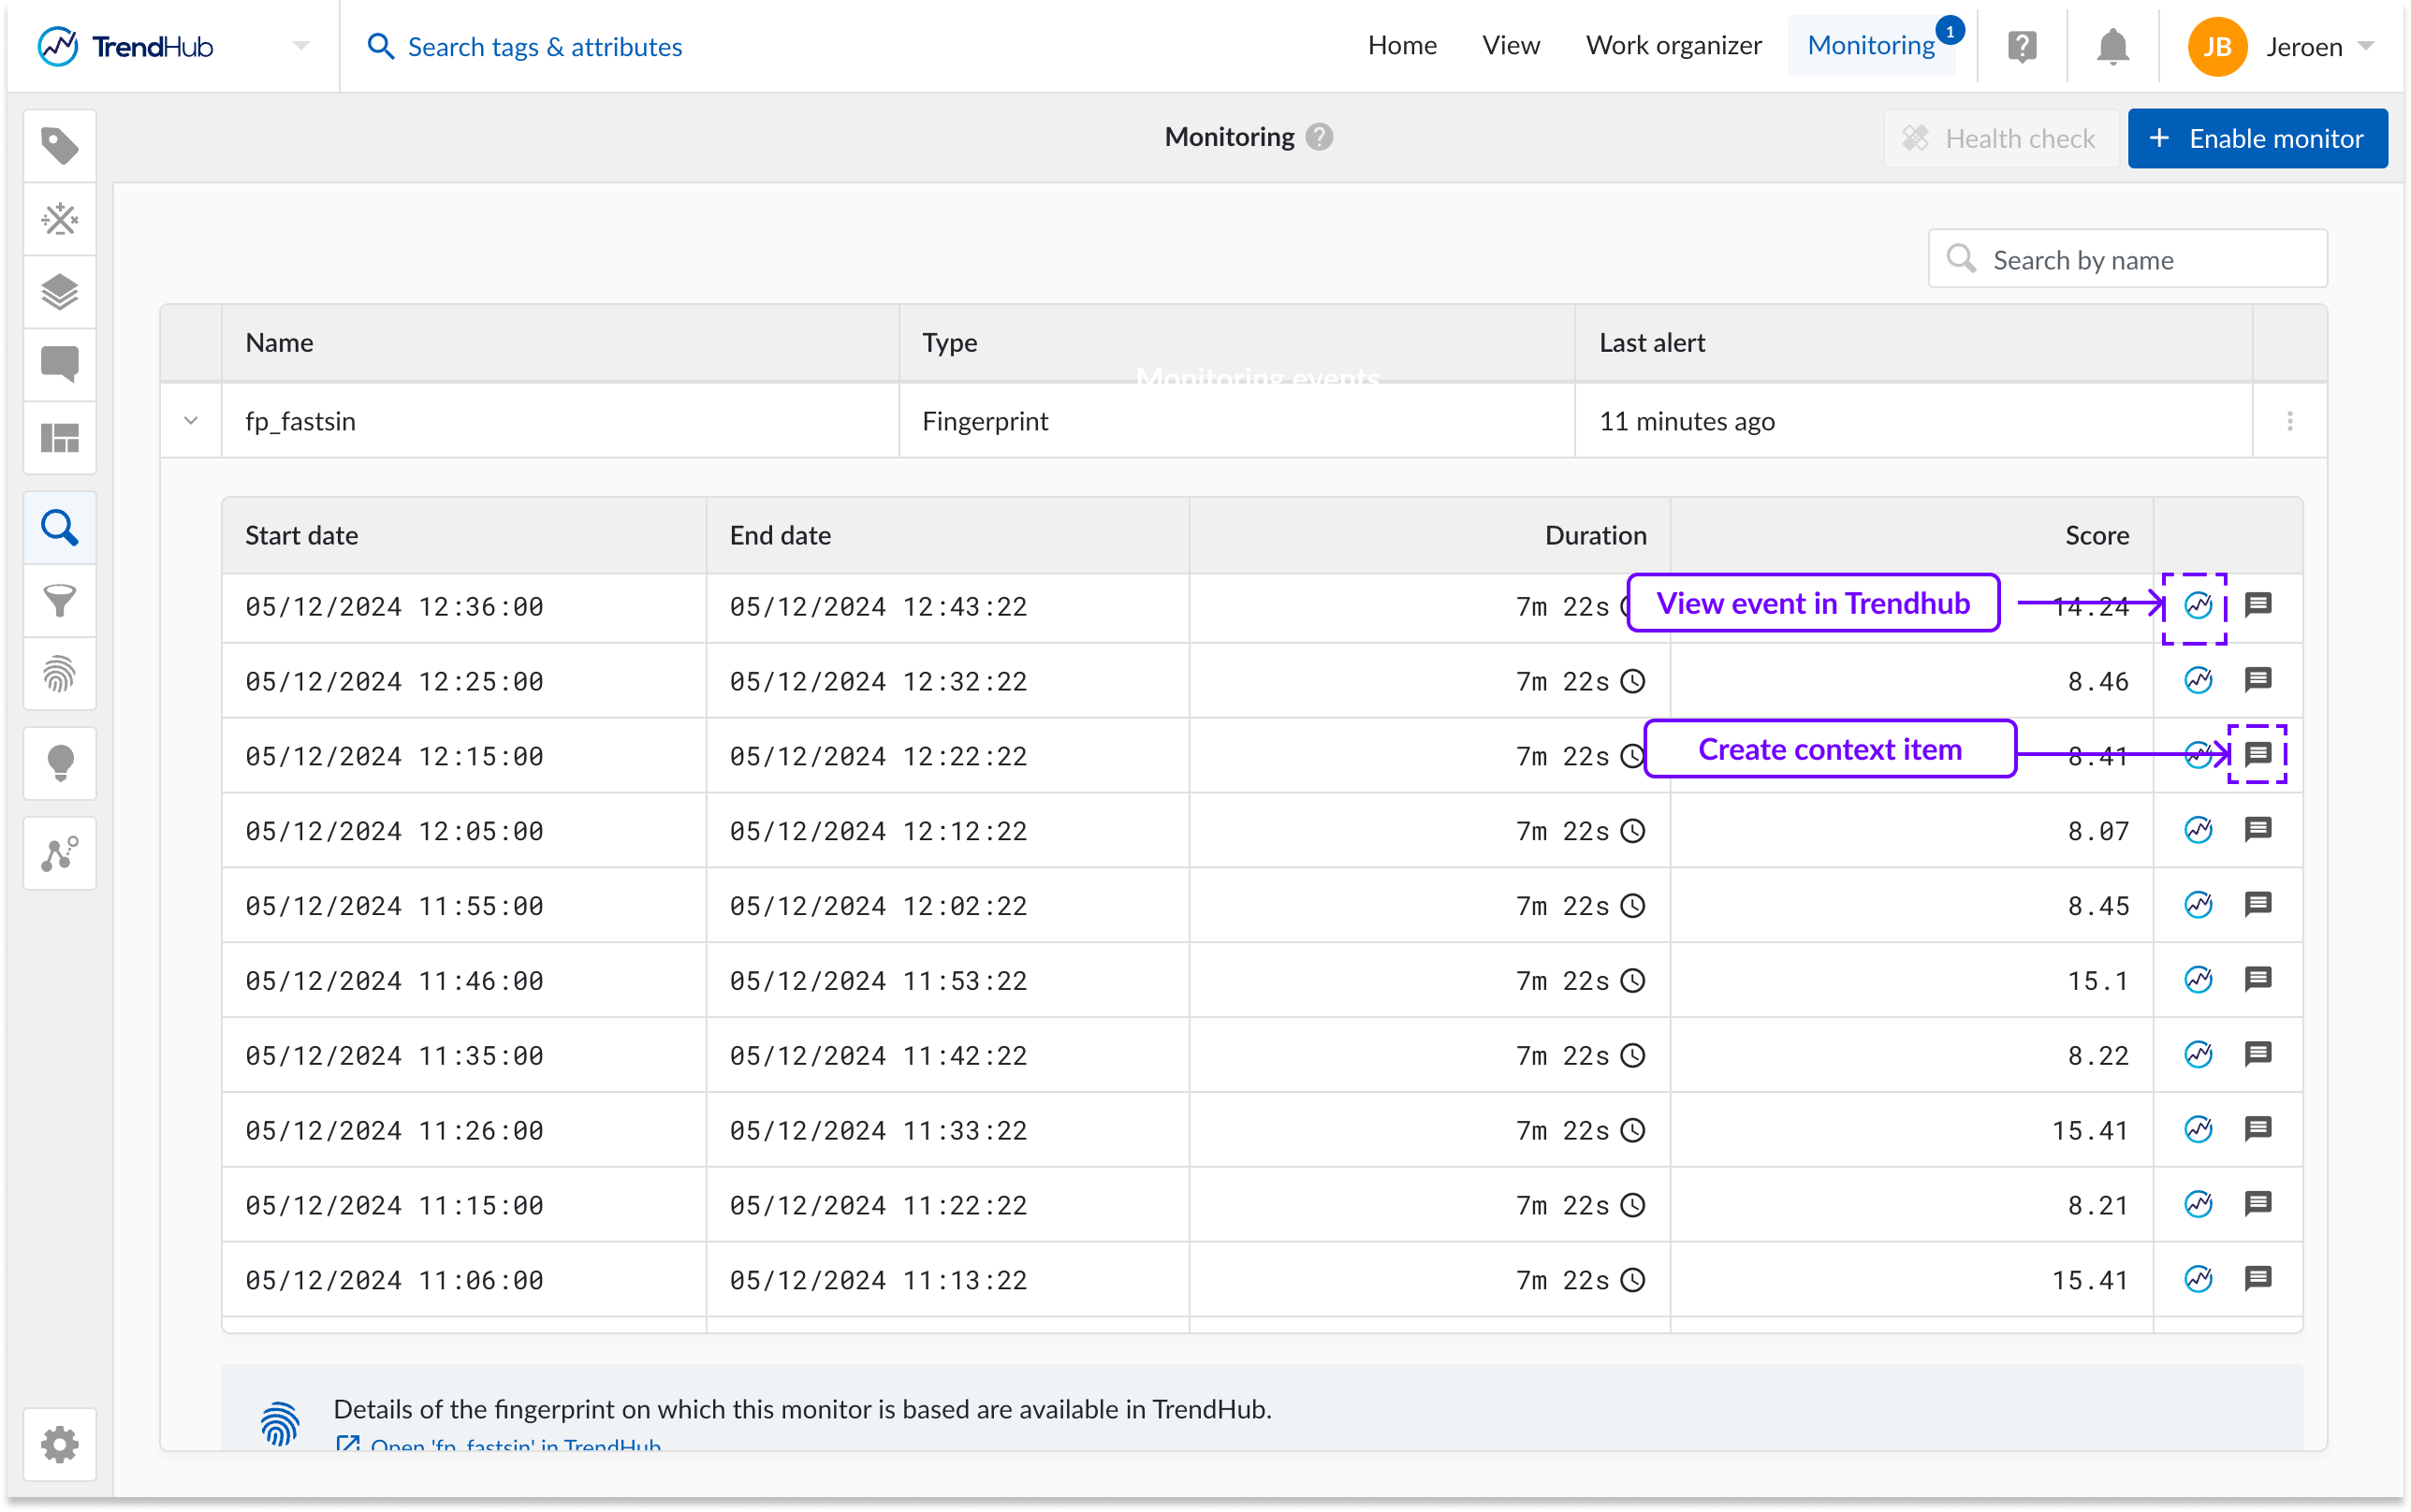
You can see the events reported by a monitor by selecting the monitor.
Up to 50 events are displayed on a table in ascending order, from the most recent to the oldest. The table will display the information of an event in the following columns:
Start date: this is the starting date and time of an event.
End date: the end date and time of the event.
Duration: the duration of the monitor since the starting date.
Score: For monitors of type Similarity search you will see an extra column indicating the match score.
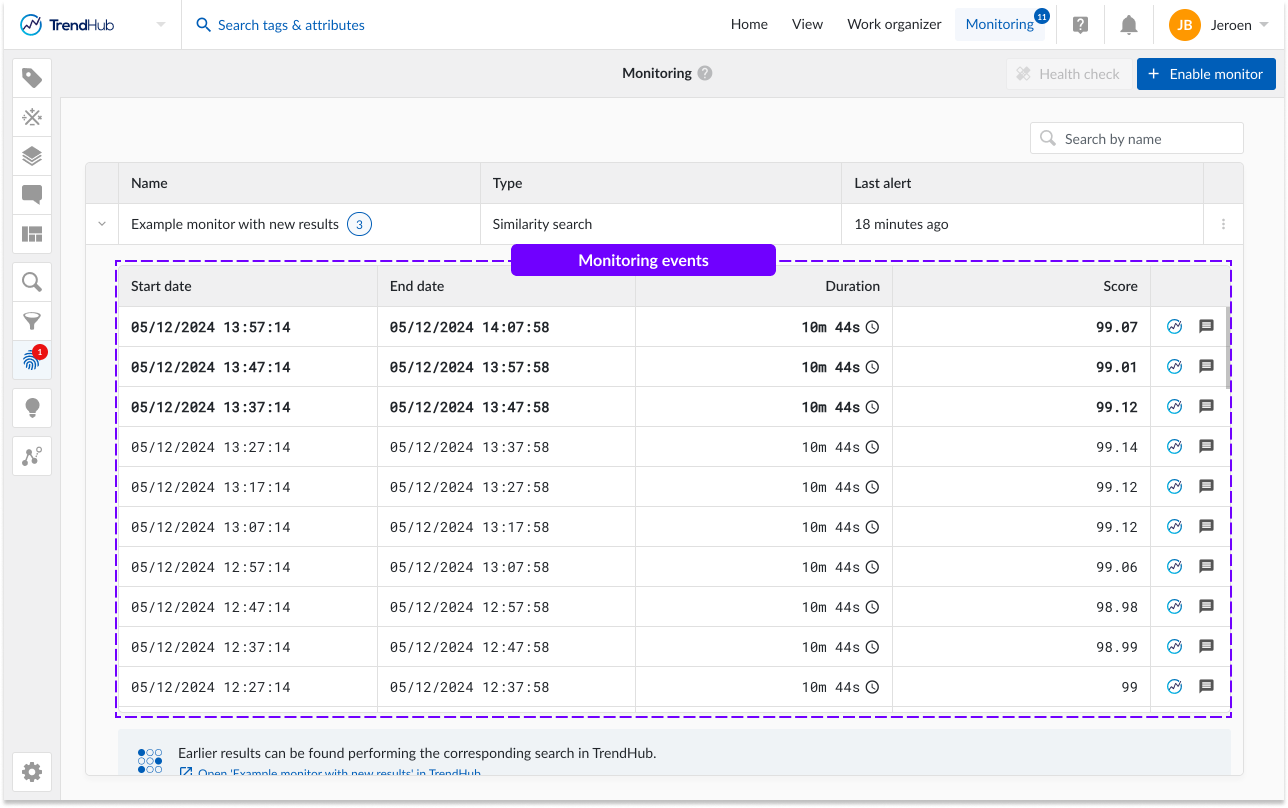
For every monitor event, 2 actions are available:
Show event on TrendHub: this will visualize the event period and relevant time series in TrendHub.
Create context item: This will open the creation form of context items, with the time stamps of the event pre-filled. For more information about creating context items please see Context Items.
The link at the bottom of the event table will direct you to the search or fingerprint detail panel.
New, unseen monitor results will be indicated with a blue number indicator above the Monitoring tab. On opening the monitor tab, new results per monitor will be highlighted next to the name of the monitor. When reviewing the monitor result table, the unseen results will be marked in bold.