Context views
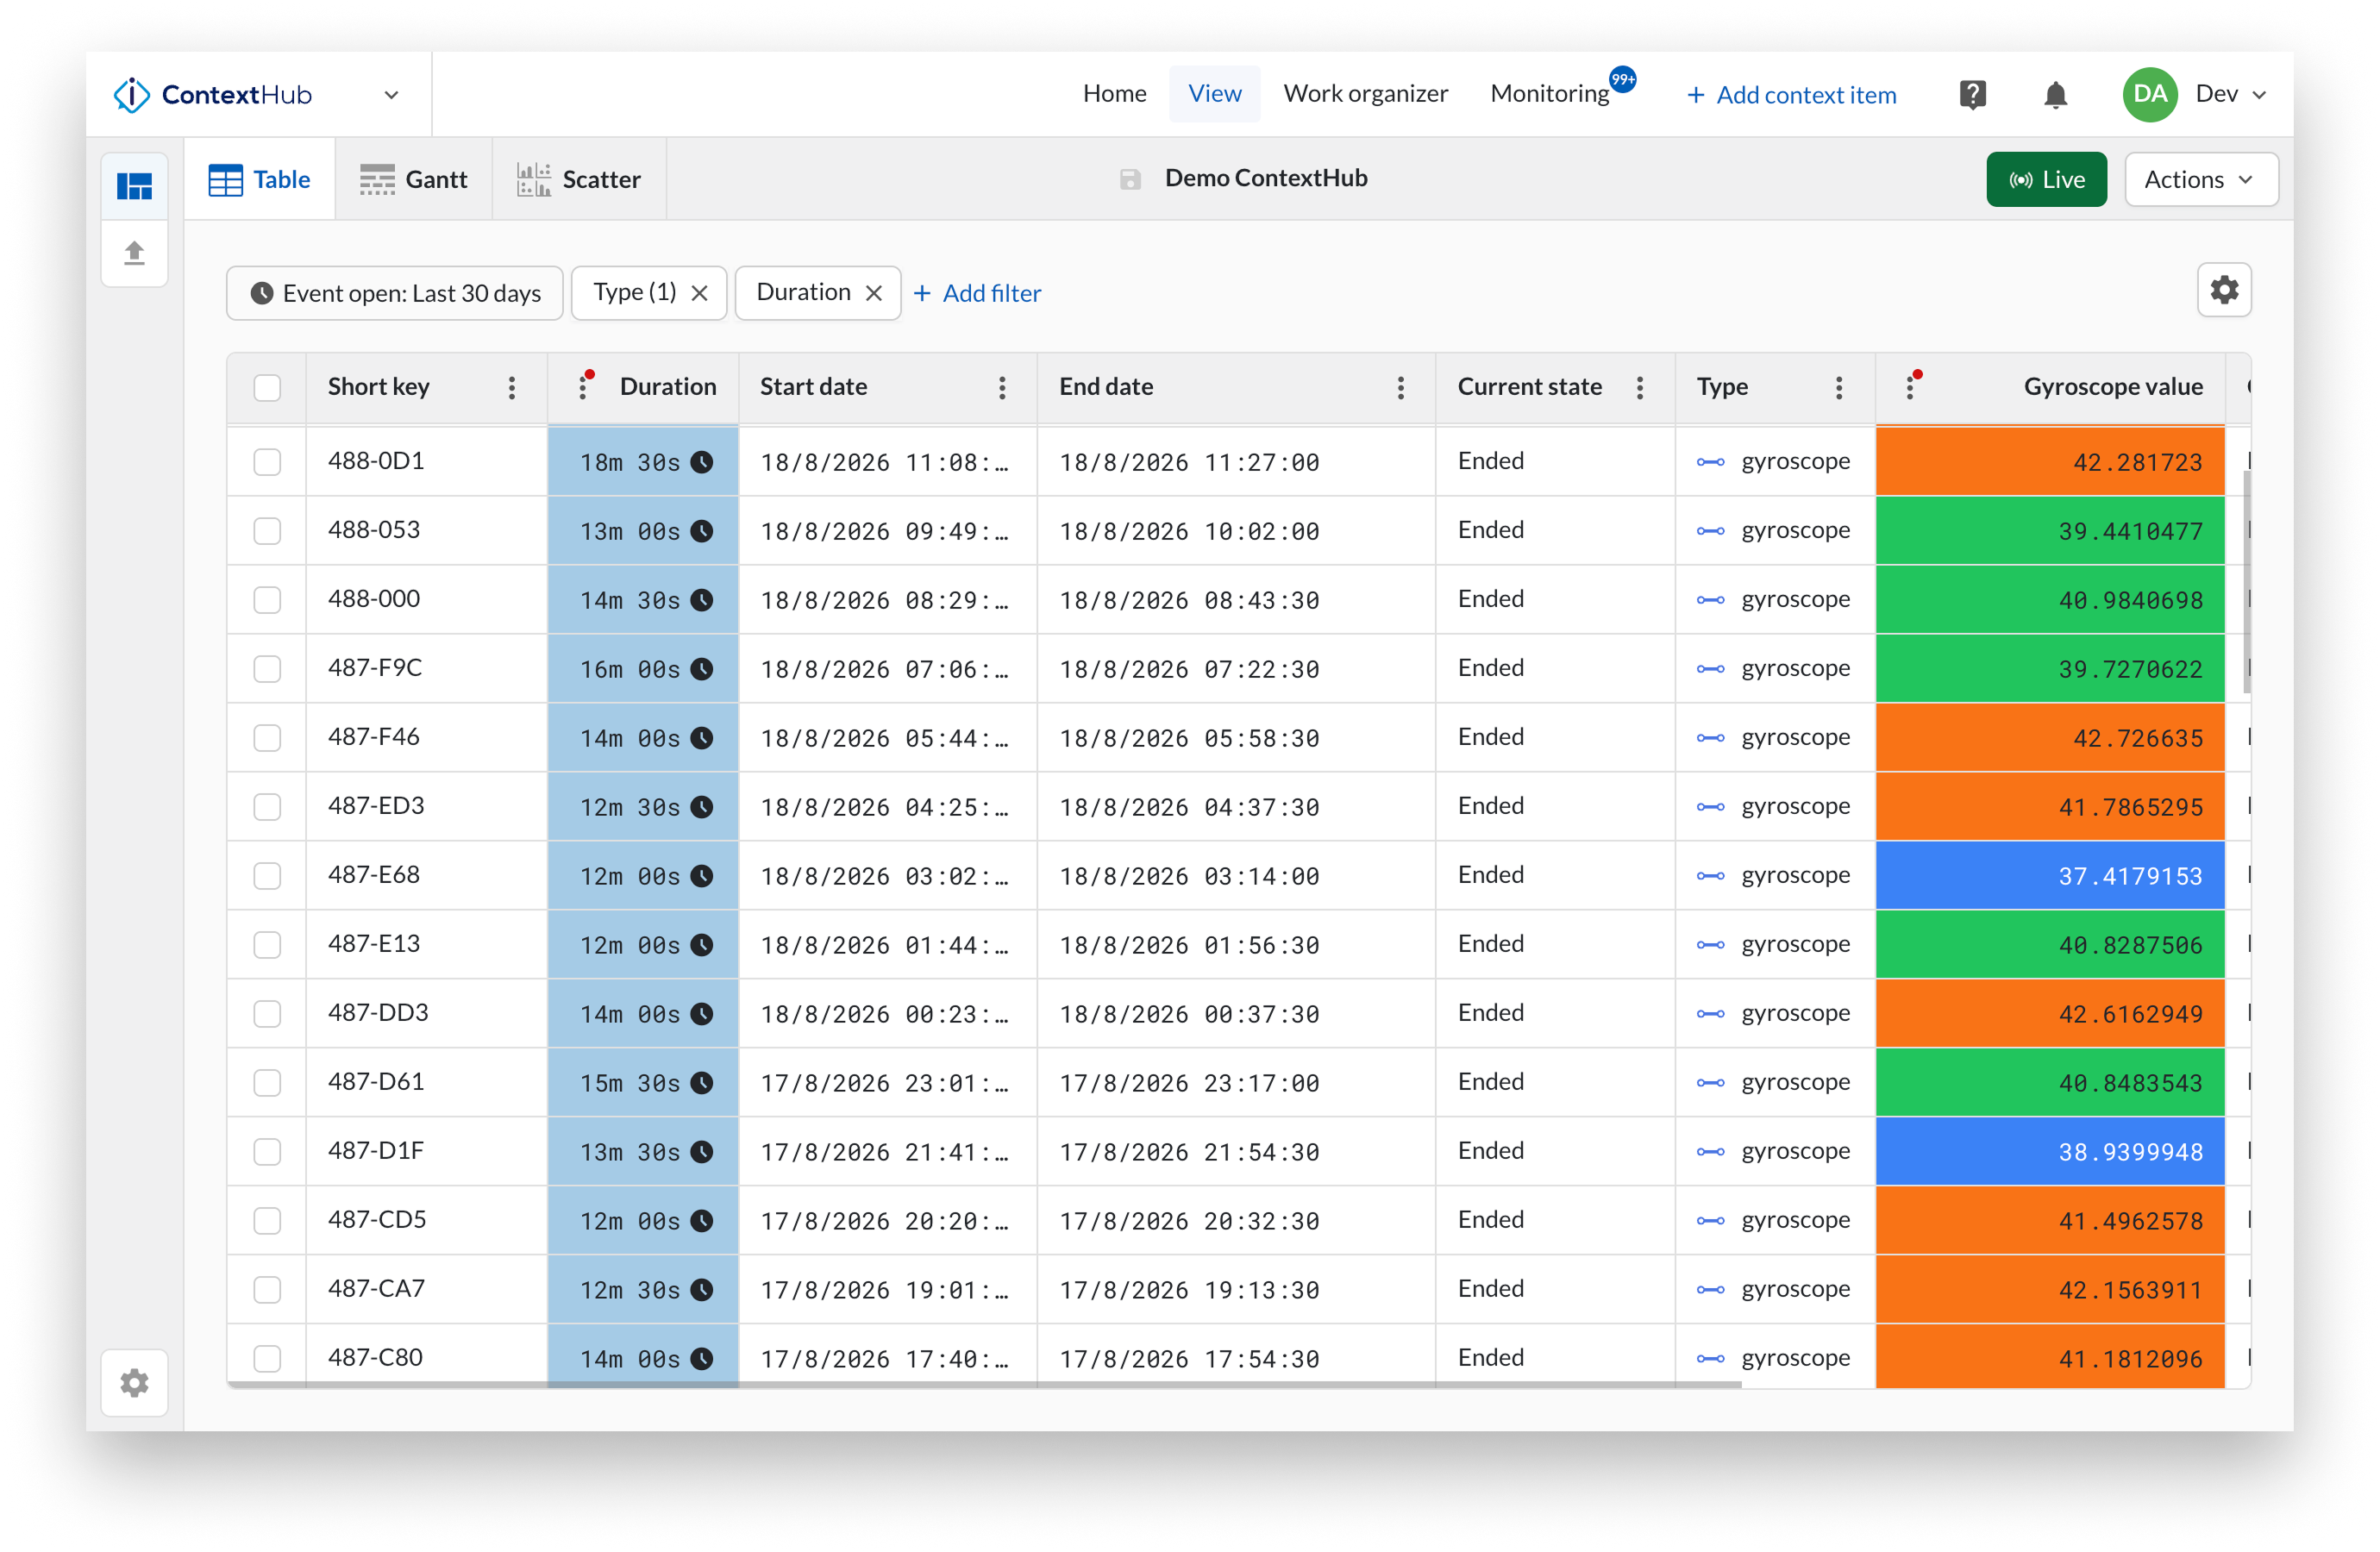
A context view is a search on your context data. You define a time range and optionally apply filters to narrow down the results. The view returns all context items that match your criteria, regardless of type. Instant context items, context item events, and open context items can all appear in the same view.
Creating a context view
To create a new context view, open ContextHub and click New view. Set a time range to define the period you want to search. You can then apply one or more filters to focus the results. Multiple filters can be combined. Once your view is configured, save it to make it available for yourself and others.
To open an existing view, click the views icon in the left bar to open the work organizer. Your most recently opened and favorited views are shown for quick access. Click Open to browse all available views.
Visualization modes
From a view you can switch between three visualization modes: table, Gantt chart, and scatter plot. The Gantt chart and scatter plot are covered in dedicated pages in this section. Actions available on individual items or on a selection of items are covered in Context view actions.
Analyzing context items alongside time series data
A saved context view can be used in TrendHub as a context item search. This lets you overlay the events from your view directly on your time series data in the focus chart, making it possible to correlate process behavior with recorded events. For more information, see the context item search documentation in TrendHub.
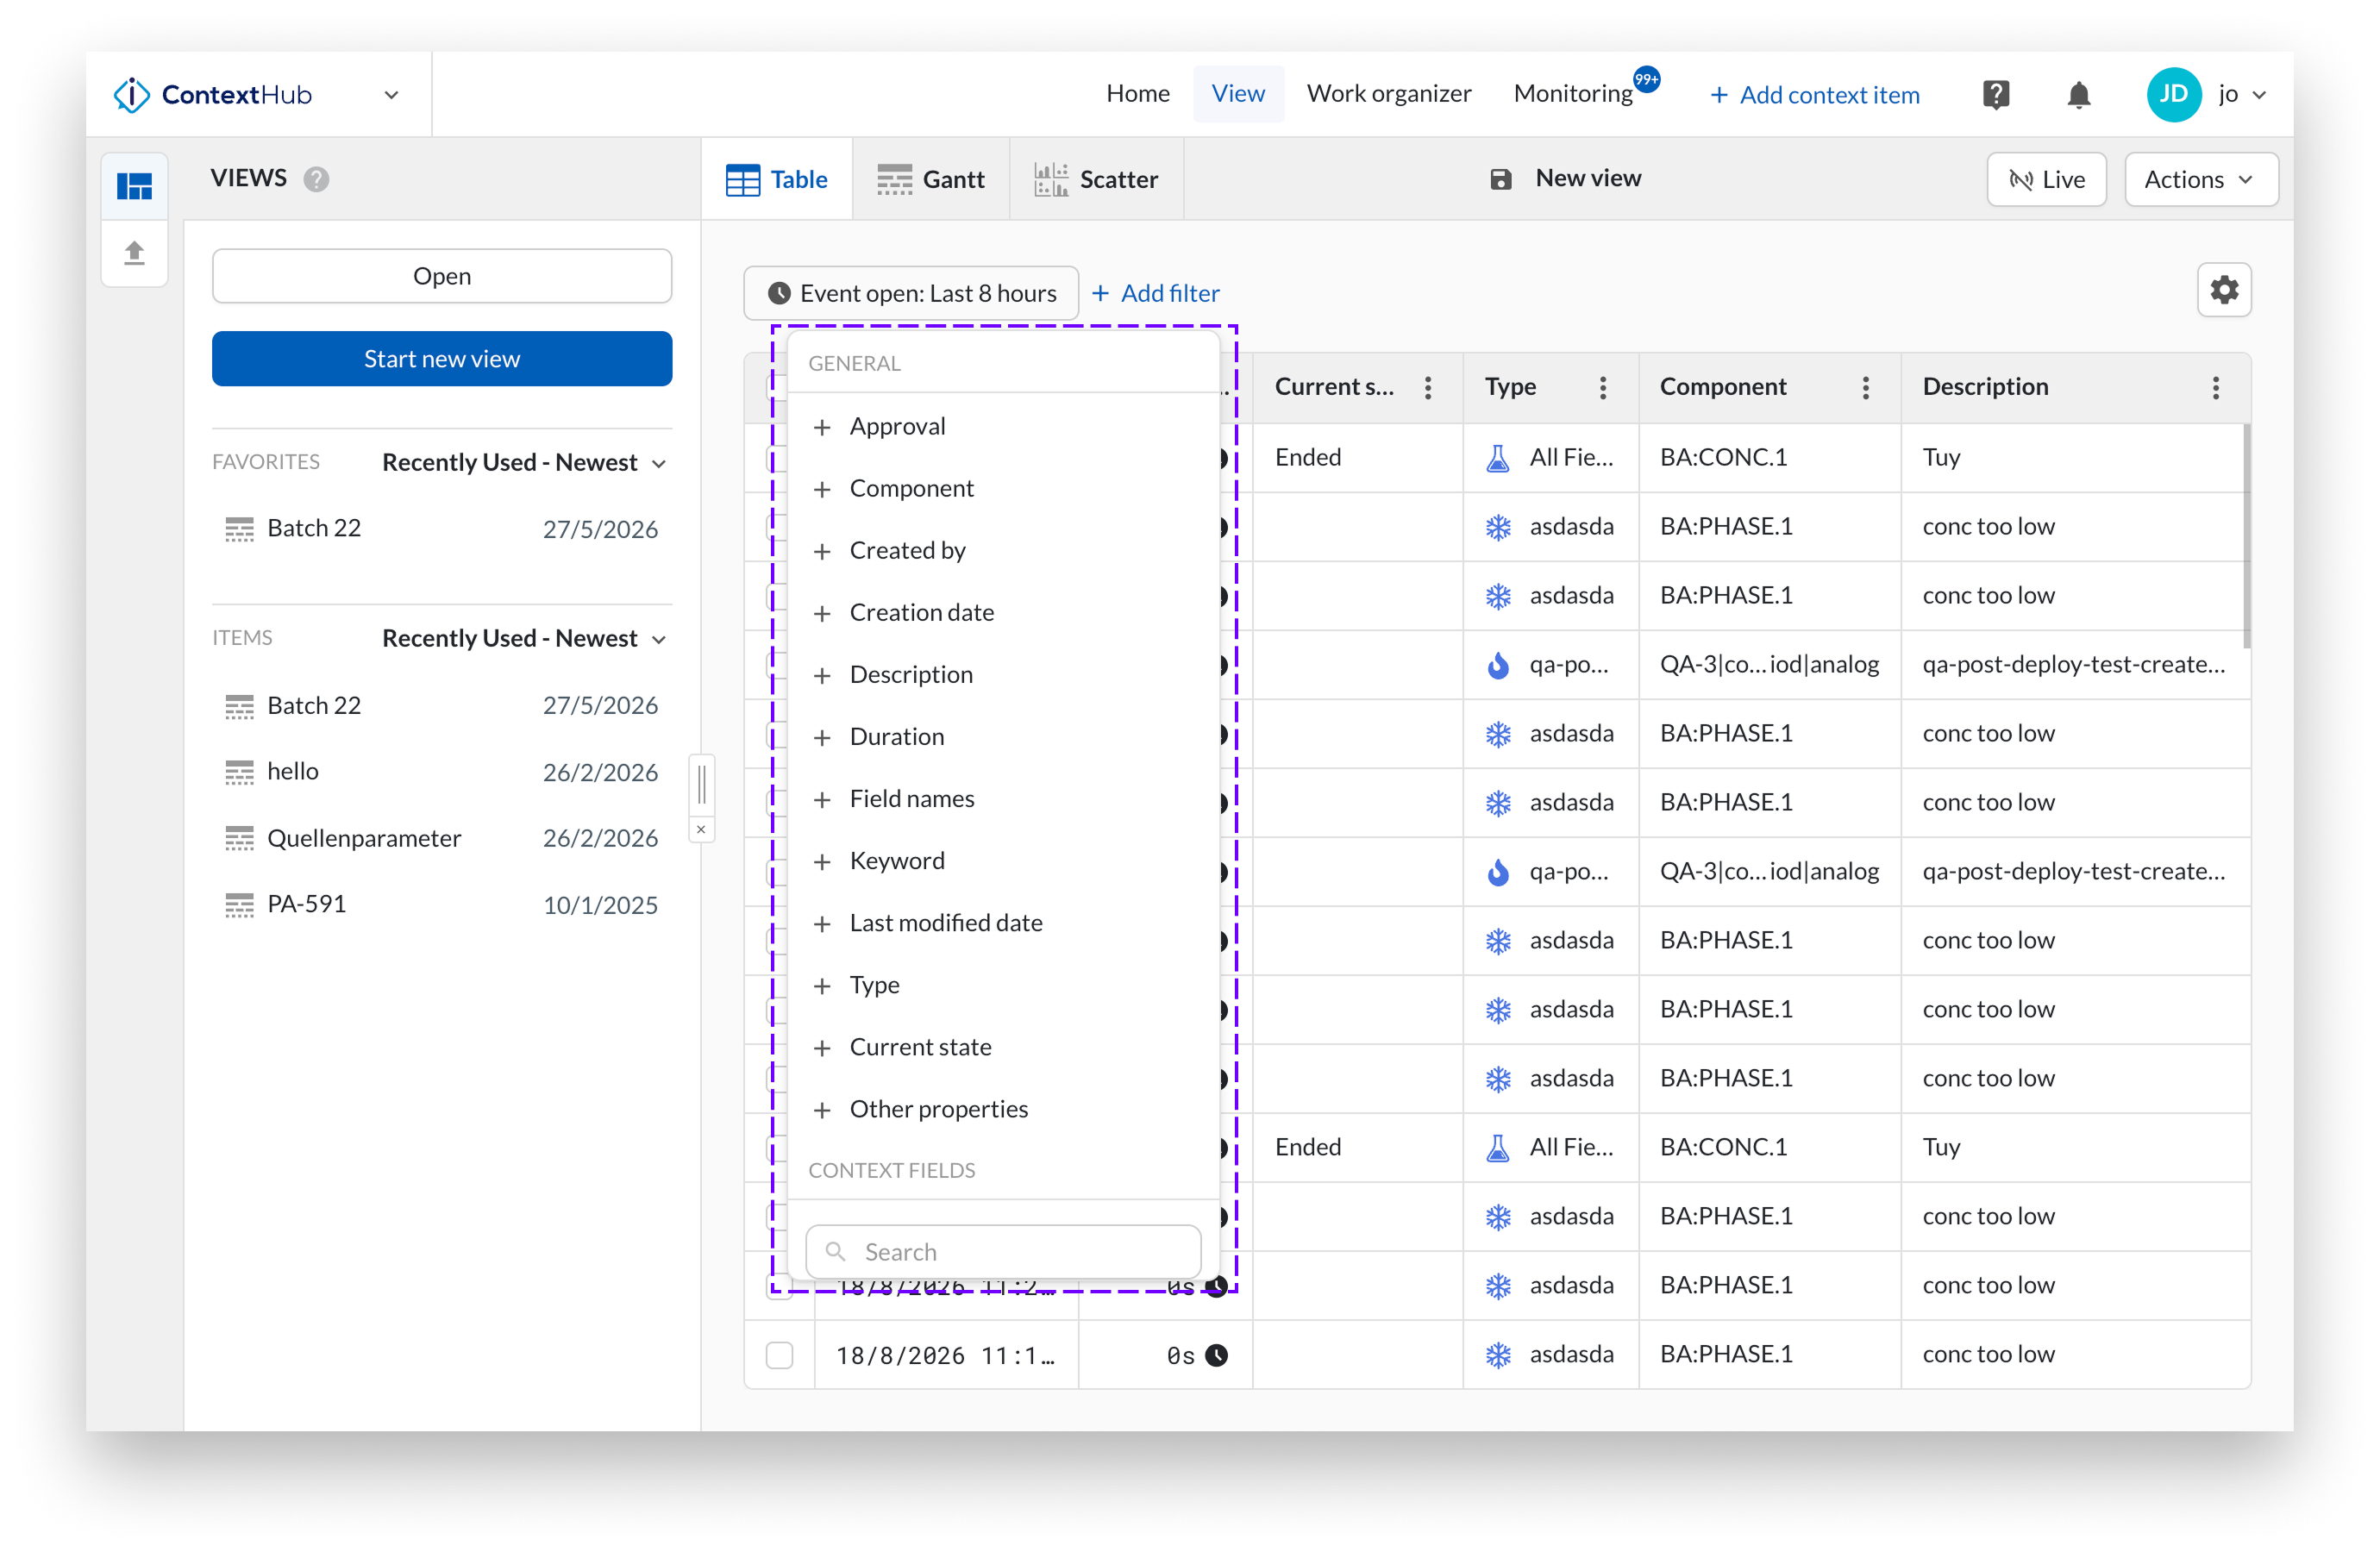
Filter your context views to create a more focused view. A view can be created by applying specific filters to context items. First, determine what you want to examine within your view’s content, then create a filter query. You can filter based on any of the available fields in the context items.
Open or create a new view, then click on the "+Add filter" function. Choose from a variety of filter types, including Approval, Component (with Hierarchy filter), Created by, Creation date, Description, Duration, Field names, Keyword, Last modified date, Type, Current state, Other properties, and Context fields.
Component filter
By using the component filter, you can refine your view by selecting a tag or an asset.
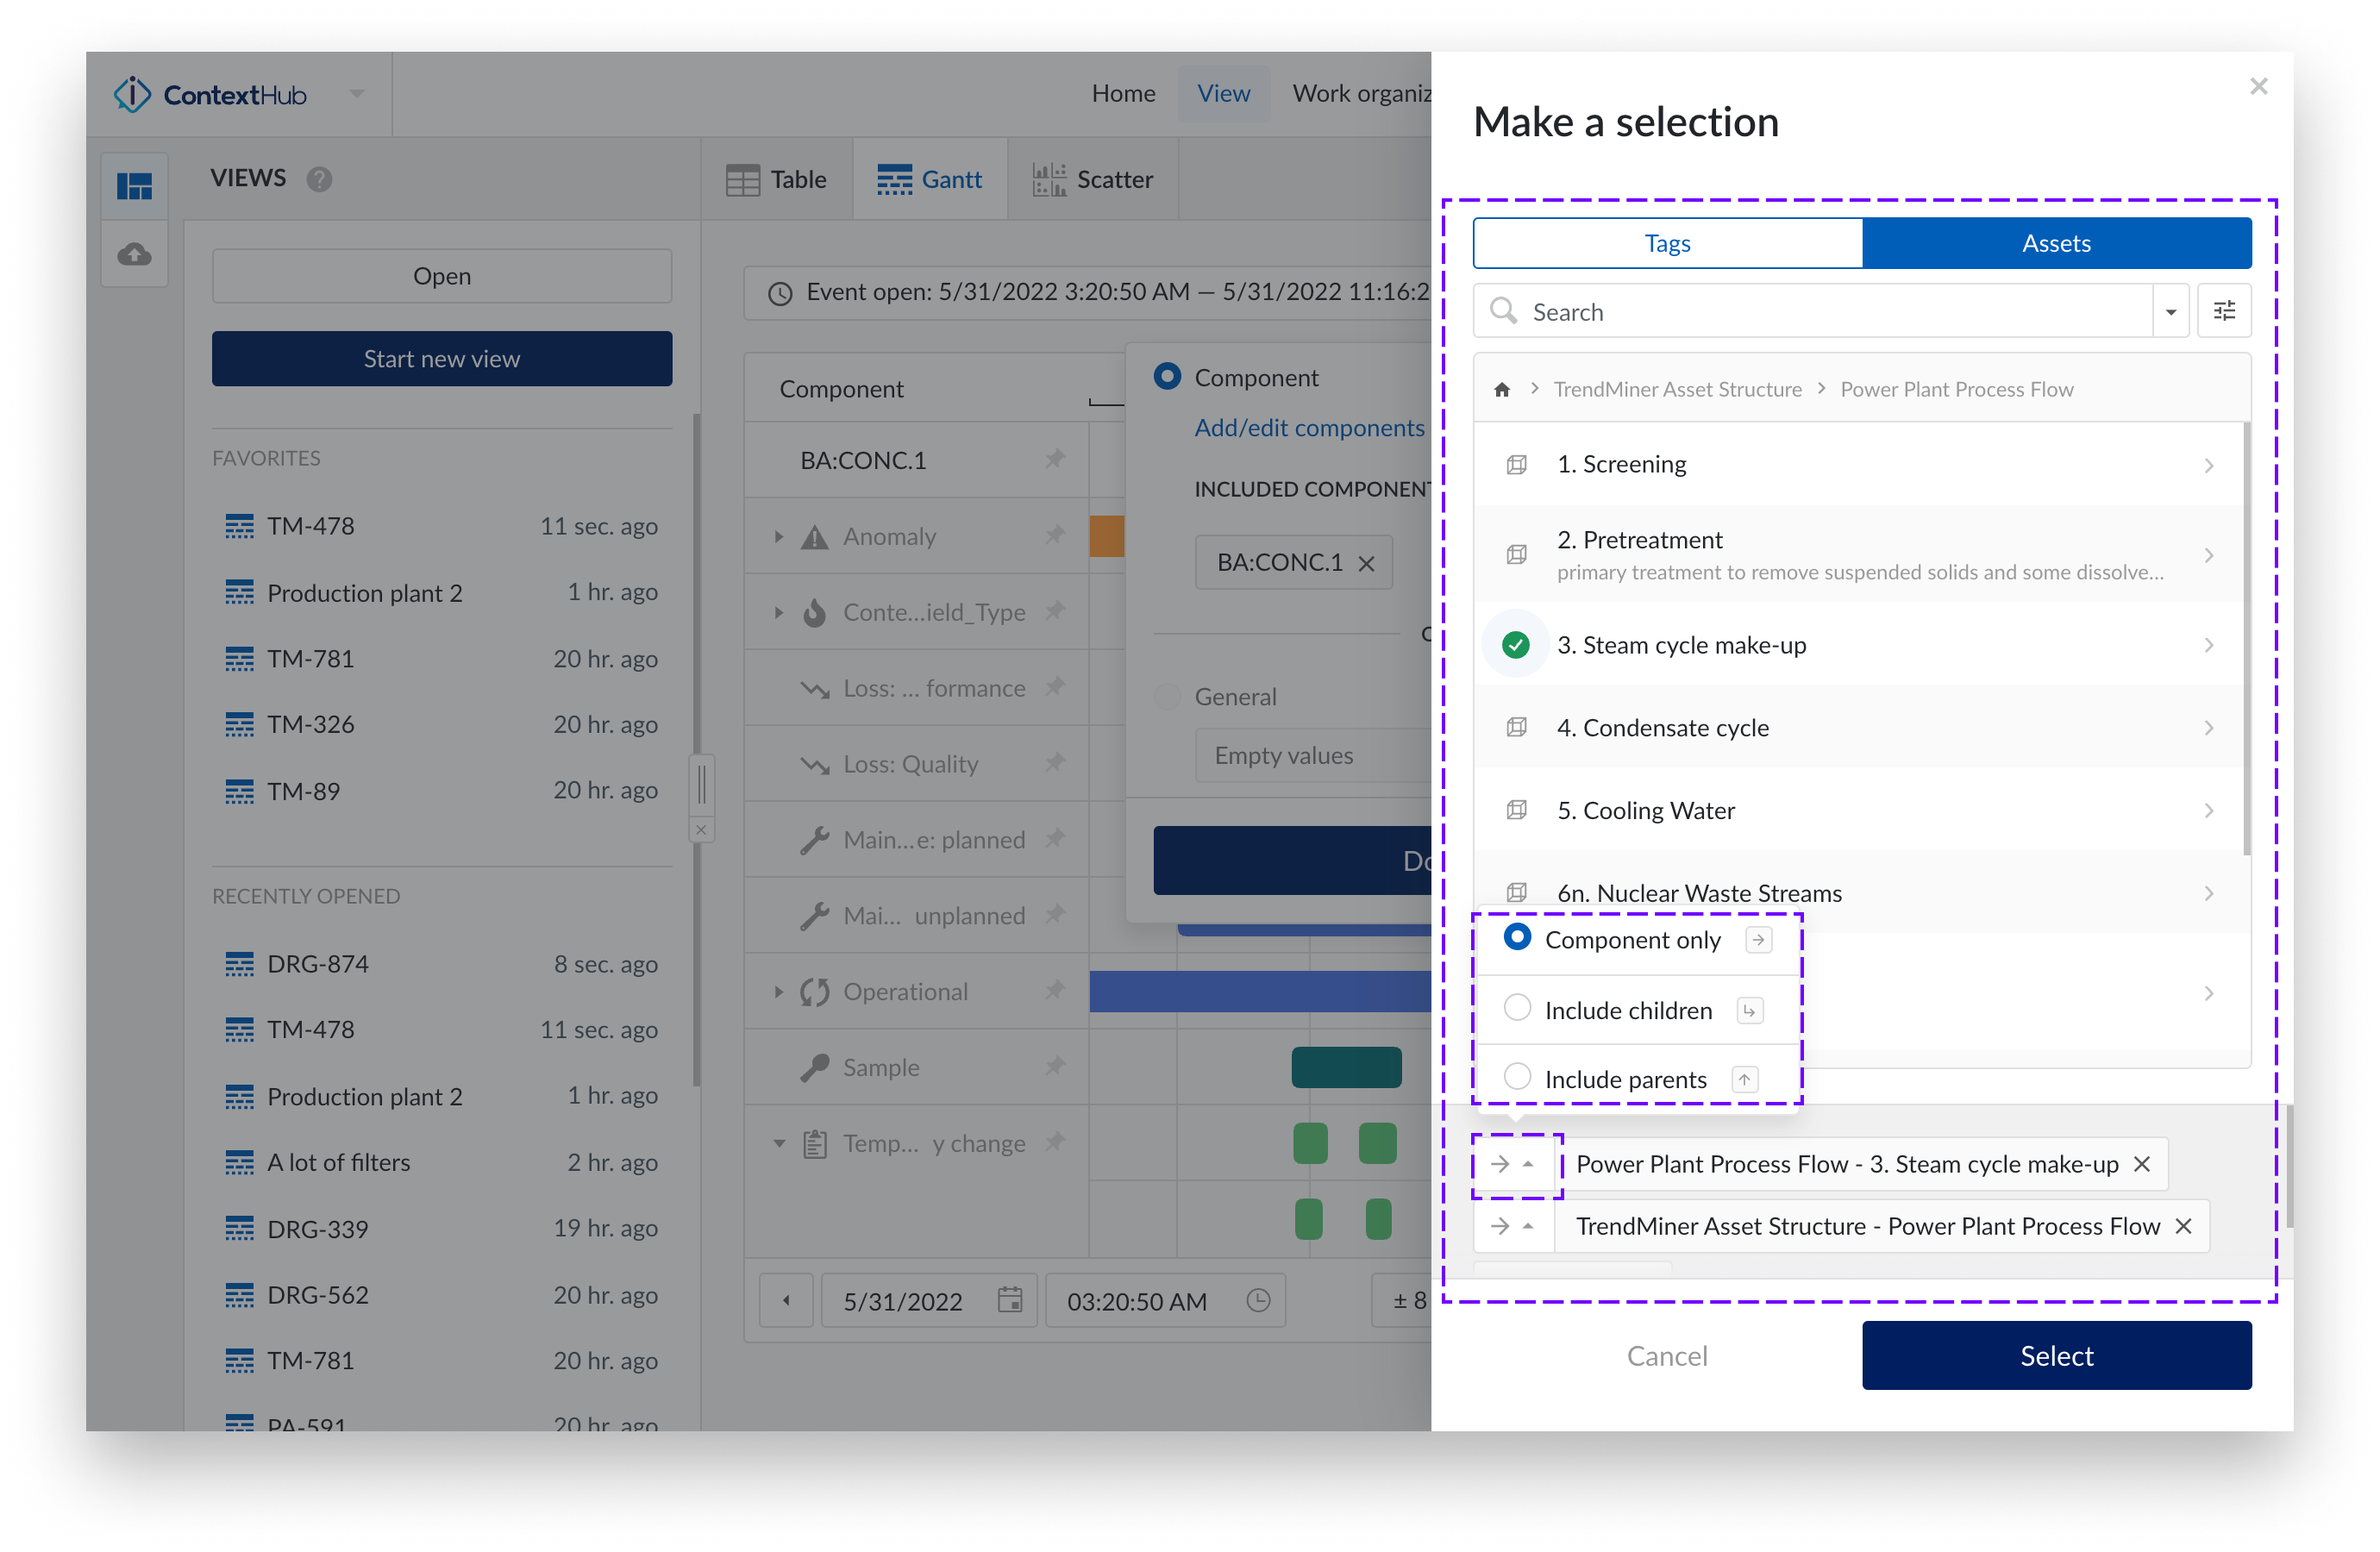
Click on the "Add Filter" button.
Select “Component”
Click on "Add/edit components".
Choose your component from the component menu. The selected component label will appear in the bottom bar of the side panel.
Optionally, click the arrow button to reveal a dropdown menu with the following options:
Component only (default)
Include children
Include parents
Select one of the options and click the "Select" button.
Once selected, your chosen components will appear in the filtered selection.
Note
The maximum number of components that can be included in a filtered view is 10'000.
Current state filter
You can filter context items by their "Current state." For example, to view all context items that are currently "In Progress," select the "Current state" filter and choose the "In Progress" option. This filter allows you to focus specifically on active context items.
Timeframe filter
The timeframe filter defines the query period of your view. A context item is returned when its time range overlaps with the query period you set. A query period is always required.
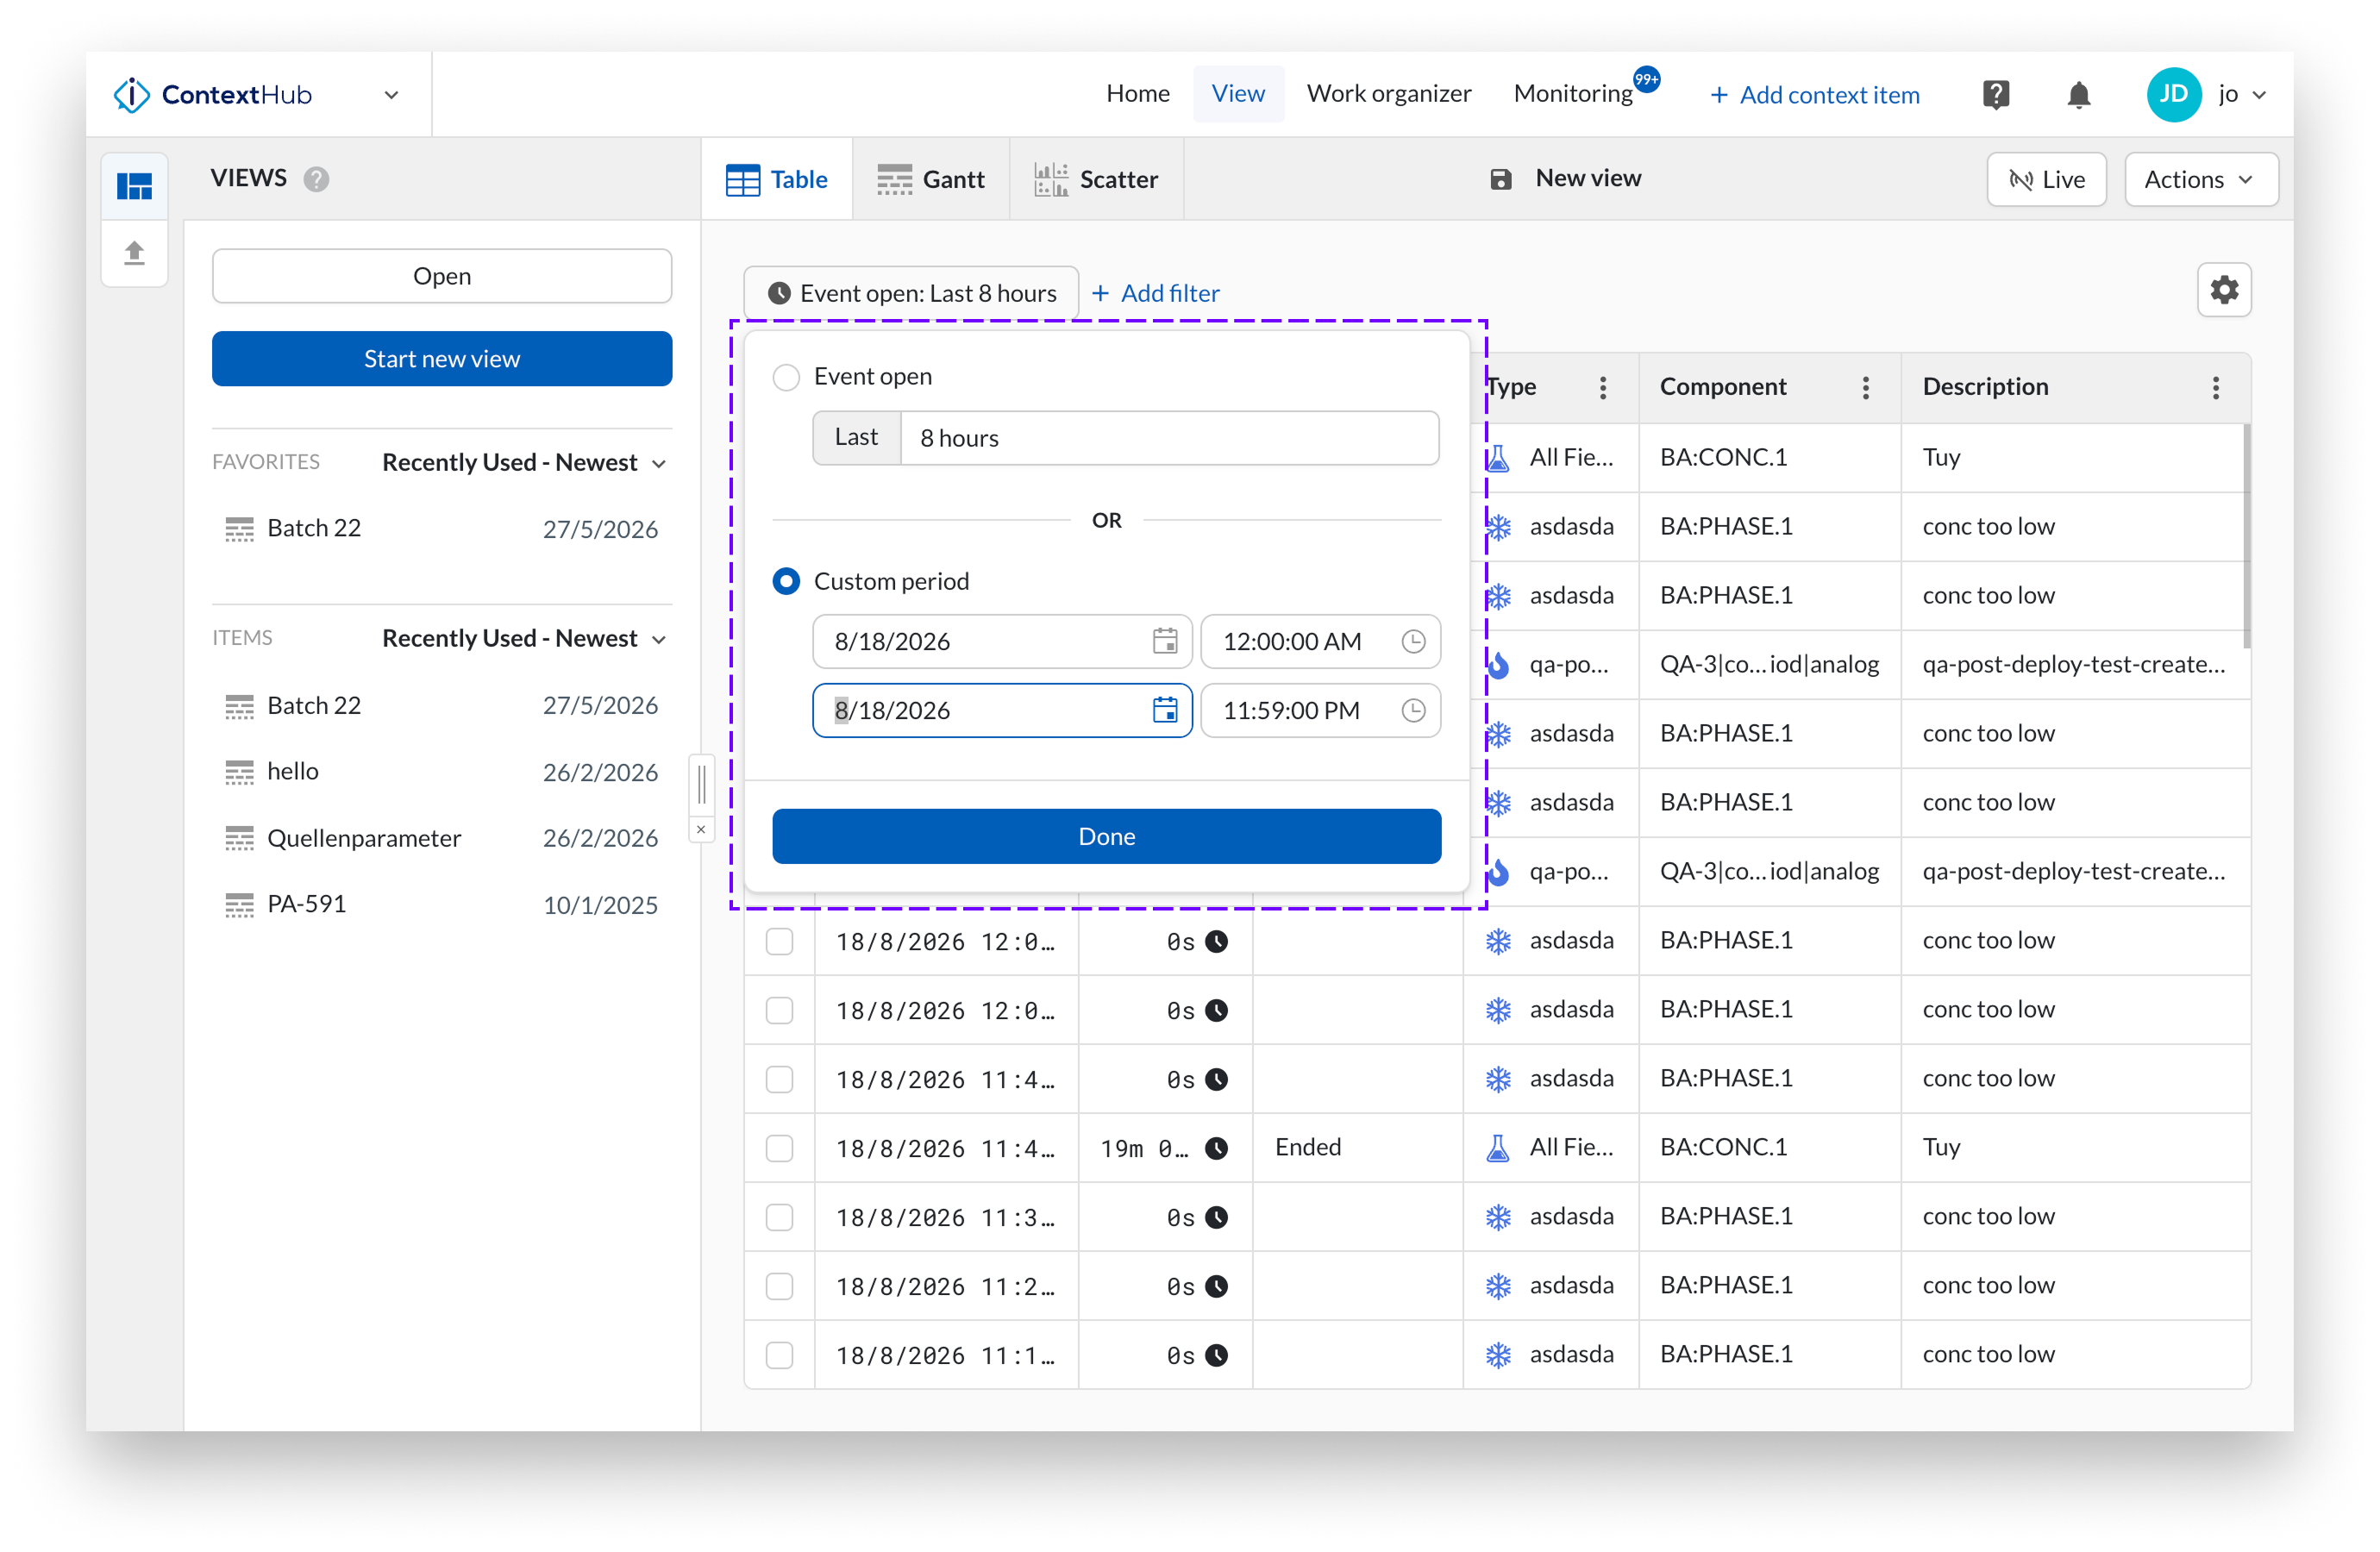
Click the timeframe chip in the filter bar to open the filter. Under Event open, you can either:
Select a preset period (e.g., "8 hours") for an event.
Choose a specific timeframe for an event.
Additionally, you can enable "Live mode" to automatically refresh the grid chart and display new items as they are added.
Once you've made your selection, click "Done" to apply the filter and focus on context items within the chosen period.
Approval Filter
Tracks whether context items are "Approved" or "Not Approved," ensuring updates are verified before finalization. Approvals are removed when the item is edited, and no approvals are granted by default.
Created By Filter
Allows you to enter a list of users to narrow down context items based on who created them.
Creation date filter
Filters context items on the date they were created. The creation date is the moment the item was recorded in TrendMiner, which is not necessarily the moment the event itself took place.
The filter is applied on top of the query period: it narrows down the items that were already returned by your timeframe filter.
You can filter on:
Before or After a specific date and time.
A custom period with a start and end date and time.
Description Filter
Filters context items based on the description field, supporting multiple values for more refined searches.
Duration Filter
Filters context items based on multiple durations using operators, allowing you to specify time ranges or conditions like "greater than" or "less than" a certain duration.
Field names filter
Filters context items on context fields by name and value. This filter matches on the name of the context field, not on its underlying identifier. The filters in the Context fields group work the other way around: each one refers to a single context field by its identifier, so it only returns items that use that exact field. Use the field names filter when several context fields share the same name but have different identifiers. Filtering on the name covers all of them at once.
Under Field name to search on, enter the name of the field, for example Batch ID. The field name must match exactly.
In the second input, enter the value you want to search on. Values are matched exactly.
To search for more than one value, click the + button to add another value input.
A context item matches when it has a field with the specified name and that field contains any one of the values you entered. Multiple values therefore behave as an OR condition.
Type
Filters context items based on one or multiple context item types. By defining context types, you can ensure that context items are organized in a meaningful way, making it easier to filter and analyze them based on their specific type.
The type filter limits the Fields filter to the fields that are present in the select Type filter(s).
Context Field Filter
Filters context items based on one or multiple context fields. For each field, you can filter values using operators or apply a general filter for empty or non-empty values.
Other properties
Use this filter to search context items based on data under "Other properties," which includes values not yet mapped to context fields.
Keyword Filter
Enables you to search context items based on specific keywords assigned to them. It also offers the option to filter by empty or non-empty values.
Last modified date filter
Filters context items on the date they were last changed. This is useful when you want to review recently edited items, for example to check which items were updated after a shift handover.
Like the creation date filter, it is applied on top of the query period and narrows down the items returned by your timeframe filter.
You can filter on:
Before or After a specific date and time.
A custom period with a start and end date and time.
Empty/non-empty values filter
You can filter not only by specific values but also by empty or non-empty values for certain property or field types. A value is considered empty if it is either null or an empty string. This option is available for the following filters:
Component filter
Description filter
Keyword filter
Current state filter
Custom numeric context field filter
Custom string context field filter
Custom dropdown context field filter
Tip
Filtering on empty or non-empty values for the Component filter is currently not supported in Gantt view.
Look-back window
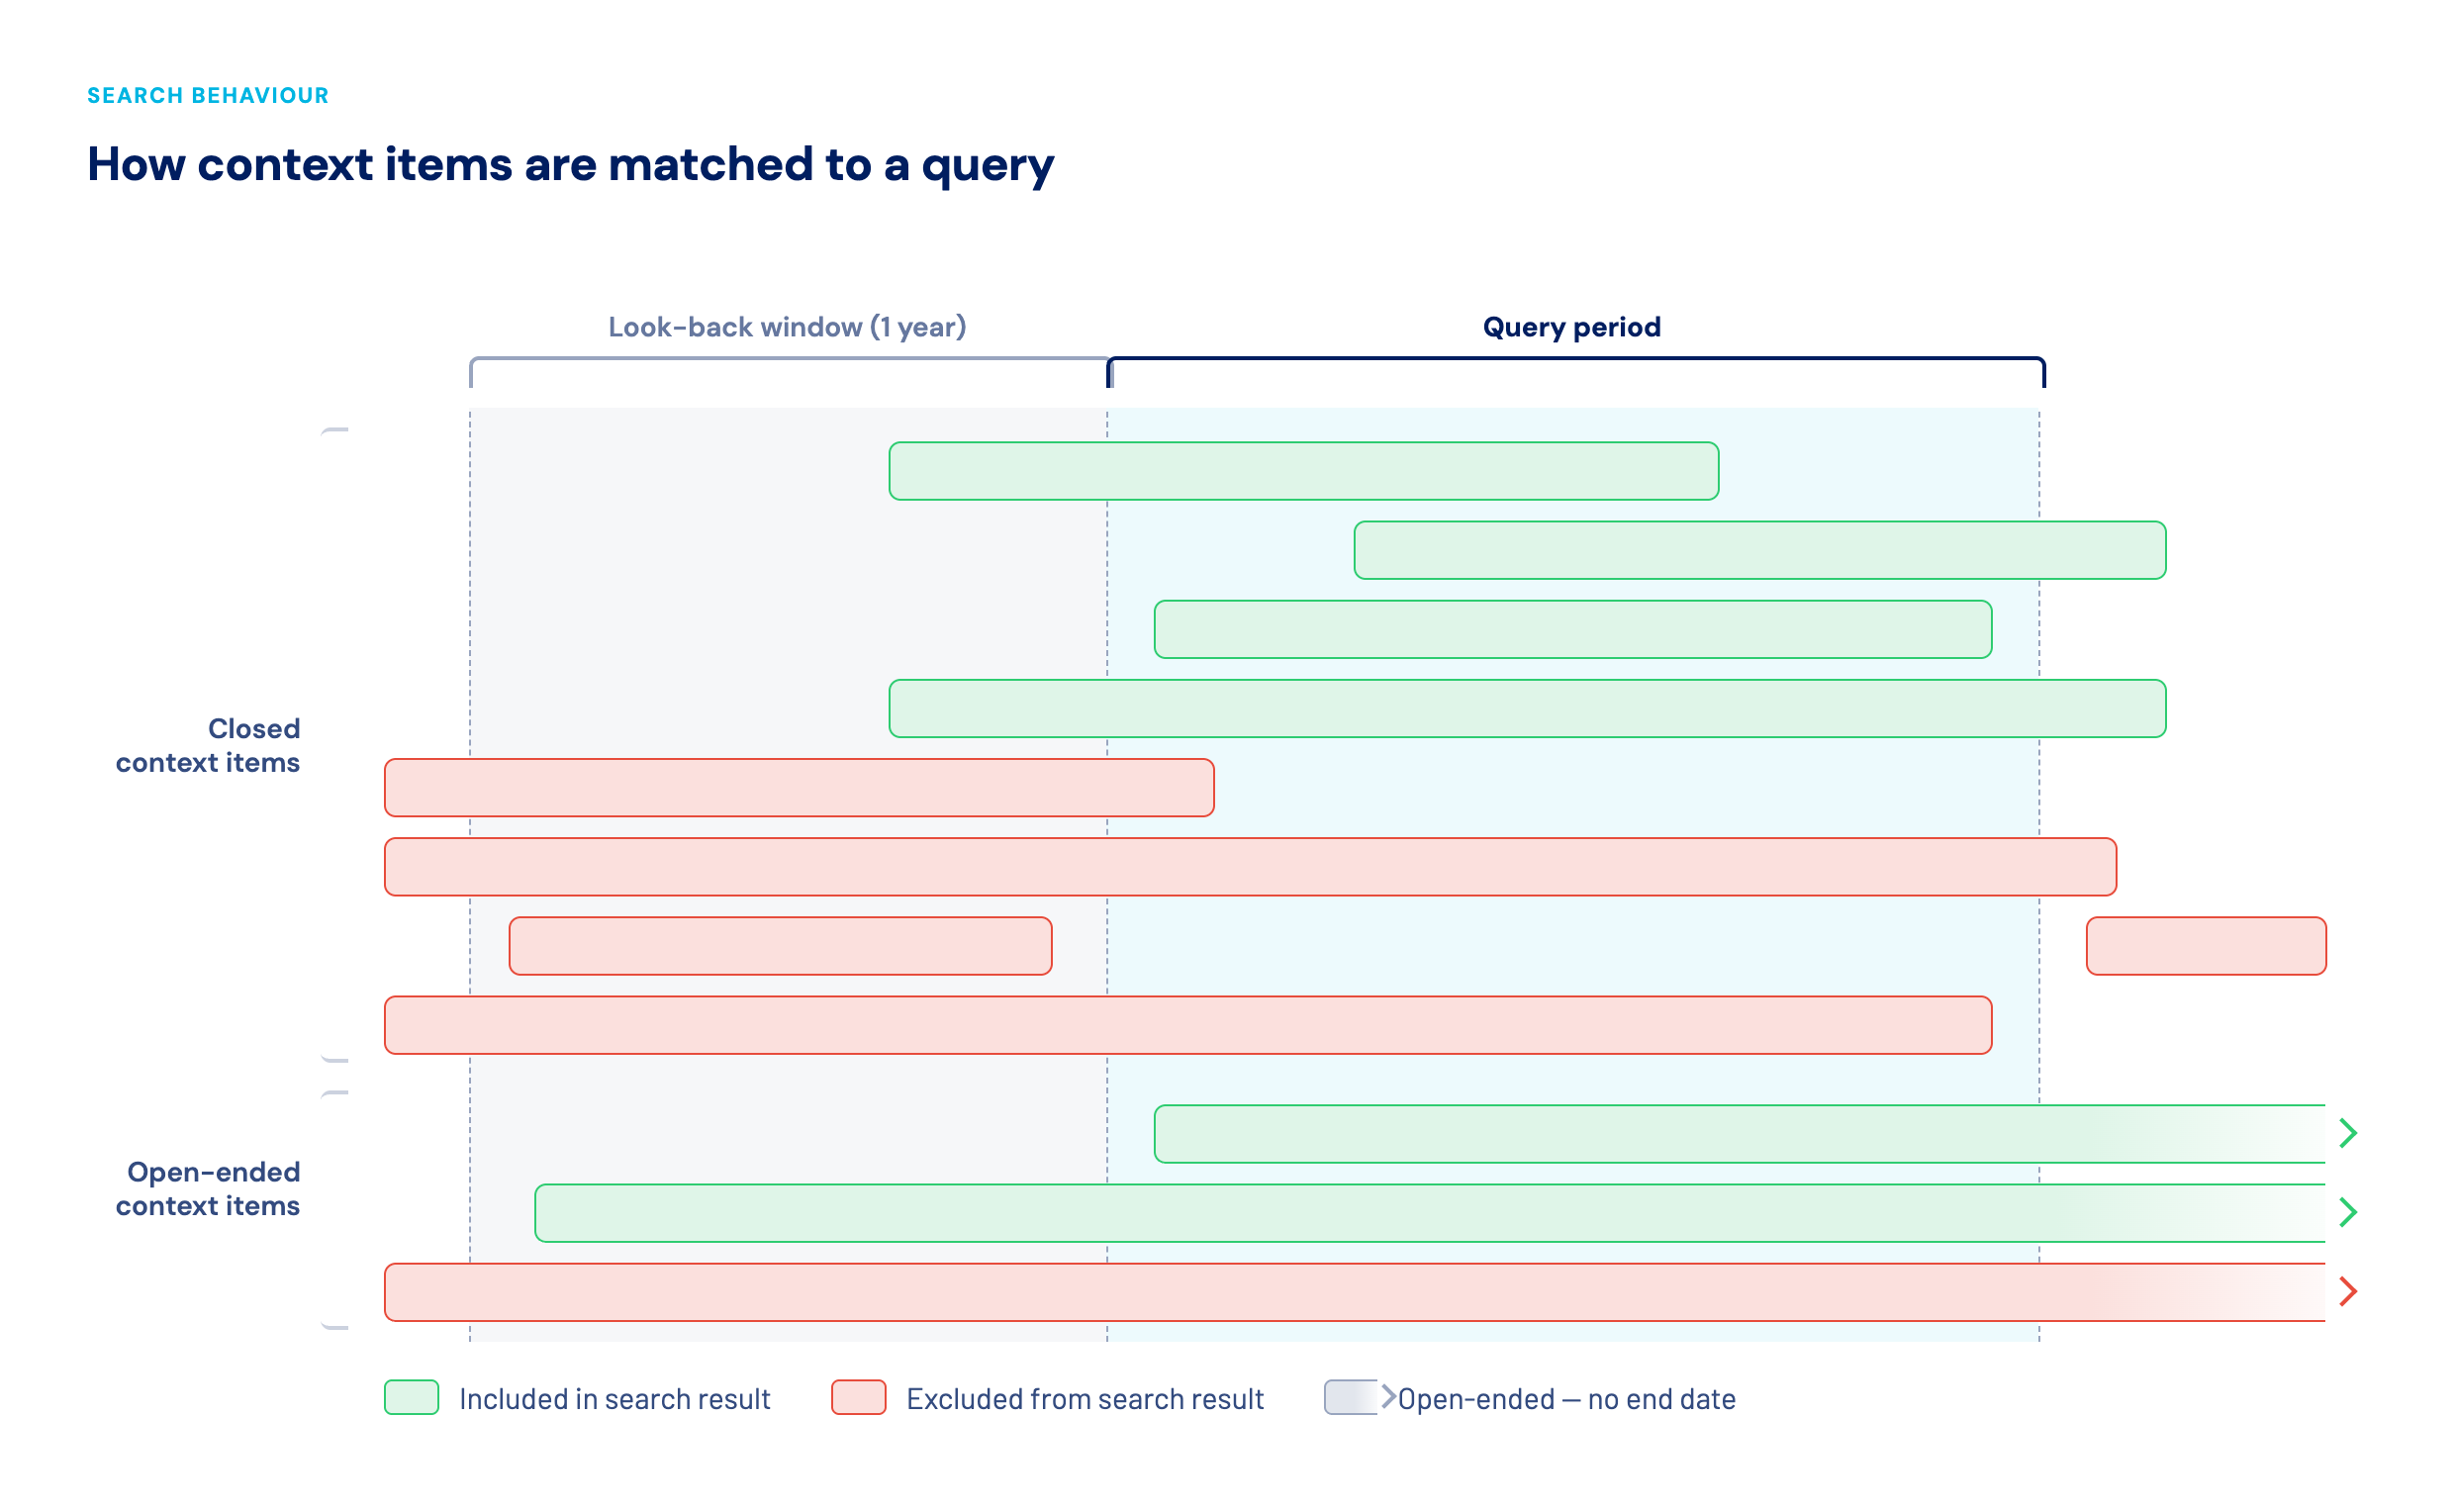
Every context view search is based on a query period, which you set with the timeframe filter. A context item is returned when its time range overlaps with that period.
Some context items are open-ended: they have a start date but no end date, for example an instant context item that is still running. Because these items have no end, they can overlap with any query period, no matter how long ago they started. Evaluating all of them on every search would slow the search down considerably.
To keep searches fast, a context view therefore applies a look-back window. By default, only context items that start within 1 year before the start of your query period are included. Older items are left out, even if they are still open.
Enabling or disabling the look-back window
The look-back window is enabled by default. You can turn it off per context view when you need to be sure that no older items are missed.
Open the context view.
Click Actions and select Context view settings. In TrendHub, click the three dots button in the header of the Context item search panel.
In the Context view settings dialog, clear the Look-back window checkbox.
Click Apply.
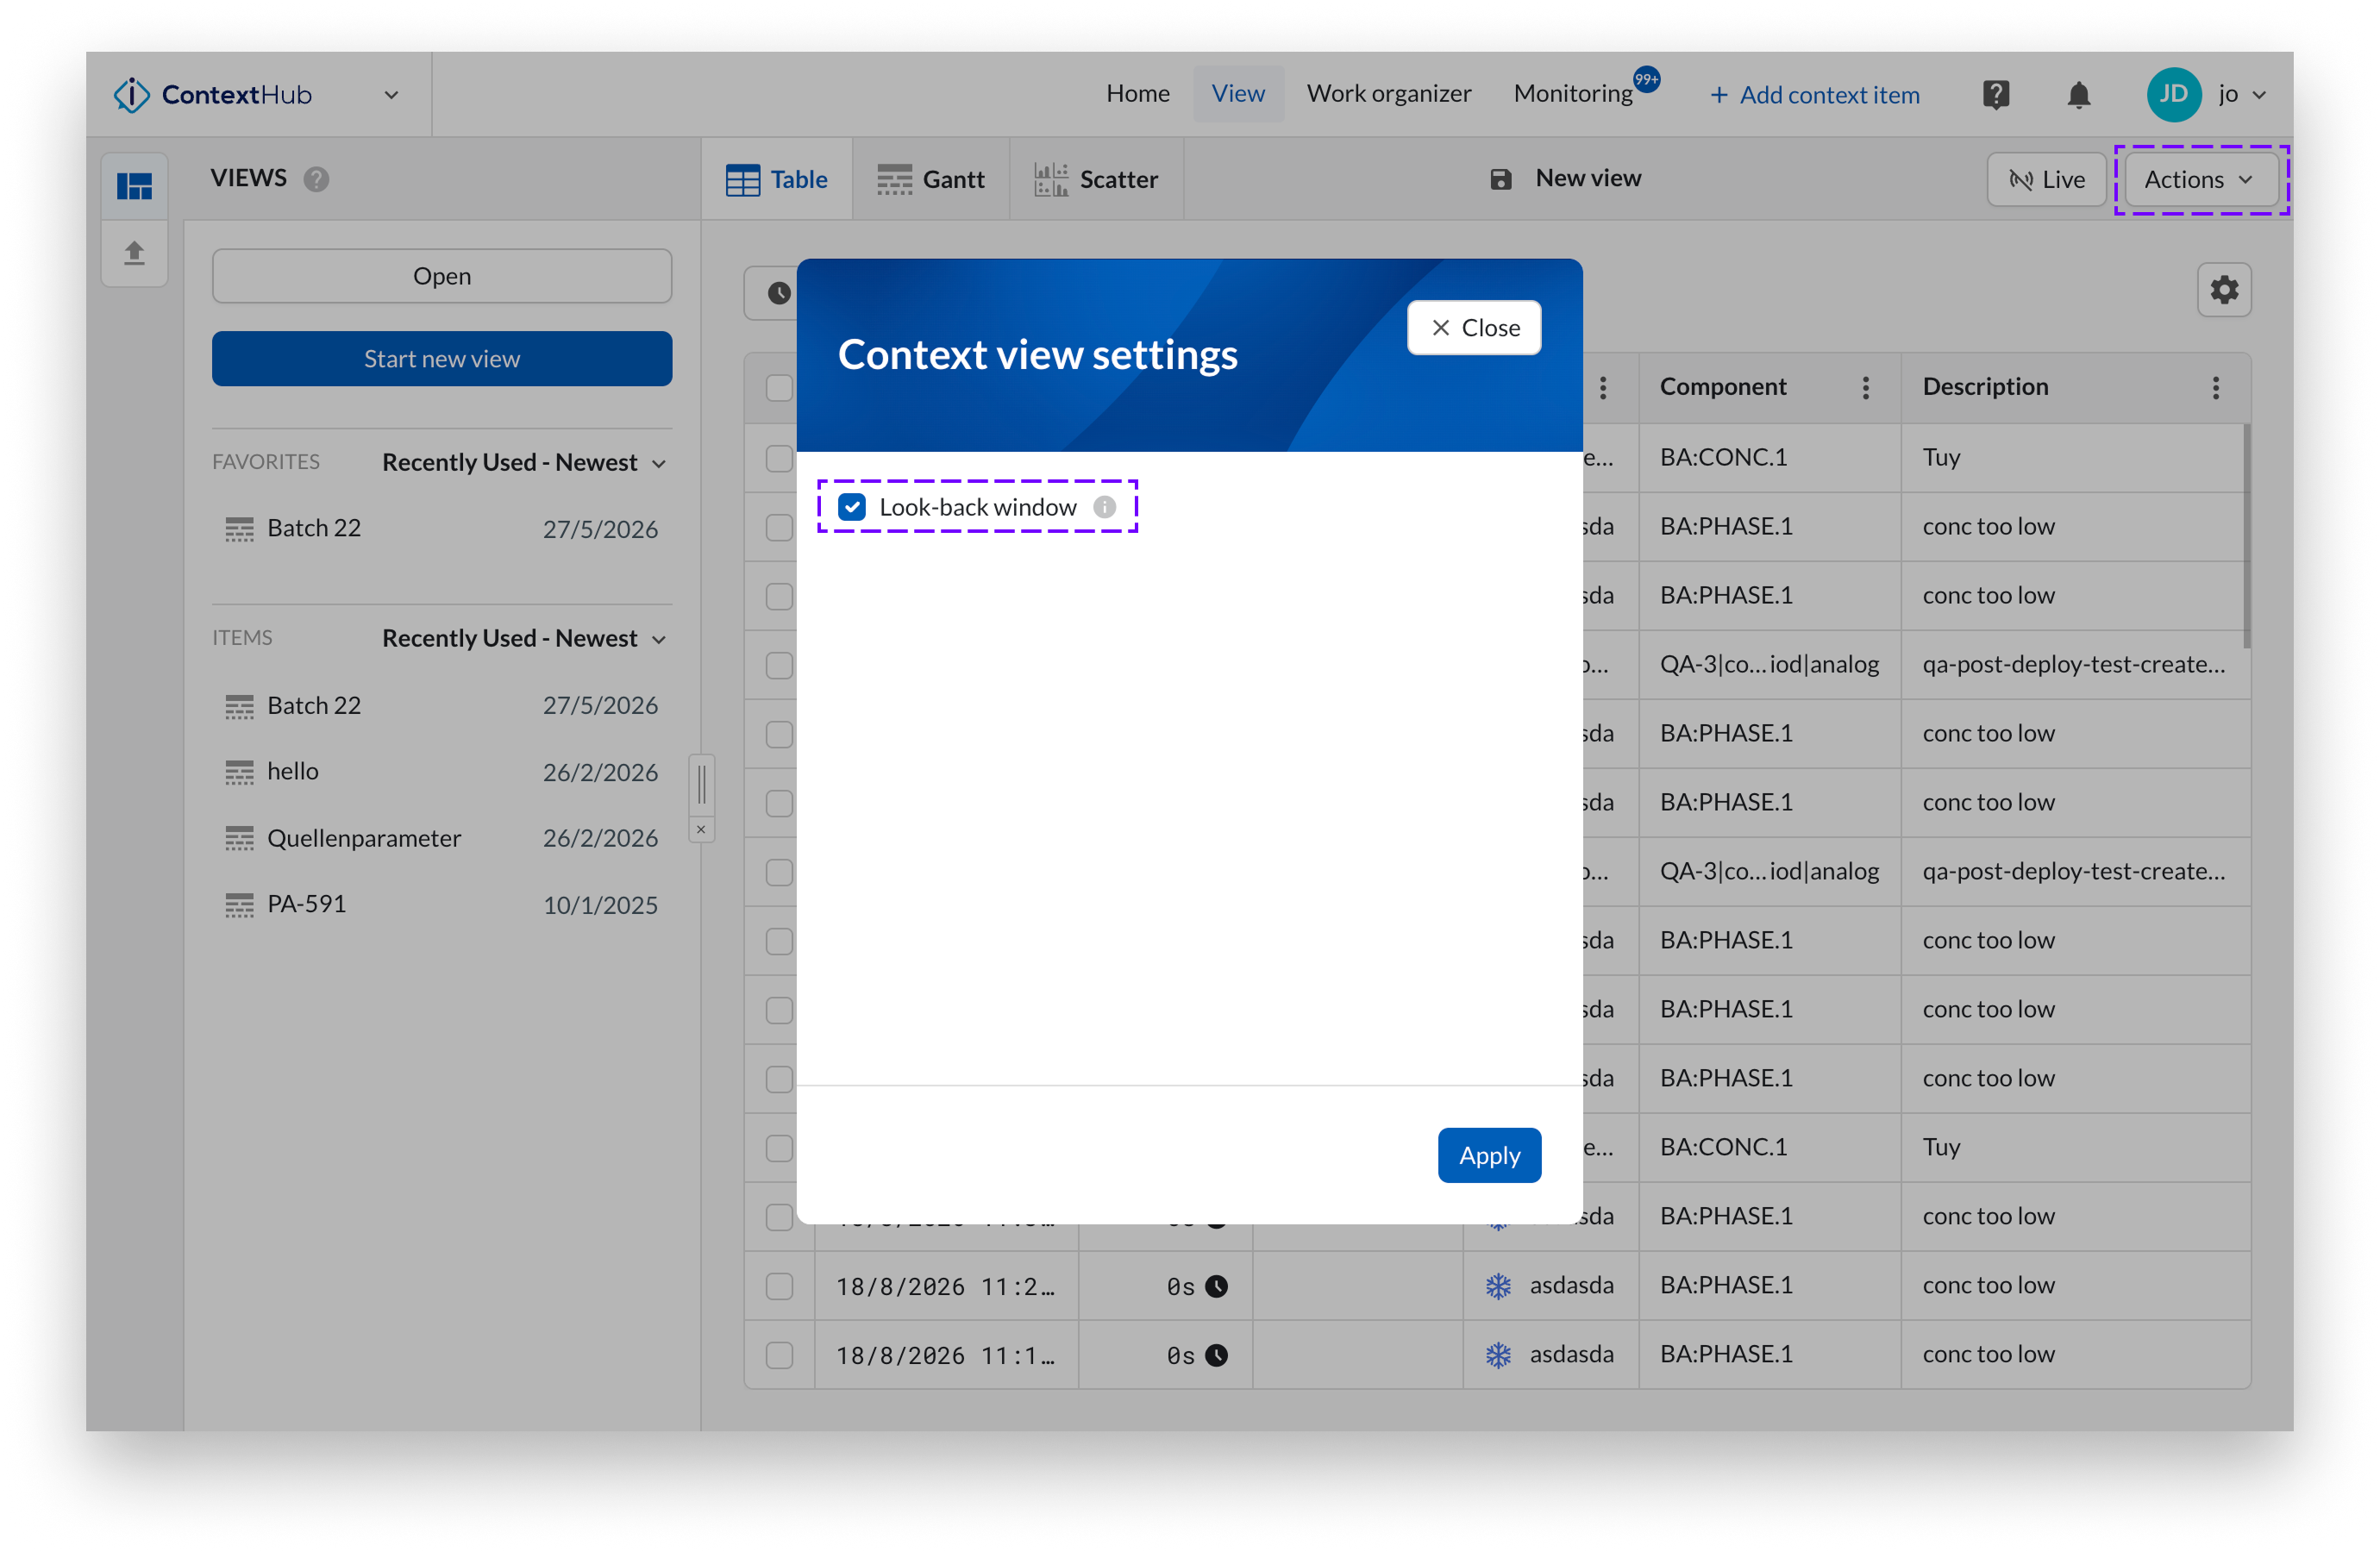
Clearing the checkbox includes all context items regardless of their age.