Machine Learning Hub and Notebooks
What is Machine Learning Hub?
TrendMiner’s vision to democratize analytics goes beyond empowering domain experts with self-service tools to also include closer collaboration between different experts when it comes to solving problems. Some of the most complex problems require the introduction of data scientists who bring specialized techniques to the table that allow companies to squeeze the deepest insights out of the available data. Think about advanced statistics and machine learning models.
With MLHub, Data Scientists can access TrendMiner data (both raw as well as pre-processed and contextualized data in TrendMiner views) and validate hypotheses or create/train/deploy machine learning models in the new Notebook environment, which other users can apply through machine learning model tags and visualize in DashHub.
How to use the MLHub
Important
MLHub can only be accessed after access management is set up, for which a separate licence is necessary. For details concerning access management read here. Contact us at TrendMiner if you require further information concerning licensing.
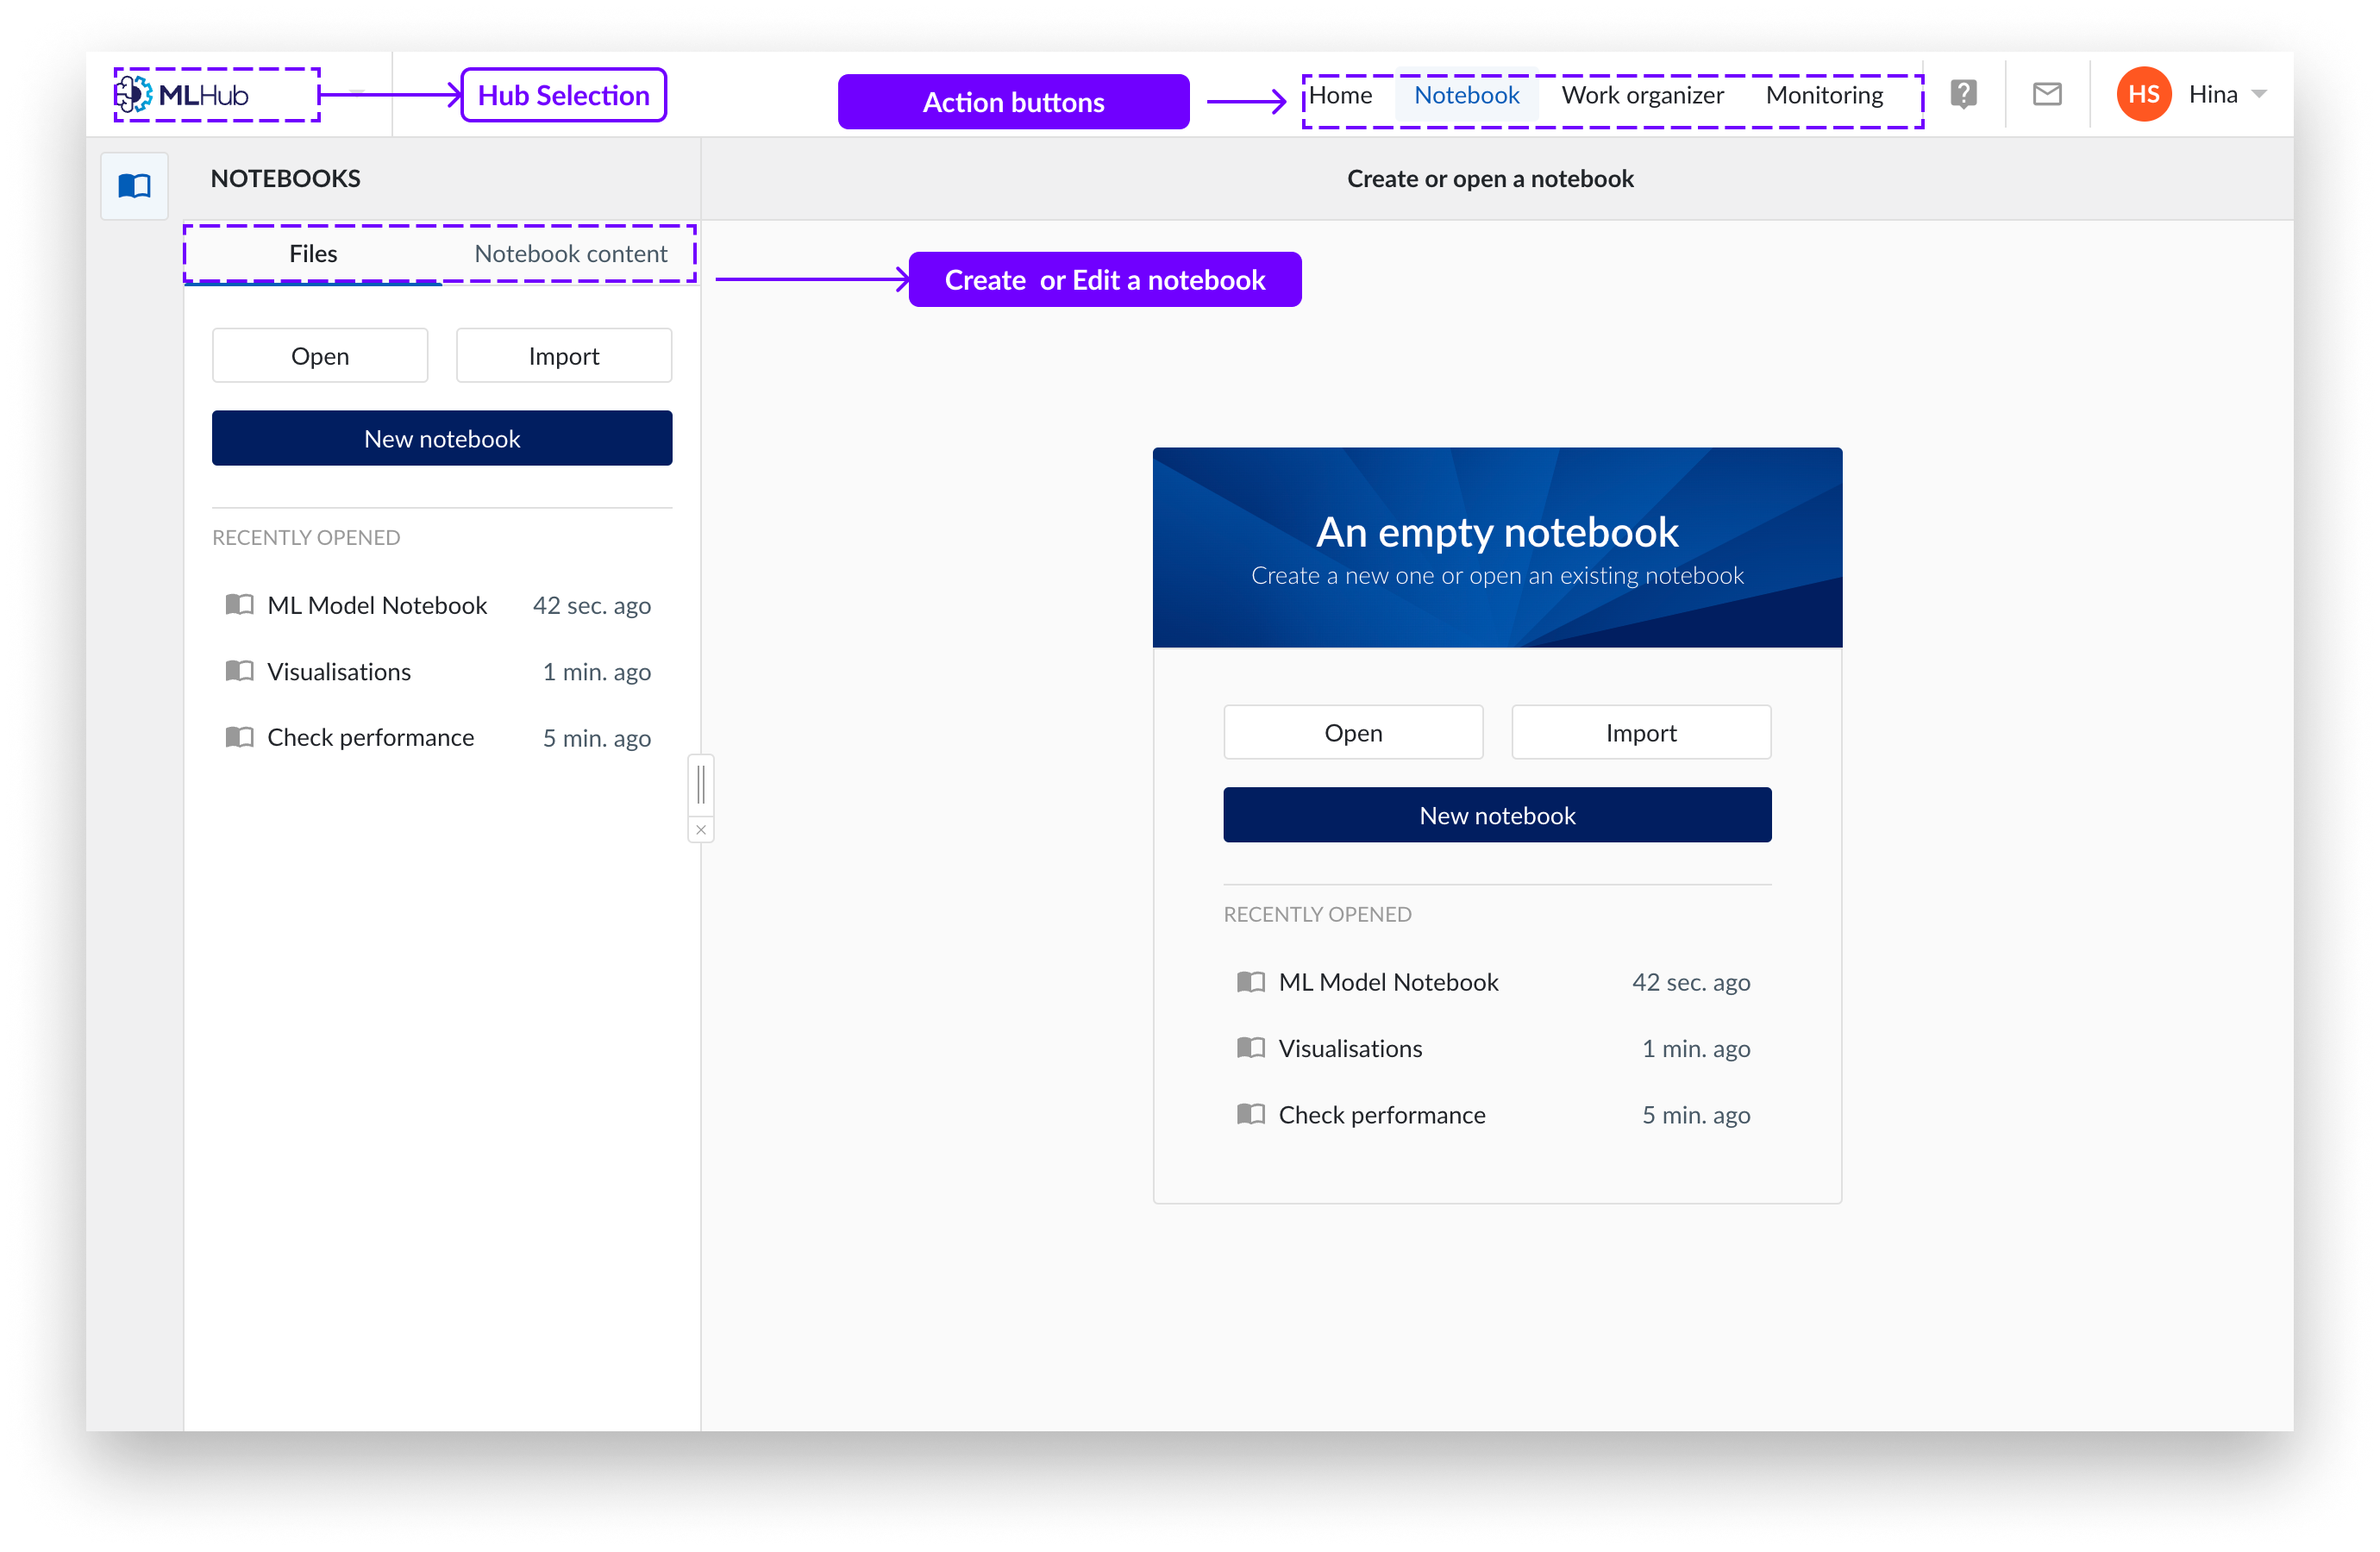
In the top left corner of the TrendMiner environment you find the Hub selection button. Here you can select the hub you want to navigate.
Click on the "MLHub" button. To close the home screen and access the “Files” or “Notebook content”, click on them. “Files” allow you to create, open or import notebooks. “Notebook content” allows you to edit notebooks.
The top bar allows you to go back to Home, Notebooks, Work Organiser and Monitoring.
TrendMiner's Notebook functionality is a platform that enables users to create and work with advanced tooling beyond the robust built-in capabilities, within the TrendMiner environment.
With embedded notebooks, you will be able to:
Load data from a TrendHub view that has been developed using the typical built-in TrendMiner capabilities (select set of interesting tags, select timeframes of interest eg. via searches, …)
Visualize and analyse your data in different ways not possible within TrendHub.
Carry out automation of analytics via scripting (e.g. repeat analysis over a large range of assets).
Create (predictive) tags using custom models (e.g. neural nets or clustering) supported by the typical notebook libraries.
You can make use of the more advanced visualization options which come built-in with the notebook. The embedded Notebook comes with its very own Notebook tile, so that you can also embed your work in a DashHub dashboard and make it available to your entire organization.
Note
Interpreter - The default interpreter of the notebooks is Python.
On the Notebook tab of MLHub, you can either create a new notebook, load or import an existing note. A new notebook will always be empty.
Click on the Files Tab of MLHub.
Click on “New notebook”.
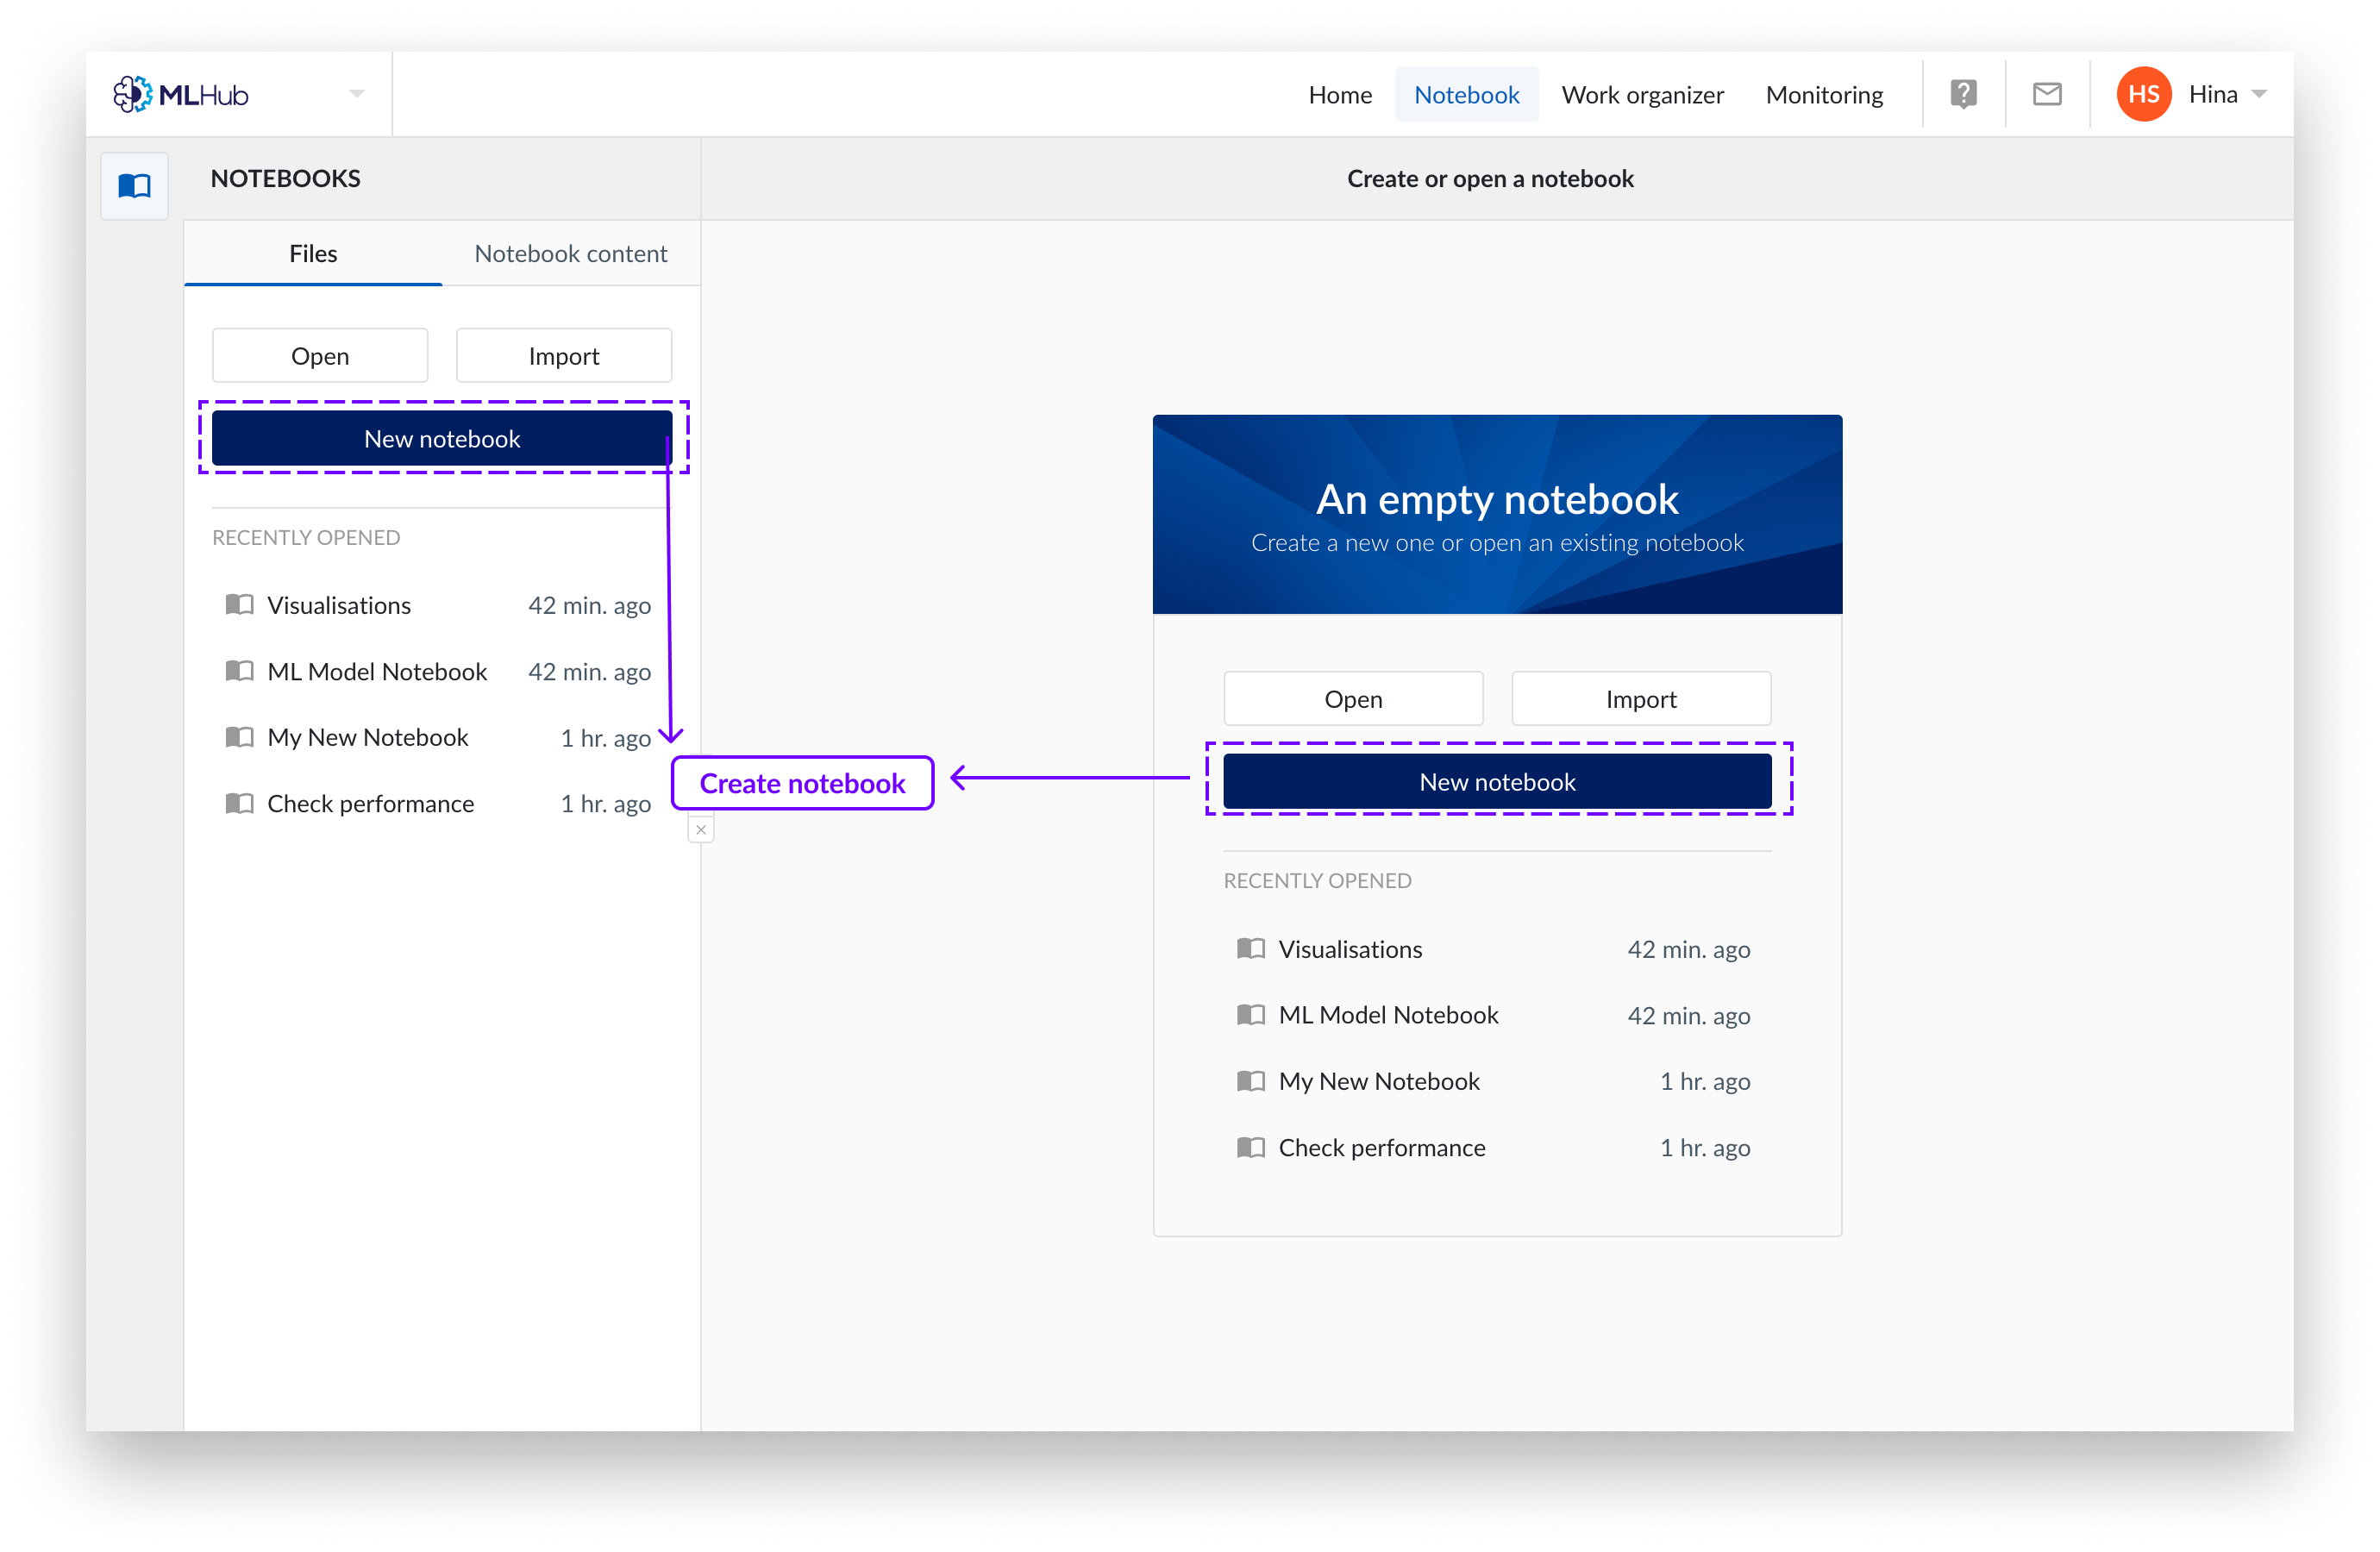
Populate the open fields and select a work organizer folder to store your new notebook.
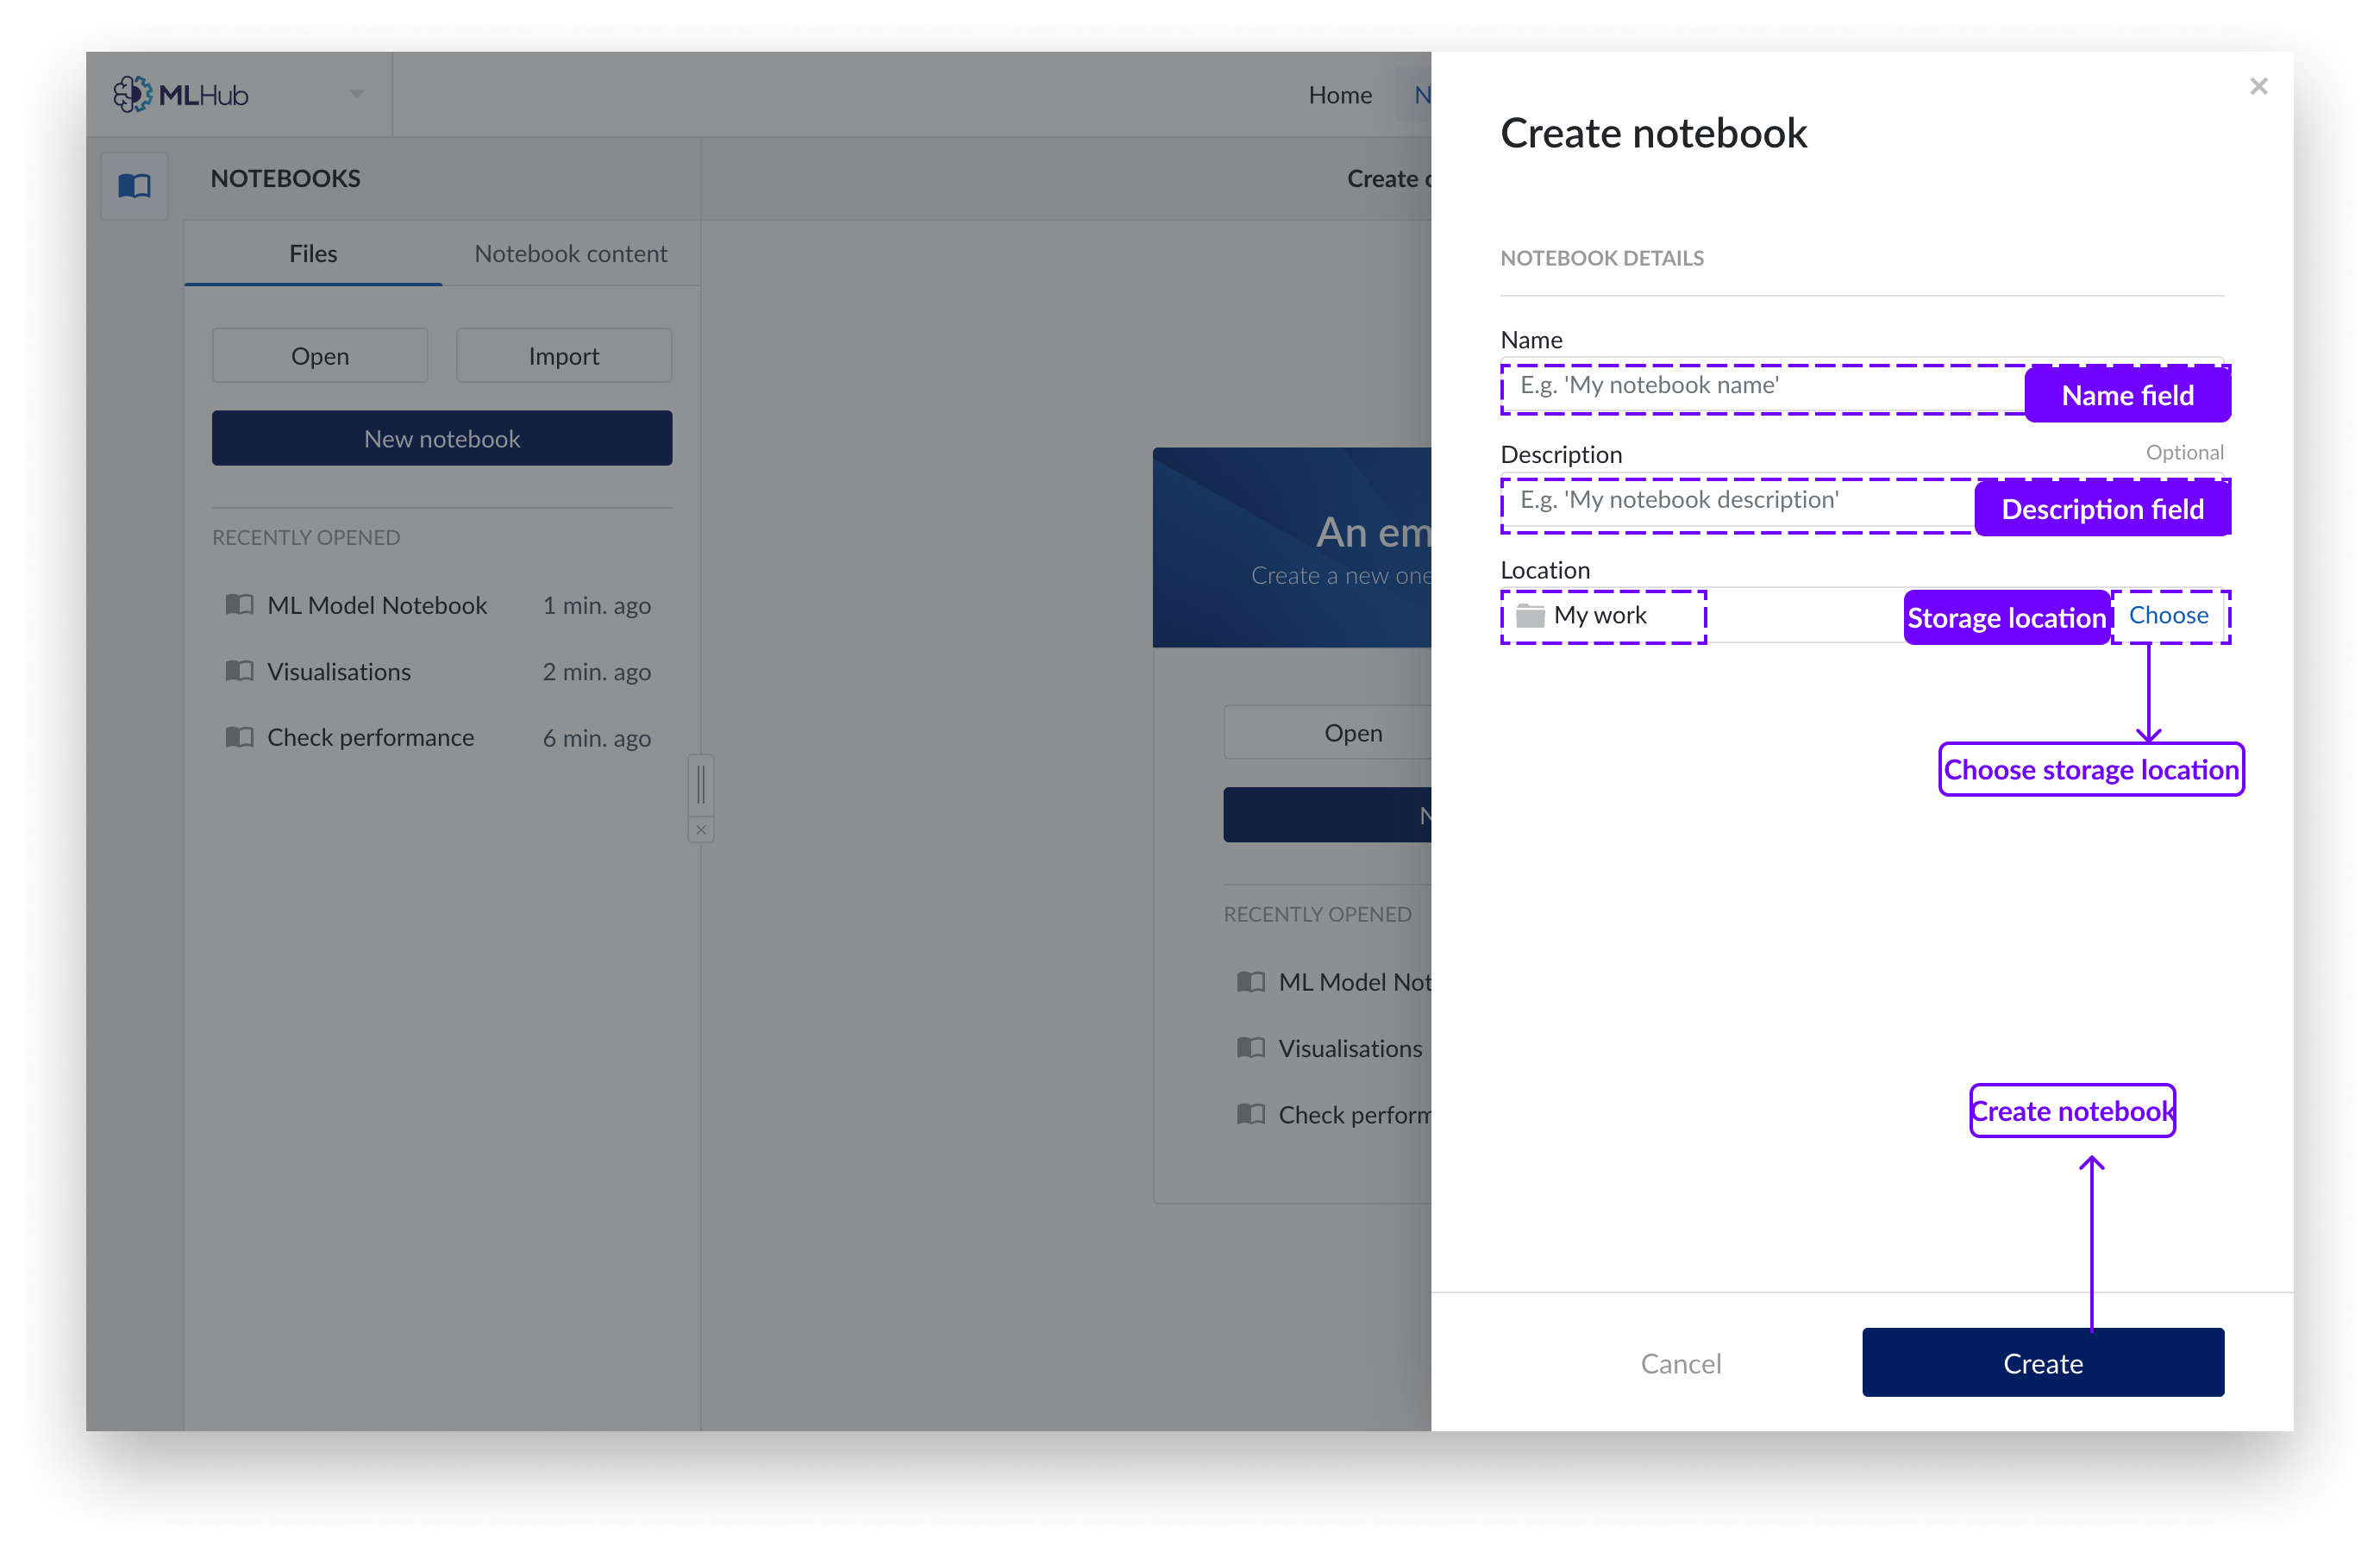
Click on the "Create" button.
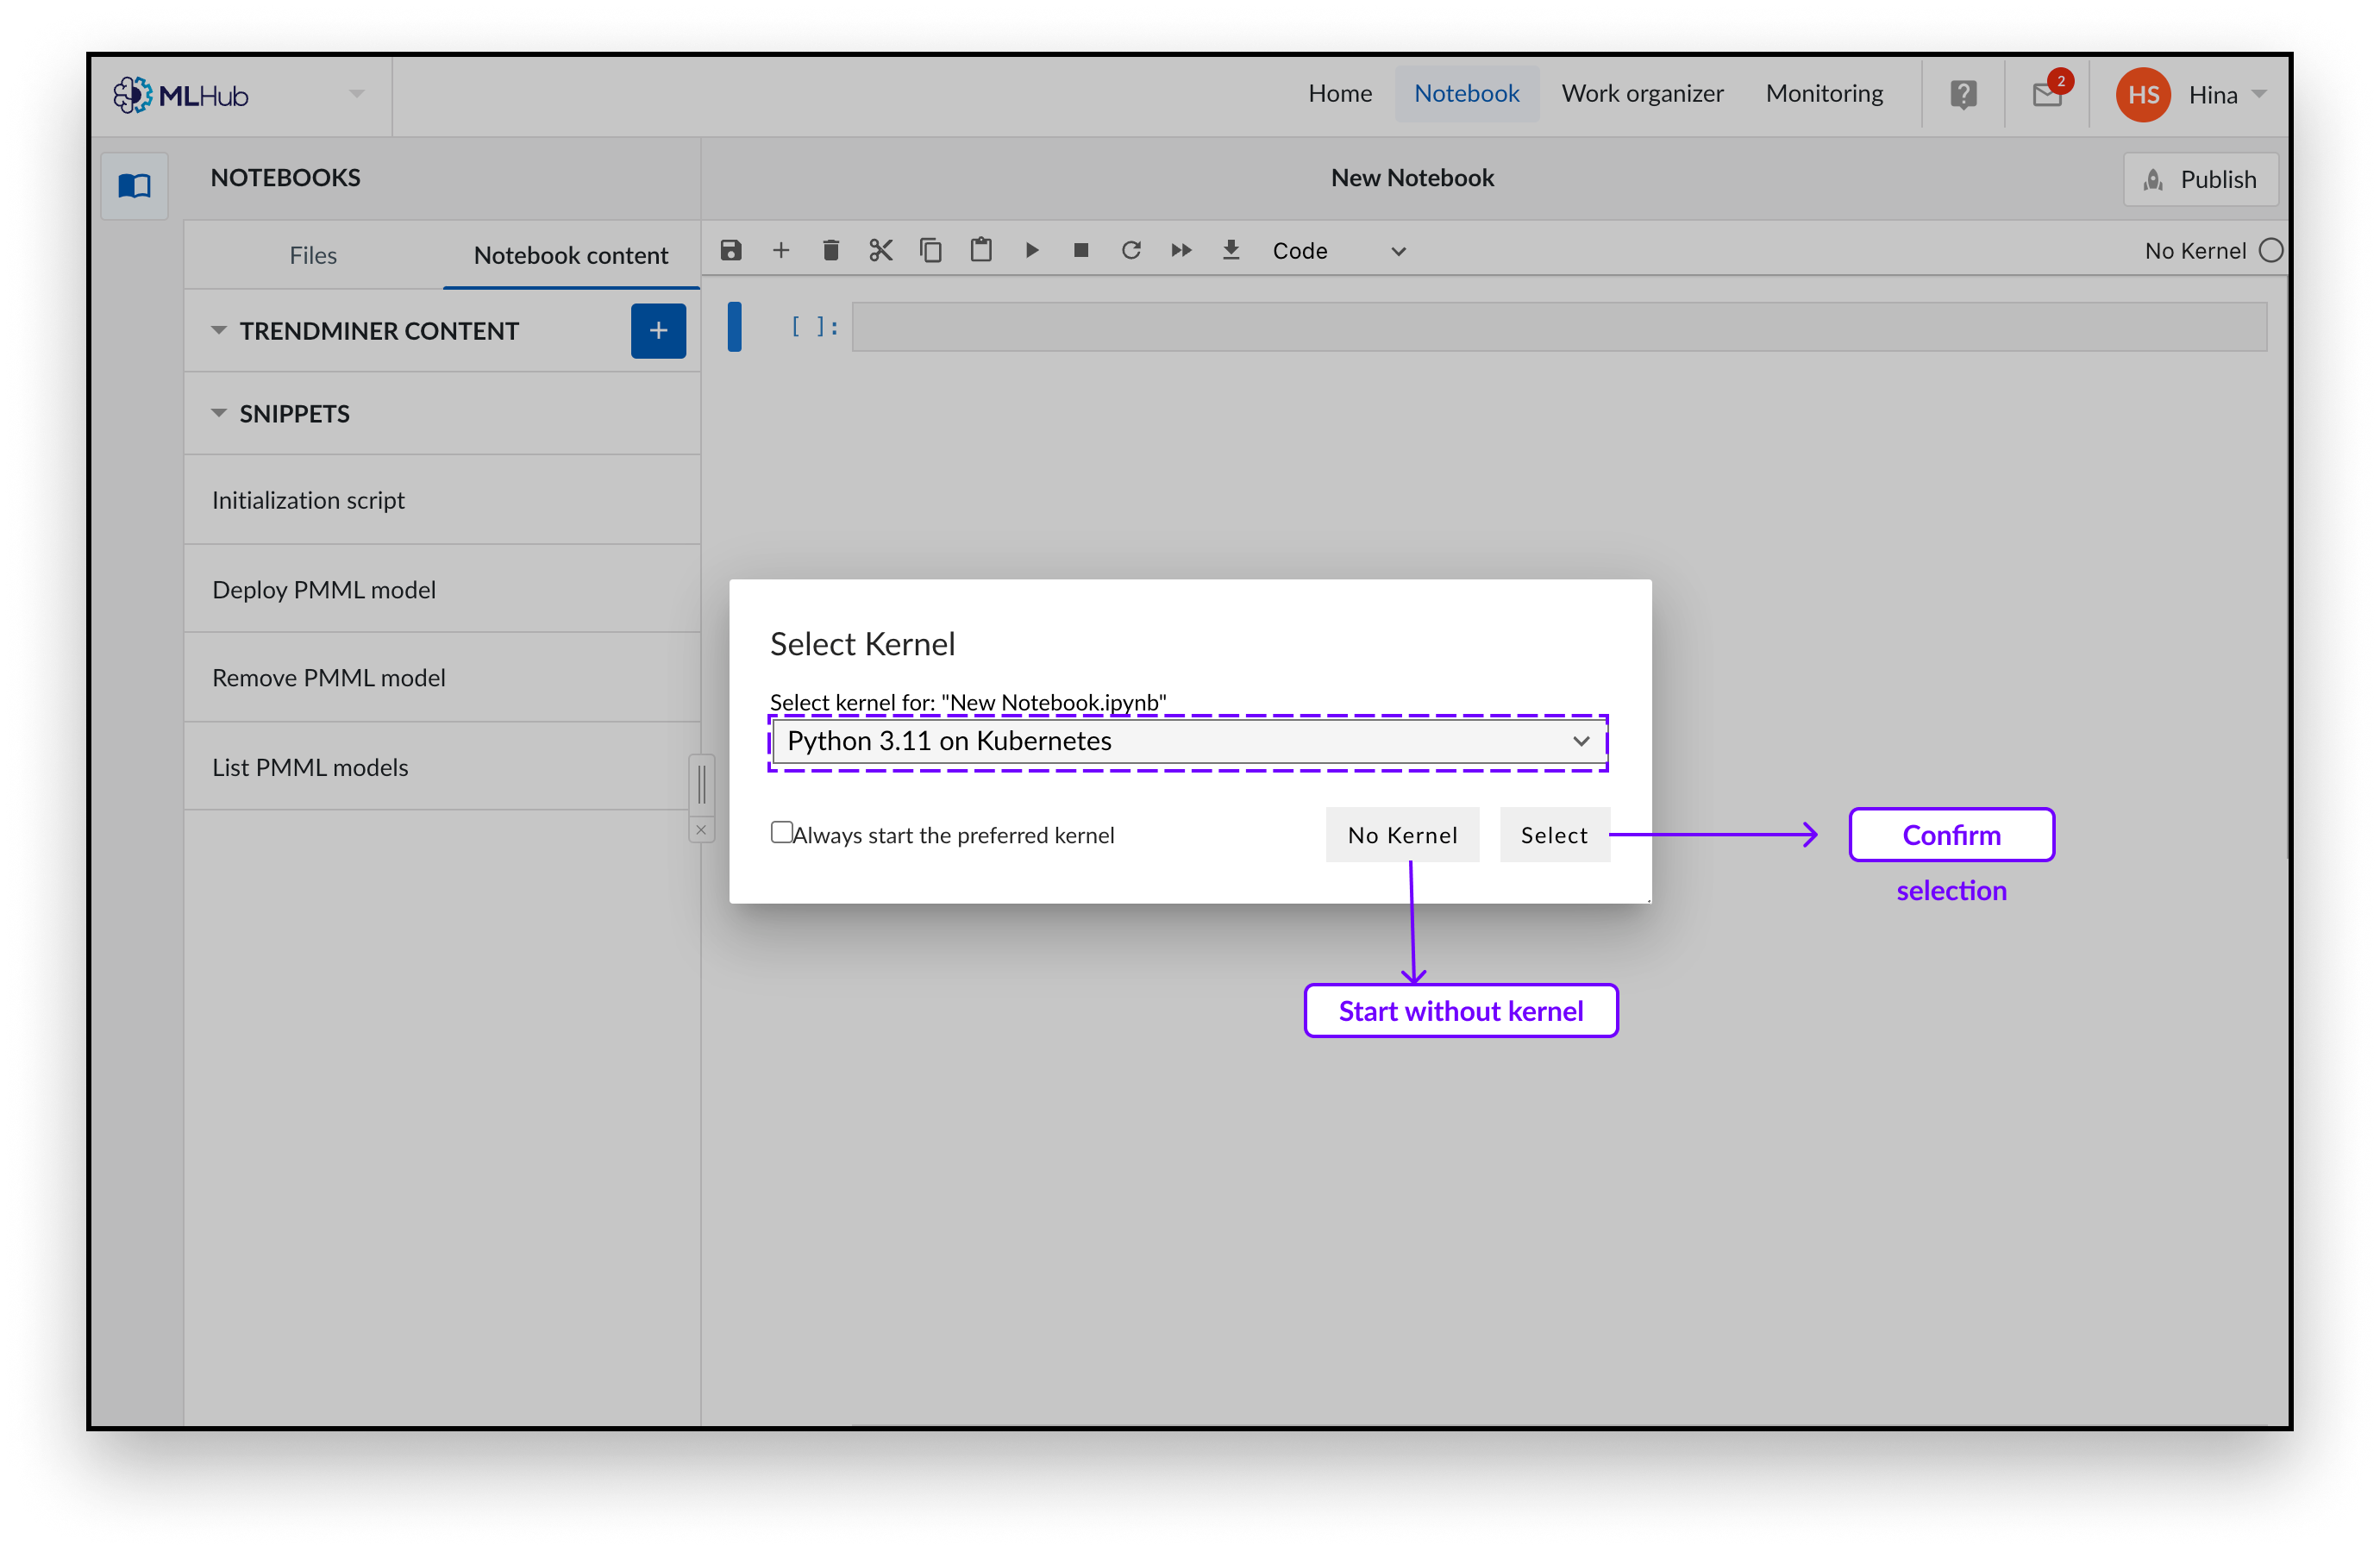
You will now enter “Notebook content” mode with code snippets in the left, side panel. These are predefined code blocks to use in your notebooks. See “code snippets” below for more details.
Choose the kernel configuration you would like to launch. We offer kernels including preinstalled visualization packages. We recommend you launch with the “Python 3.11 on Kubernetes” kernel.
Confirm your selection by clicking “Select”.
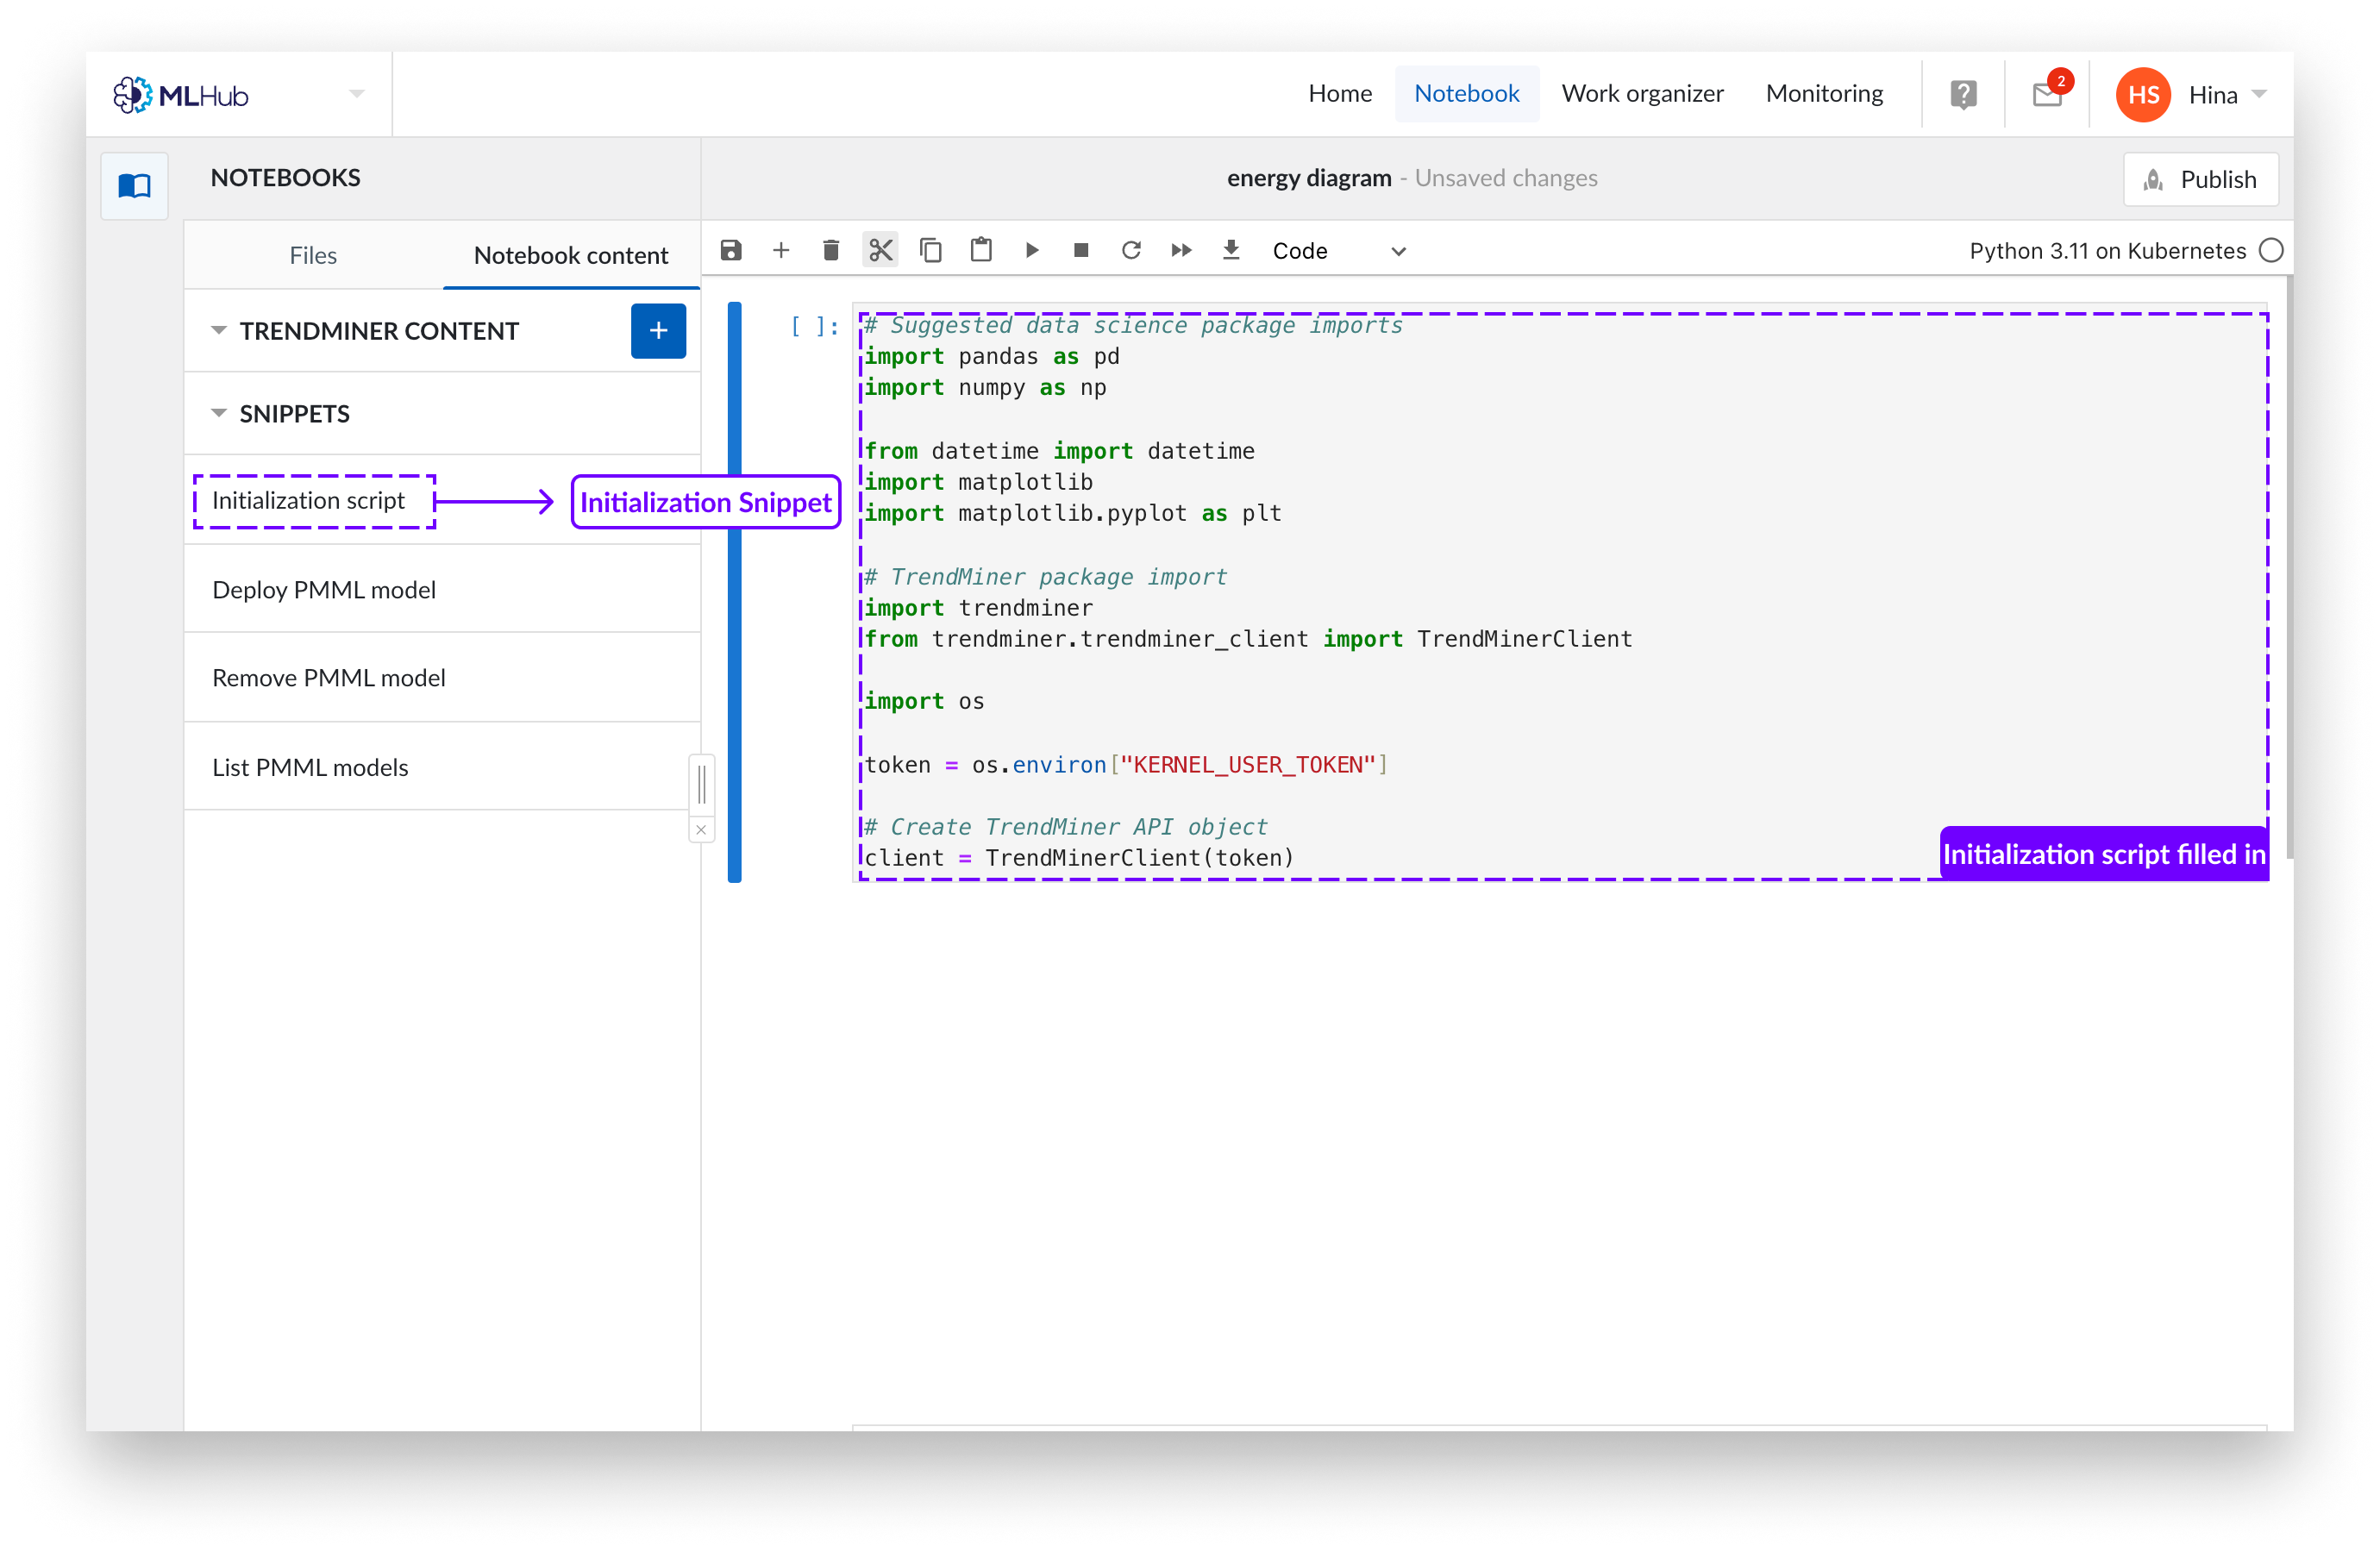
You can now write your python code in the created notebook. You may like to introduce our boiler-plate code which loads highly recommended packages, as you will need it to read in the TrendMiner content. You can add this code by clicking the snippet button “initialization script” from the snippet menu on the left.
Opening a Notebook
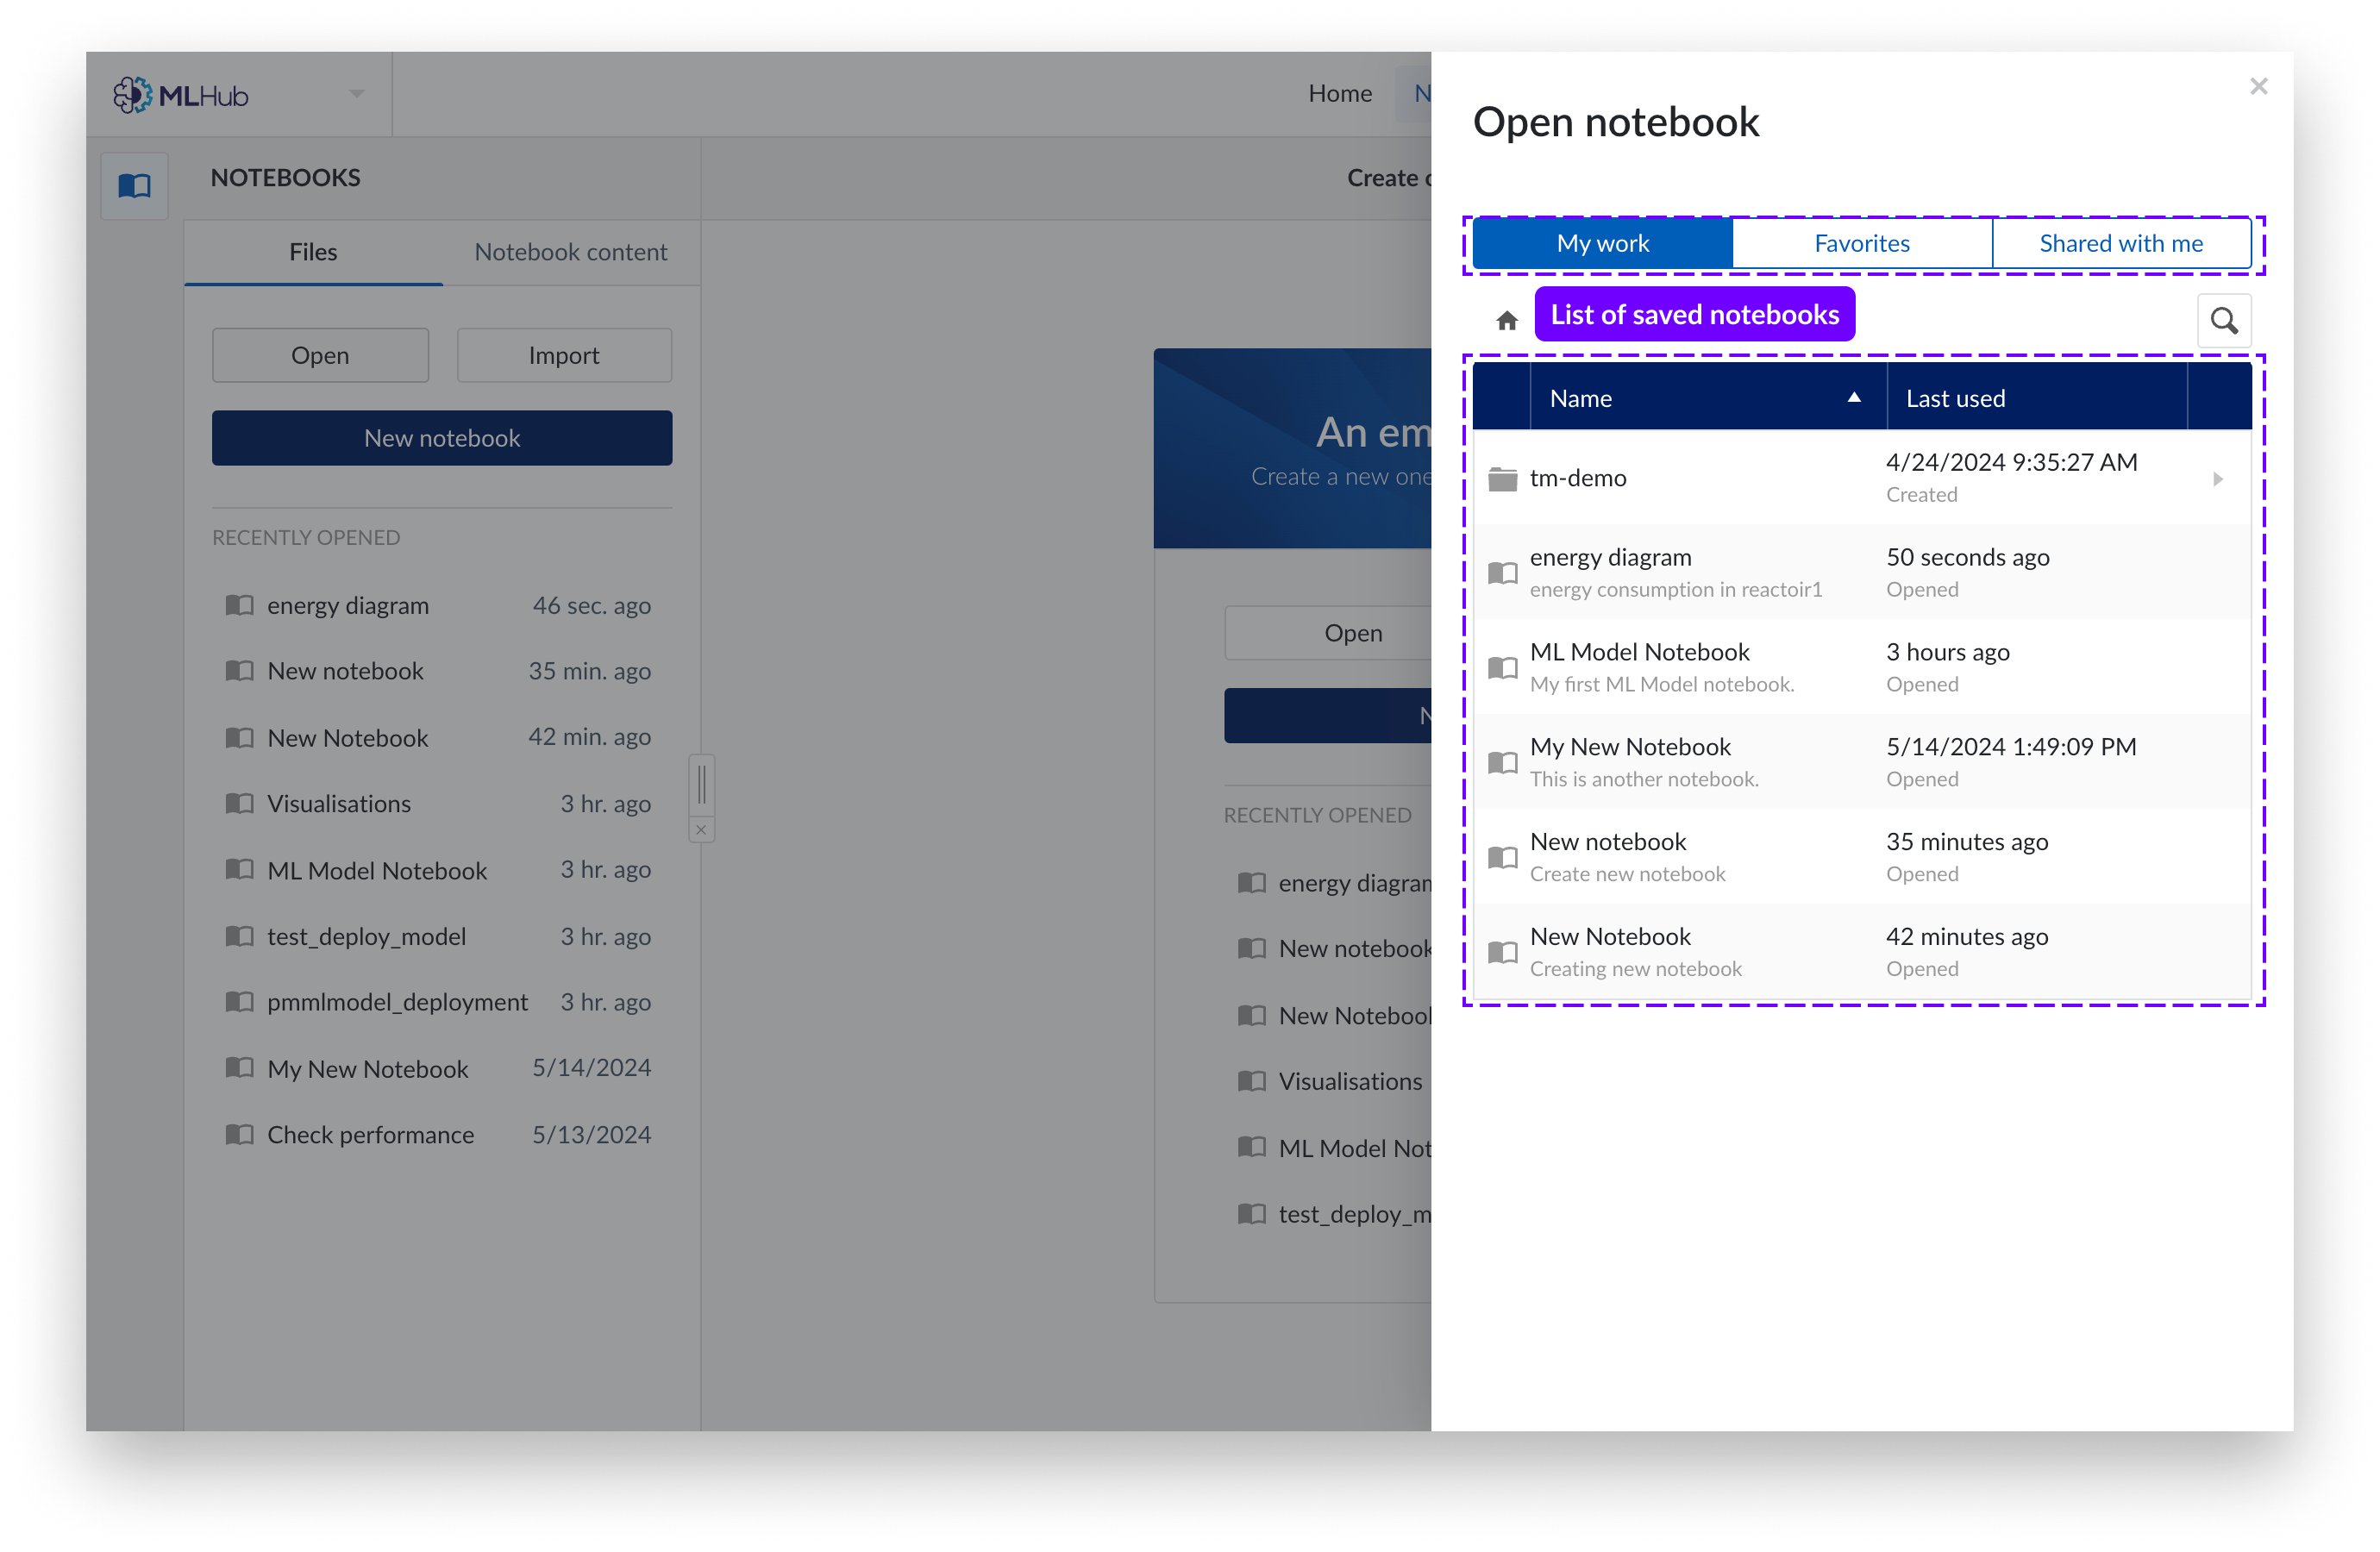
Click on the “Files” Tab of MLHub.
Click on “Open”.
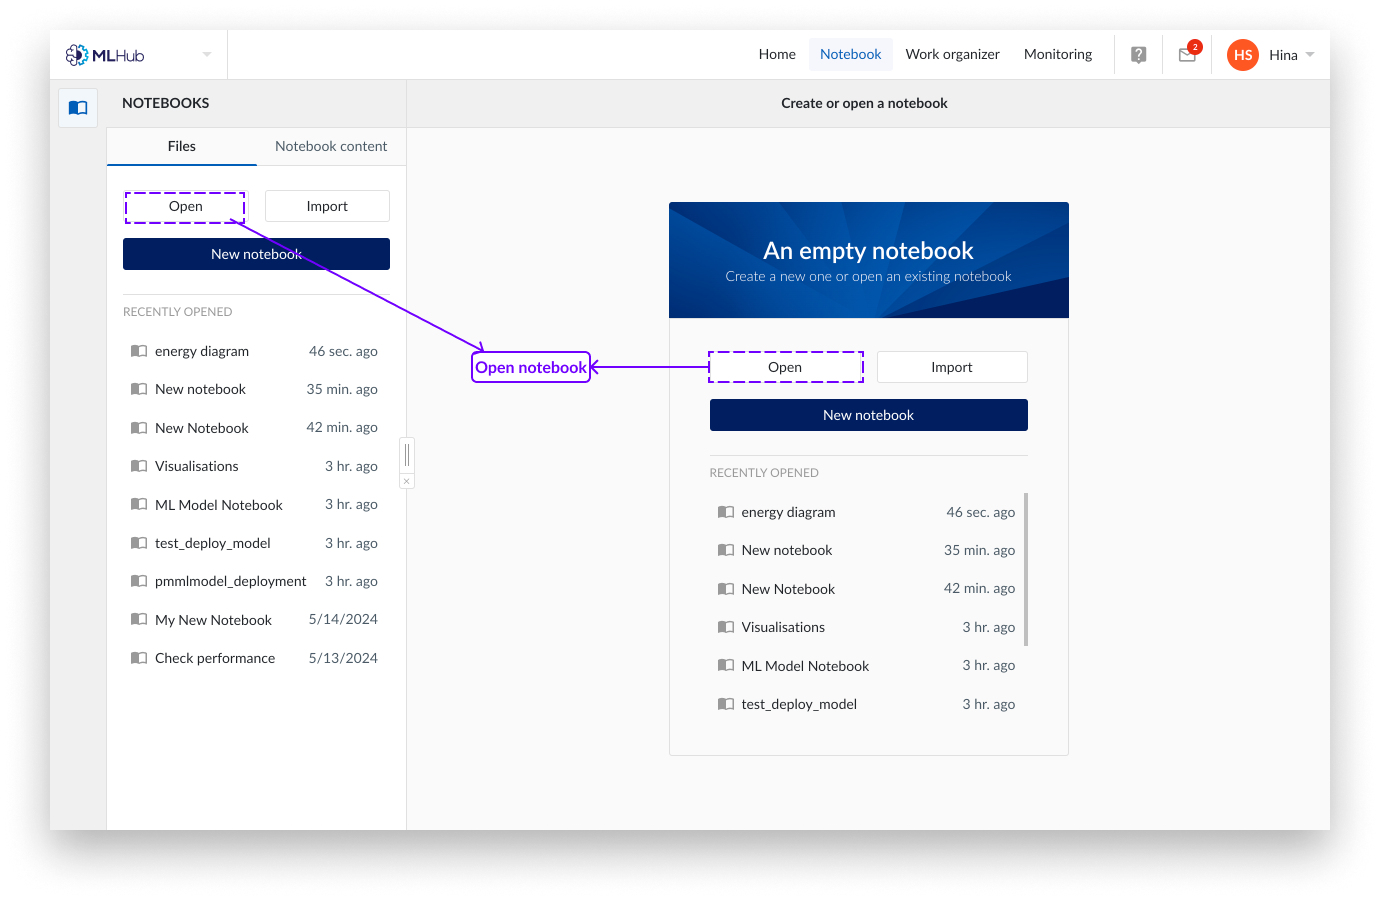
You can now view your notebooks in “My Work” or “Favorites” . Click the notebook you want to open.
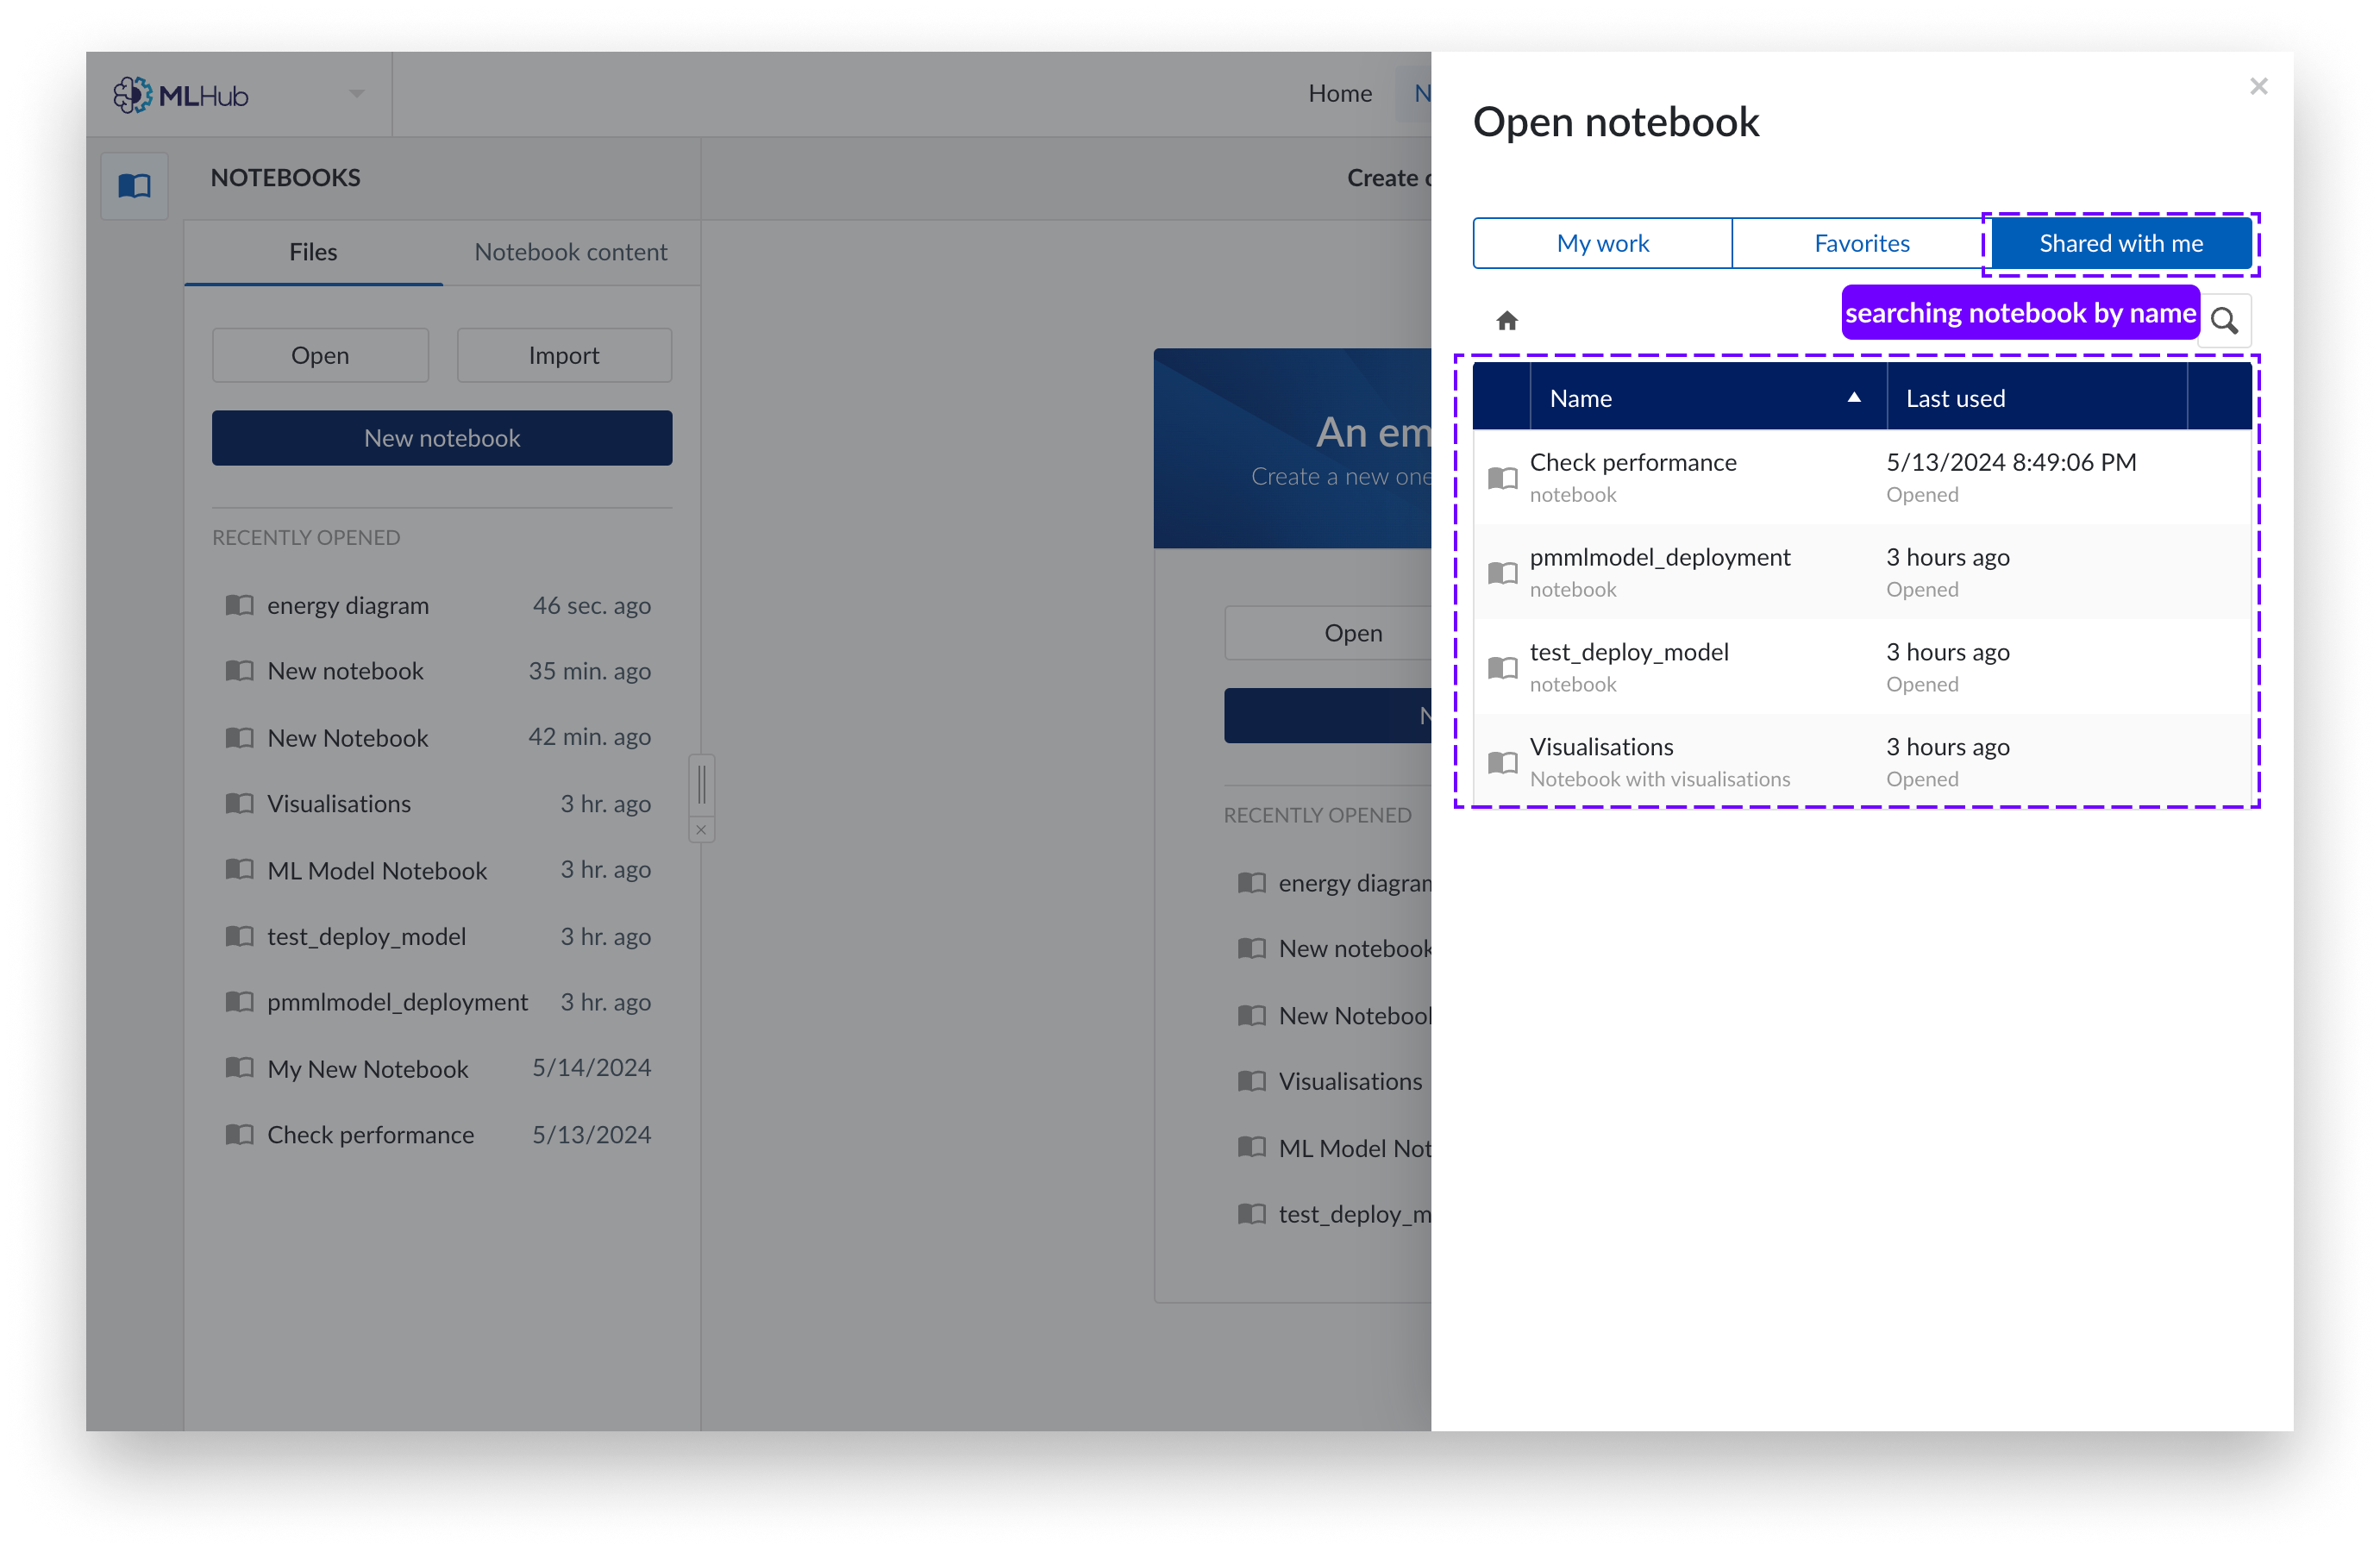
You may also access notebooks shared with you by other users in “Shared with me” .
Click on the “Files” tab of MLHub.
Click on the "Import" button.
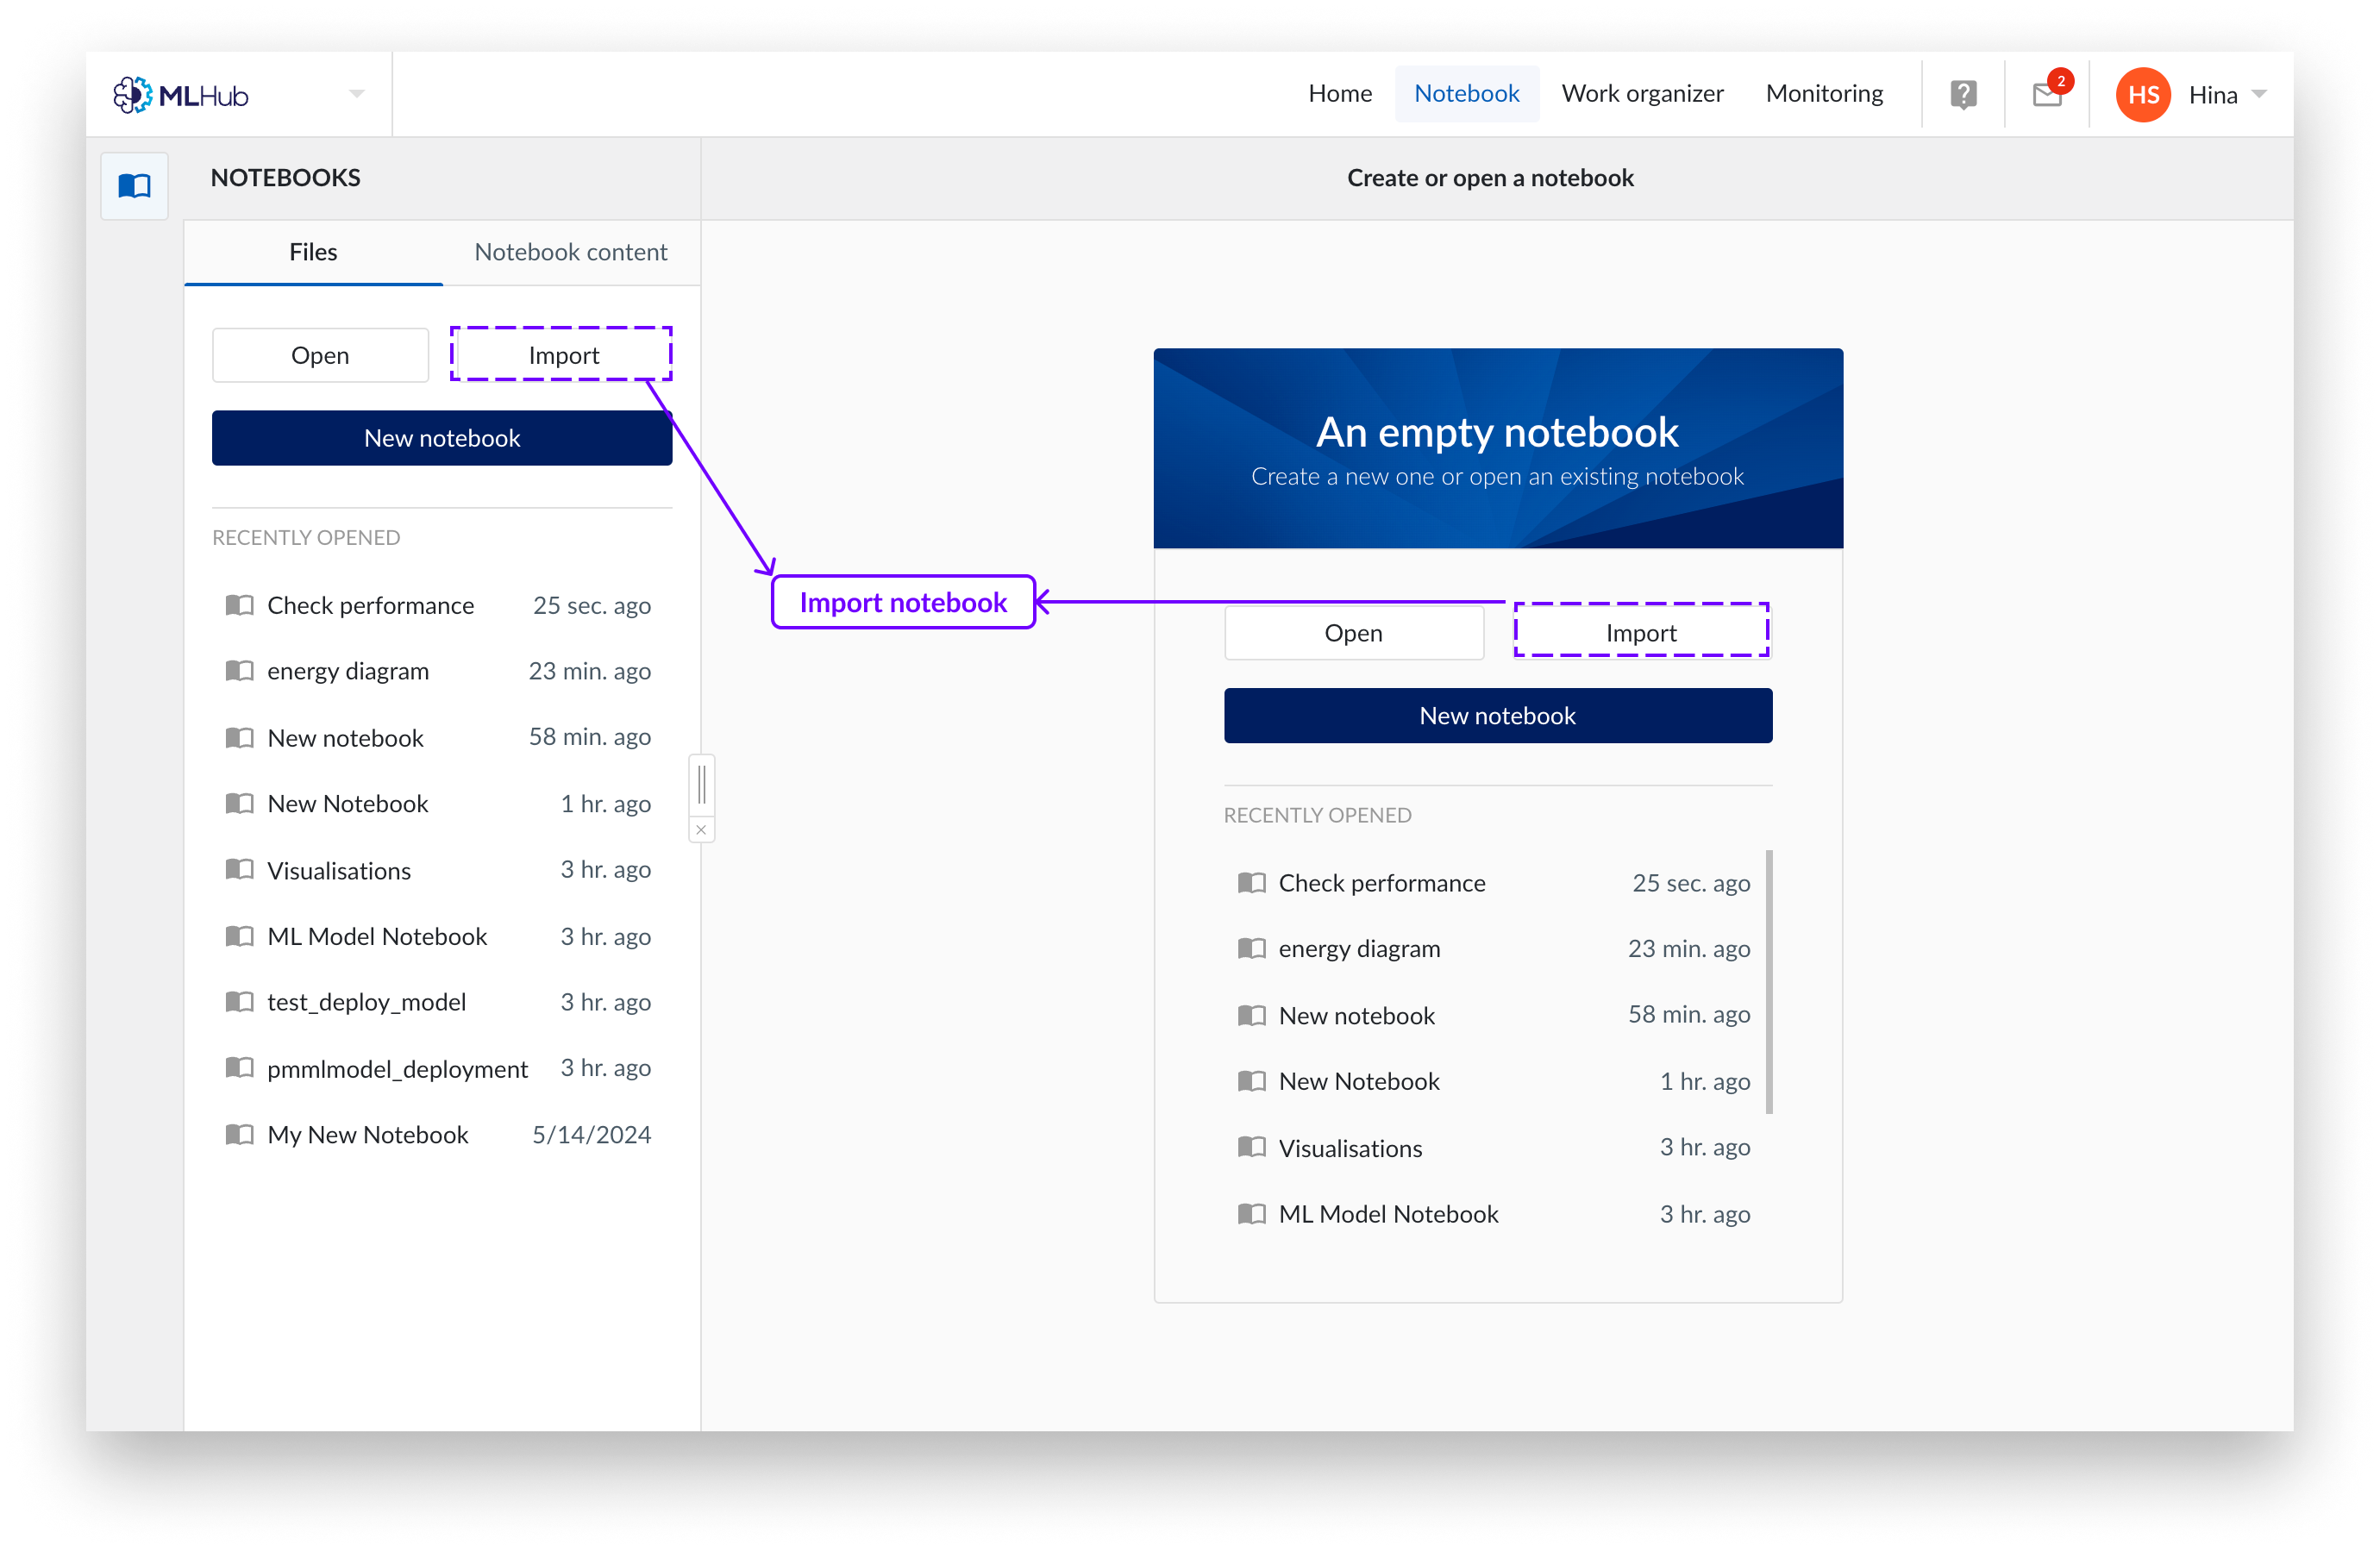
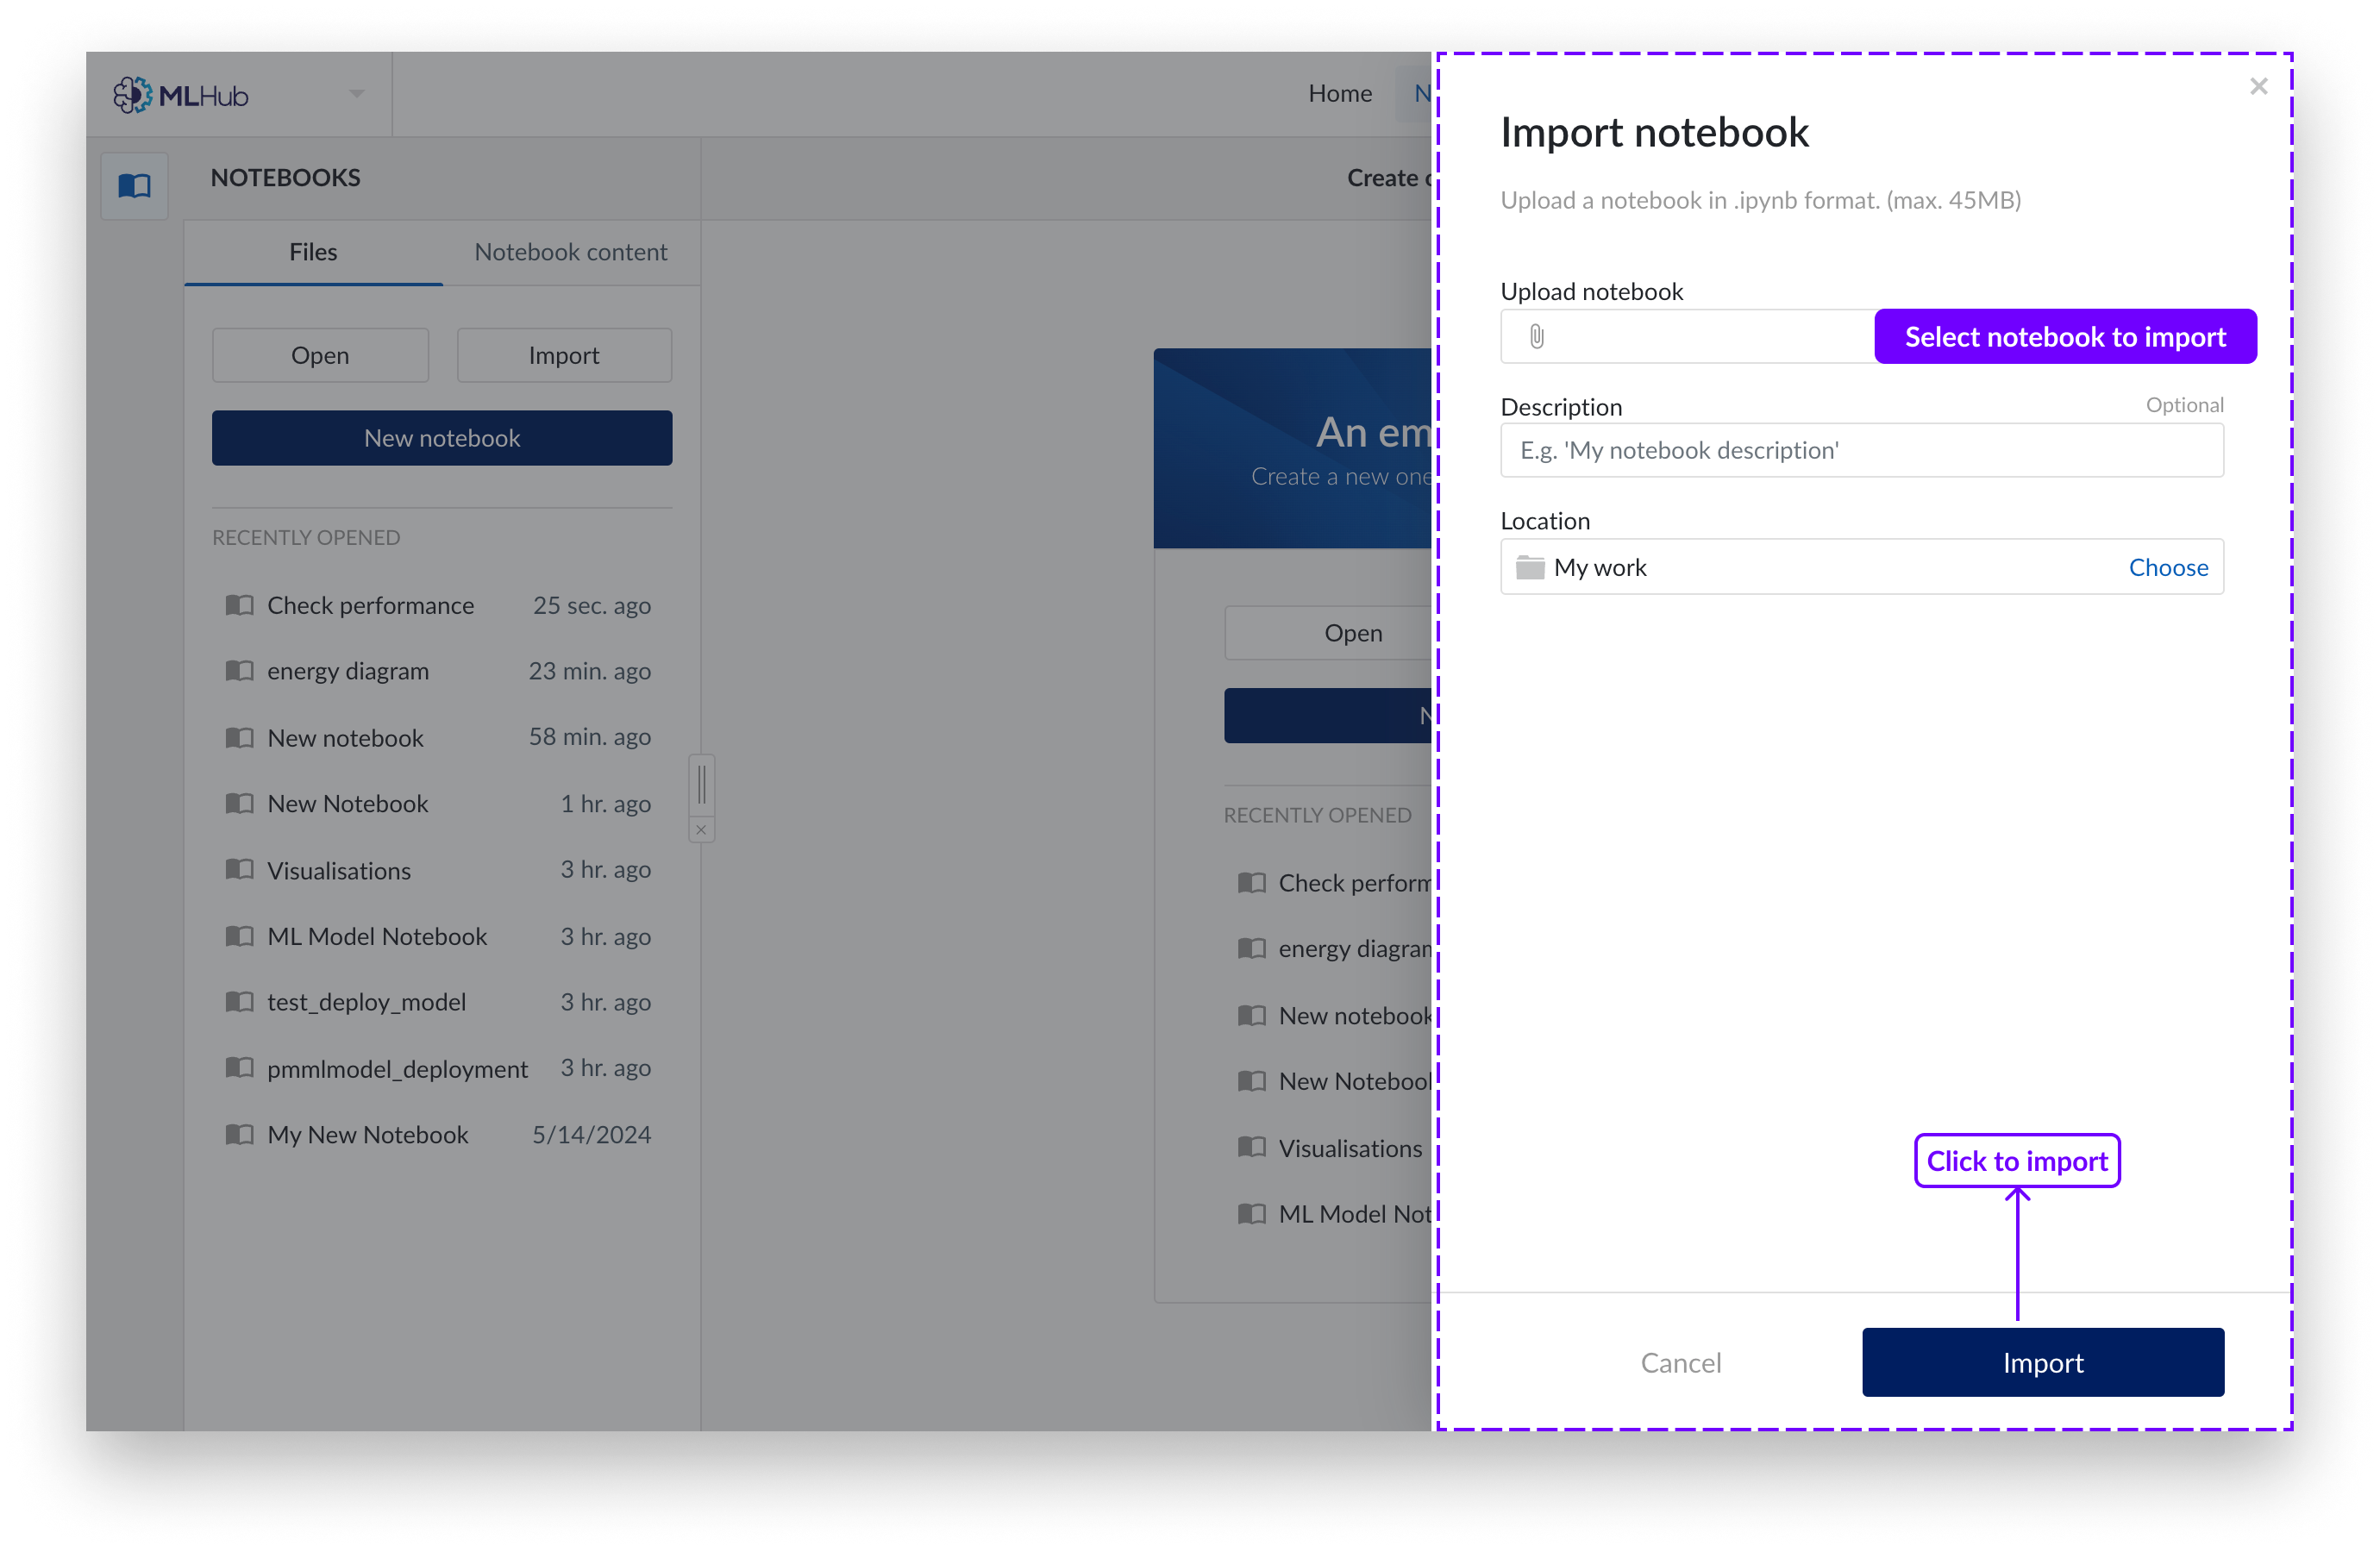
A panel appears from the right of the screen. Choose to upload a notebook with your local file browser system or choose to use the work organizer. Only Jupyter notebooks (file extension .ipynb) are supported.
Select "Import".
Note
As of version 2022.R2, only "TrendHub Views" and “ContextHub Views” are available as TrendMiner content. More content will be introduced in later versions.
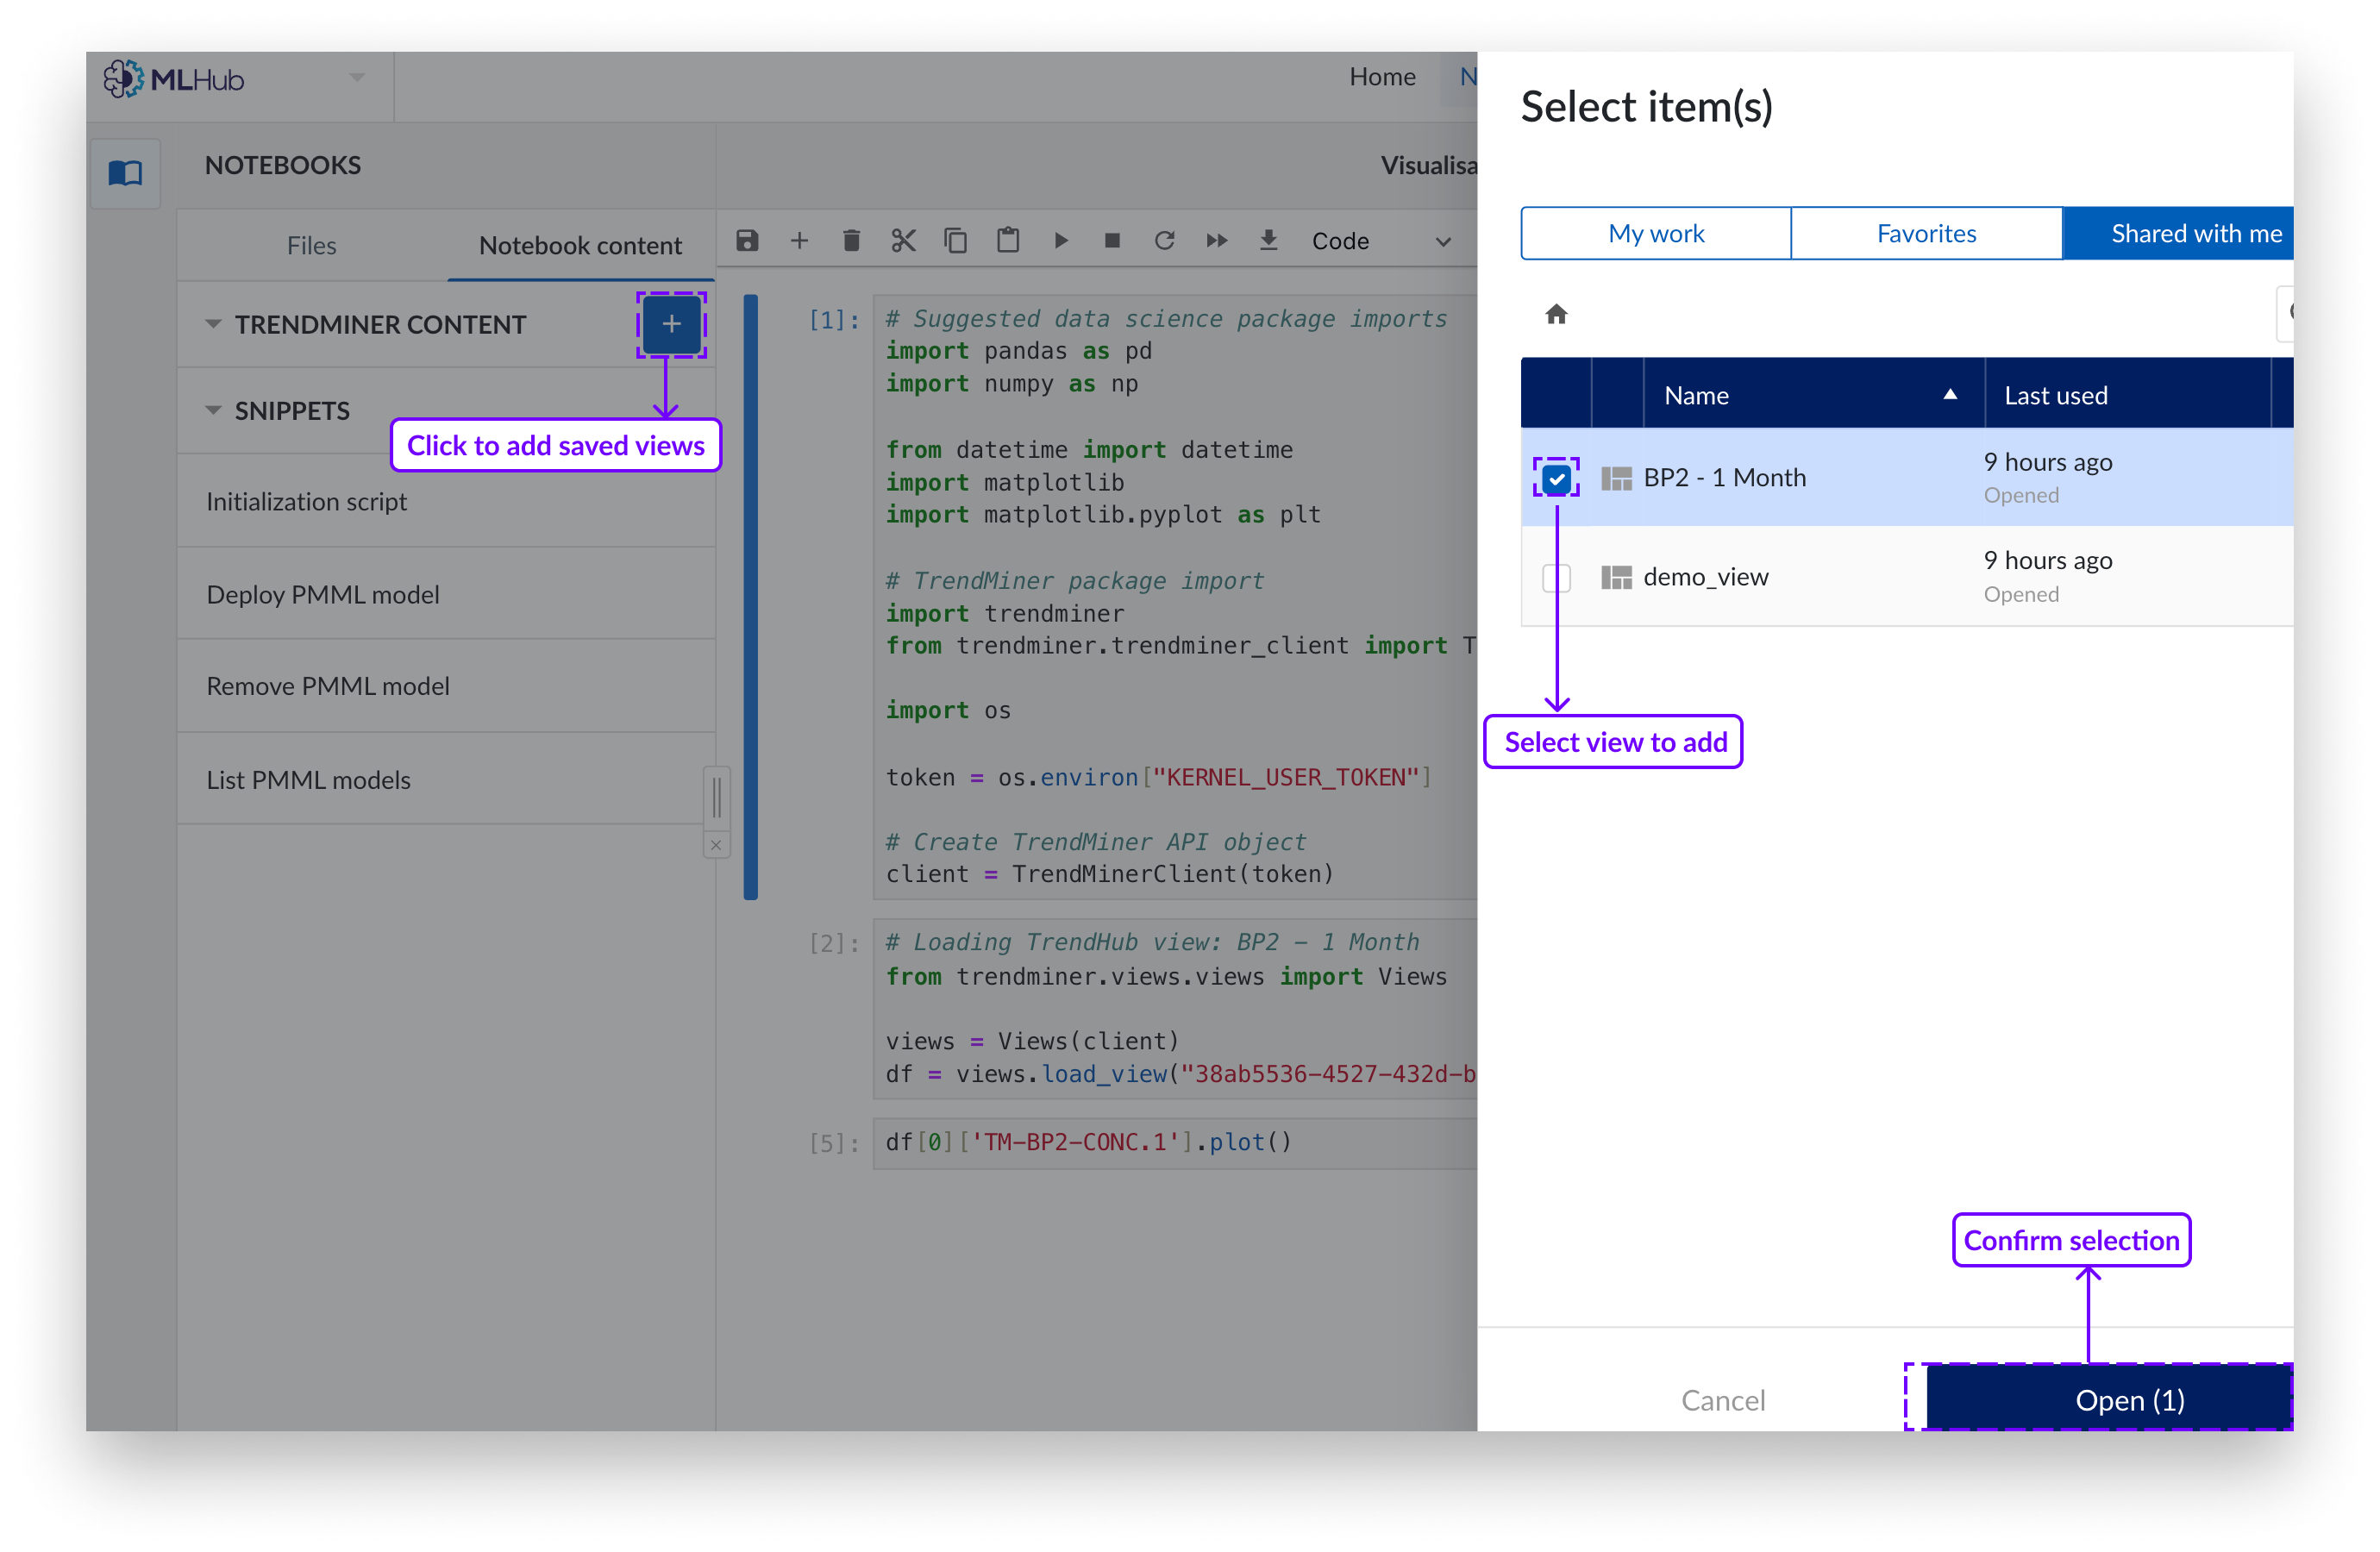
You can load TrendHub or ContextHub views, for example, of good and/or abnormal operation periods and compare them using advanced analytics, add them to your TRENDMINER CONTENT list.
Click on the blue “+" button. A side panel will appear from the right.
Select the saved view item(s) you wish to add as a dataset.
Click "Load".
Items in the content menu list can be either opened or deleted. To delete click on the "x in the menu located on the right of the item to be deleted.
Click on the new content to open. This will add the relevant python-code into a new cell at the end of the Notebook.
More information can be obtained by running the following command in the notebook:
help(trendminer.dataframes.data_frames)
load_view( ): Loads the time series data of a saved TrendHub view into a list of Pandas DataFrames.
One DataFrame is returned per layer in the view.
Each DataFrame can have a different set of tags available.
The optional parameters [layer_ids] allows you to only load a specified list of layers (identified by the layer ids, as provided by the view_info function).
view_info( ): Collect information about a view based on its ID. This info can be used to fetch data from a view: it lists all the layers that are included in the view. When fetching data from the view you can select layers to be included in the data.
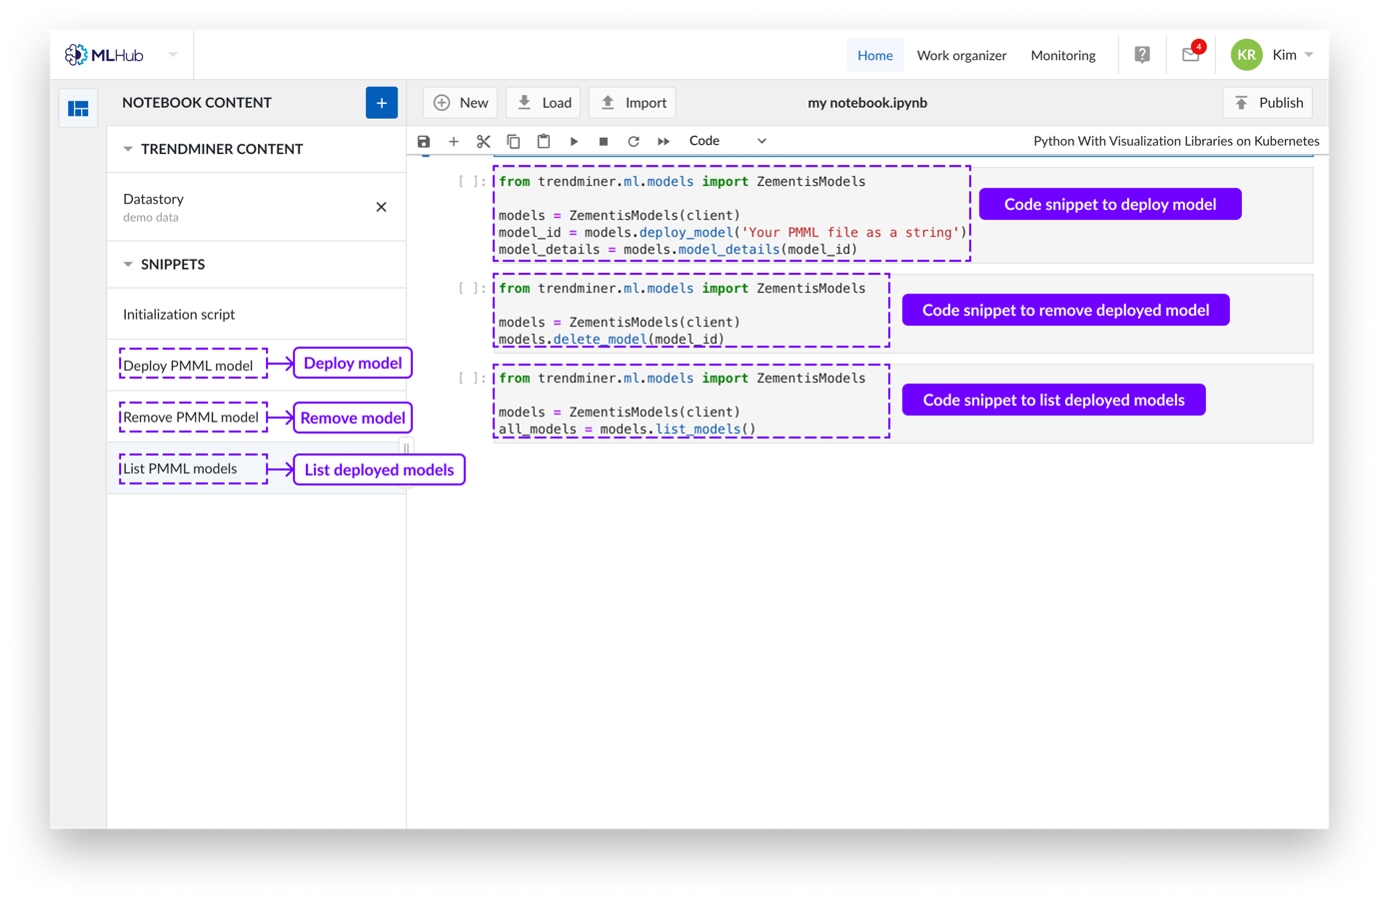
Snippets
Currently snippets are applicable in python kernels to deploy machine learning models.
If you have a notebook output cell with an interesting result or visualization you want to share, you can publish it into a notebook pipeline object.
Steps:
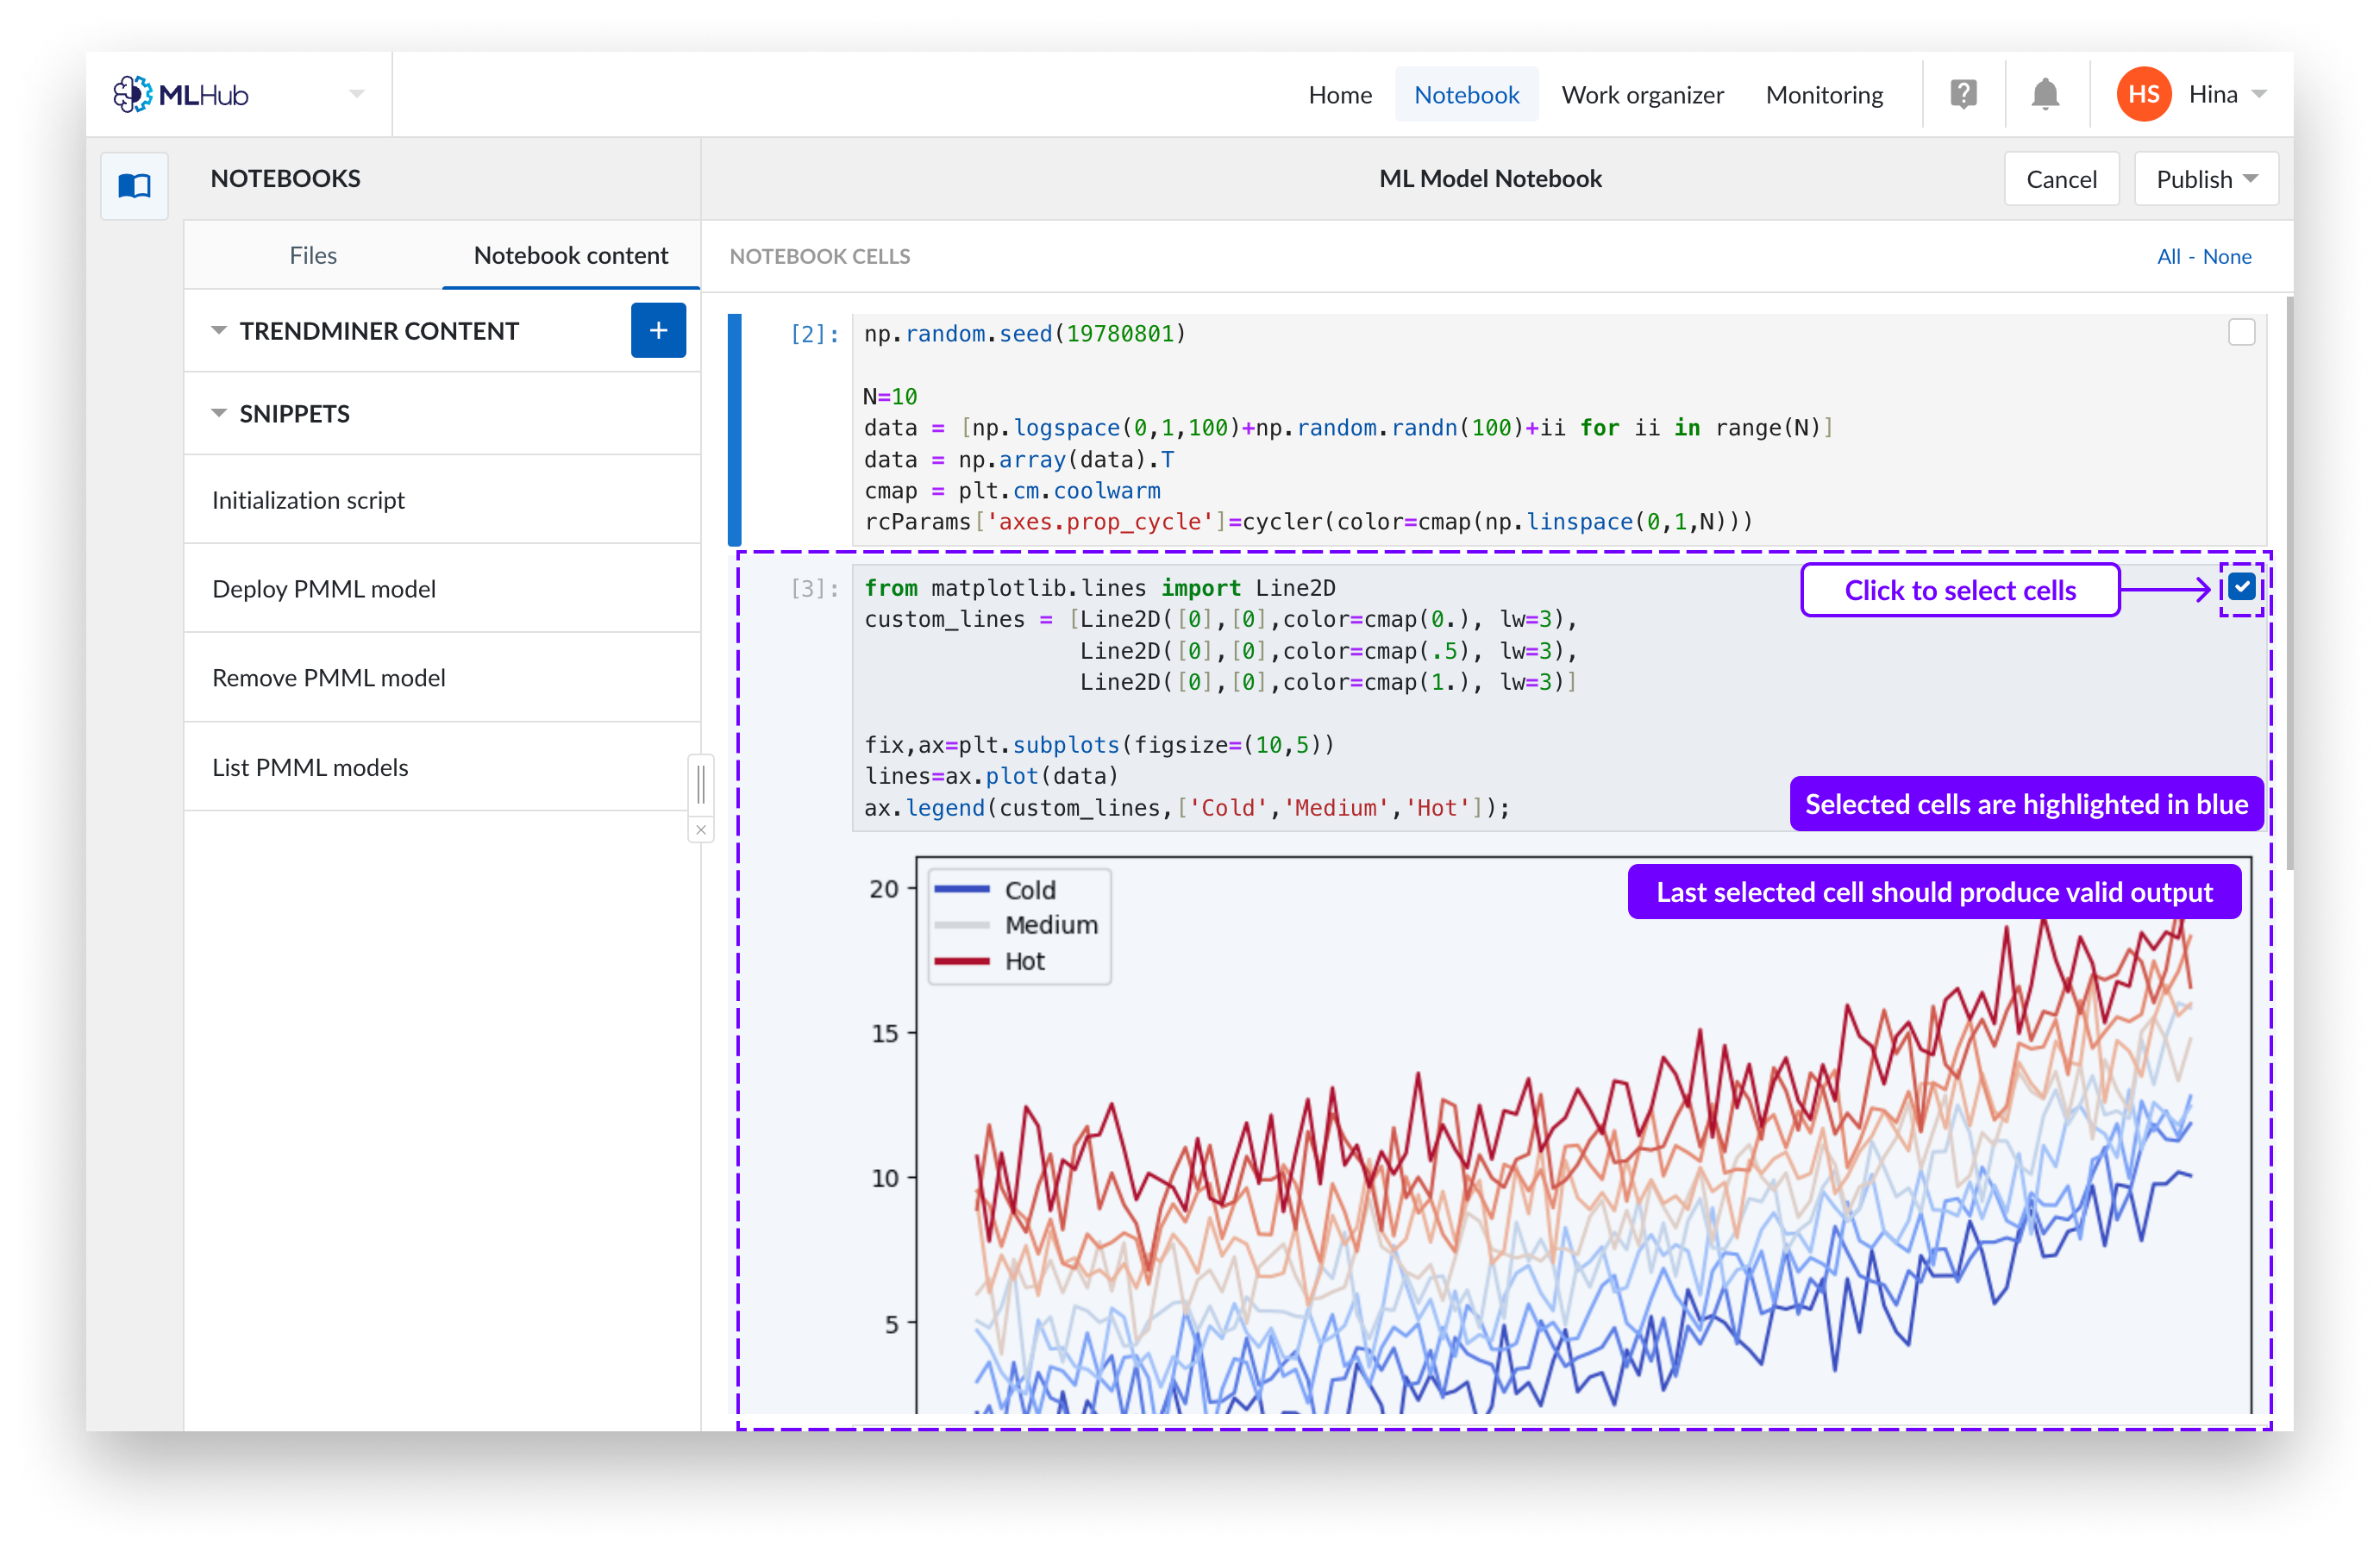
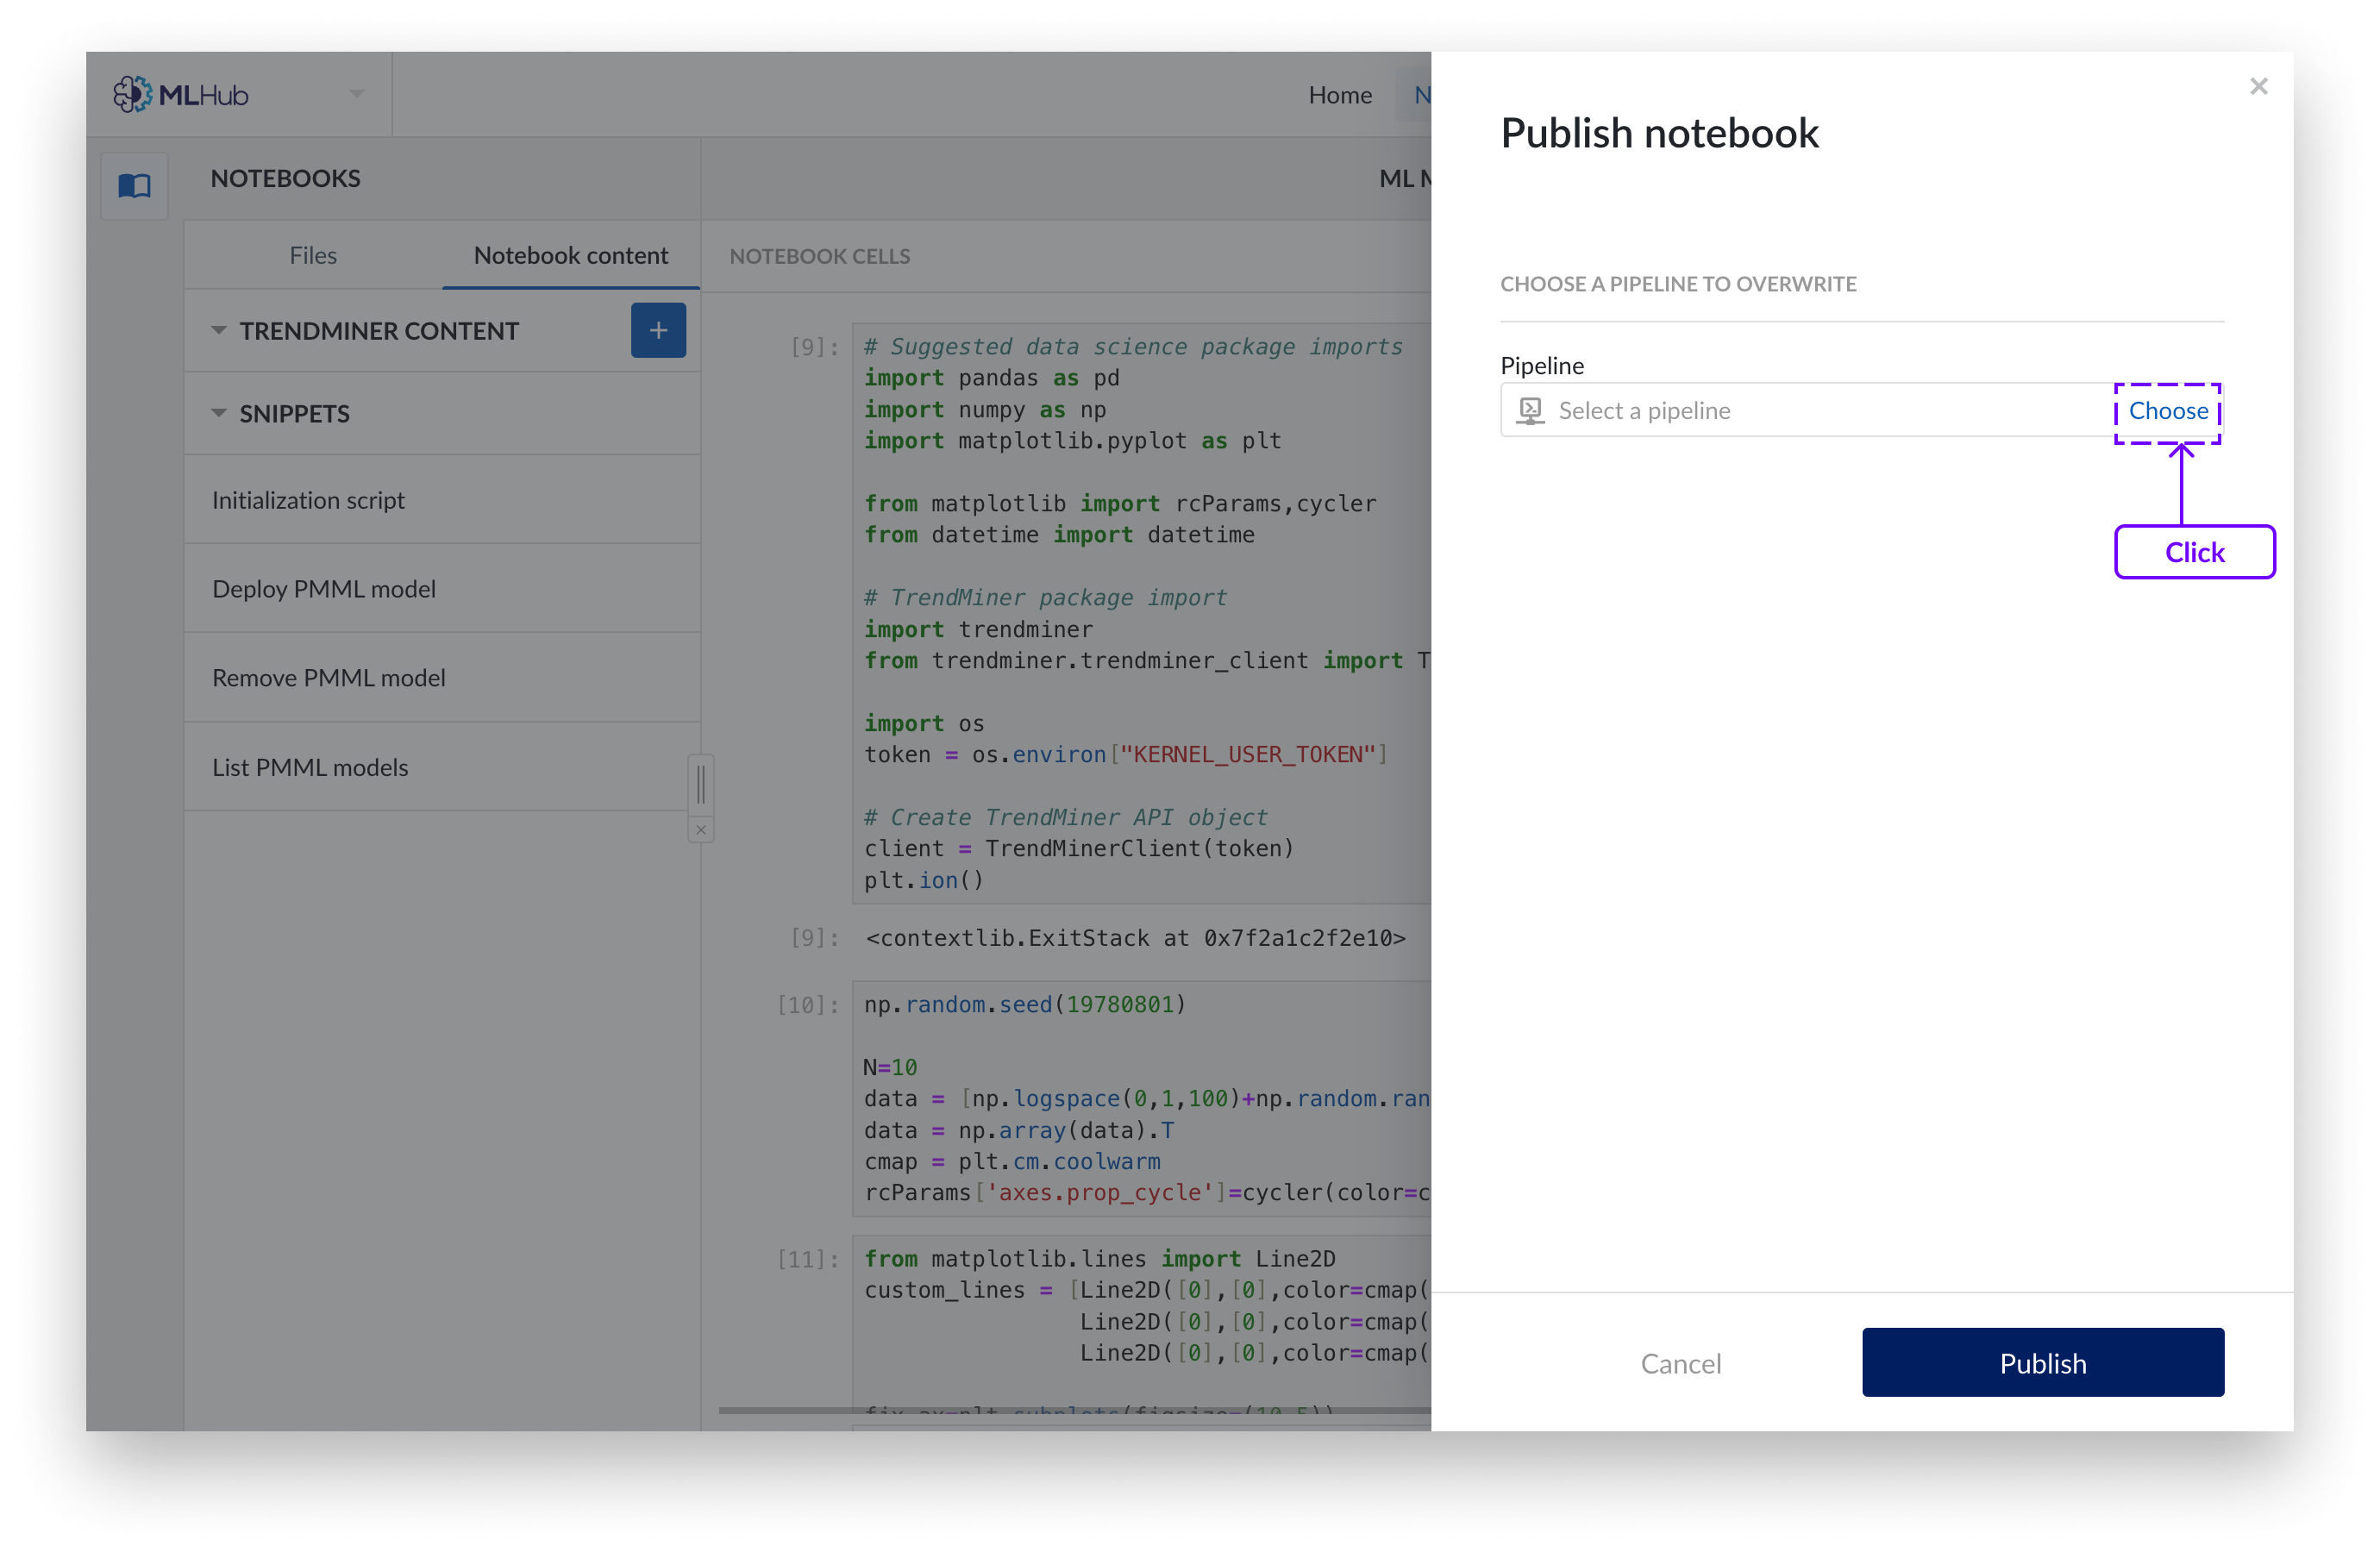
Click the ‘Publish’ button in the top right corner.

Select ALL cells that are relevant for the output you want to publish, including ‘import’ statements and variable declarations. Make sure the last selected cell produces valid output. You can select a cell by clicking anywhere on it, or use the checkboxes in the top right corners.
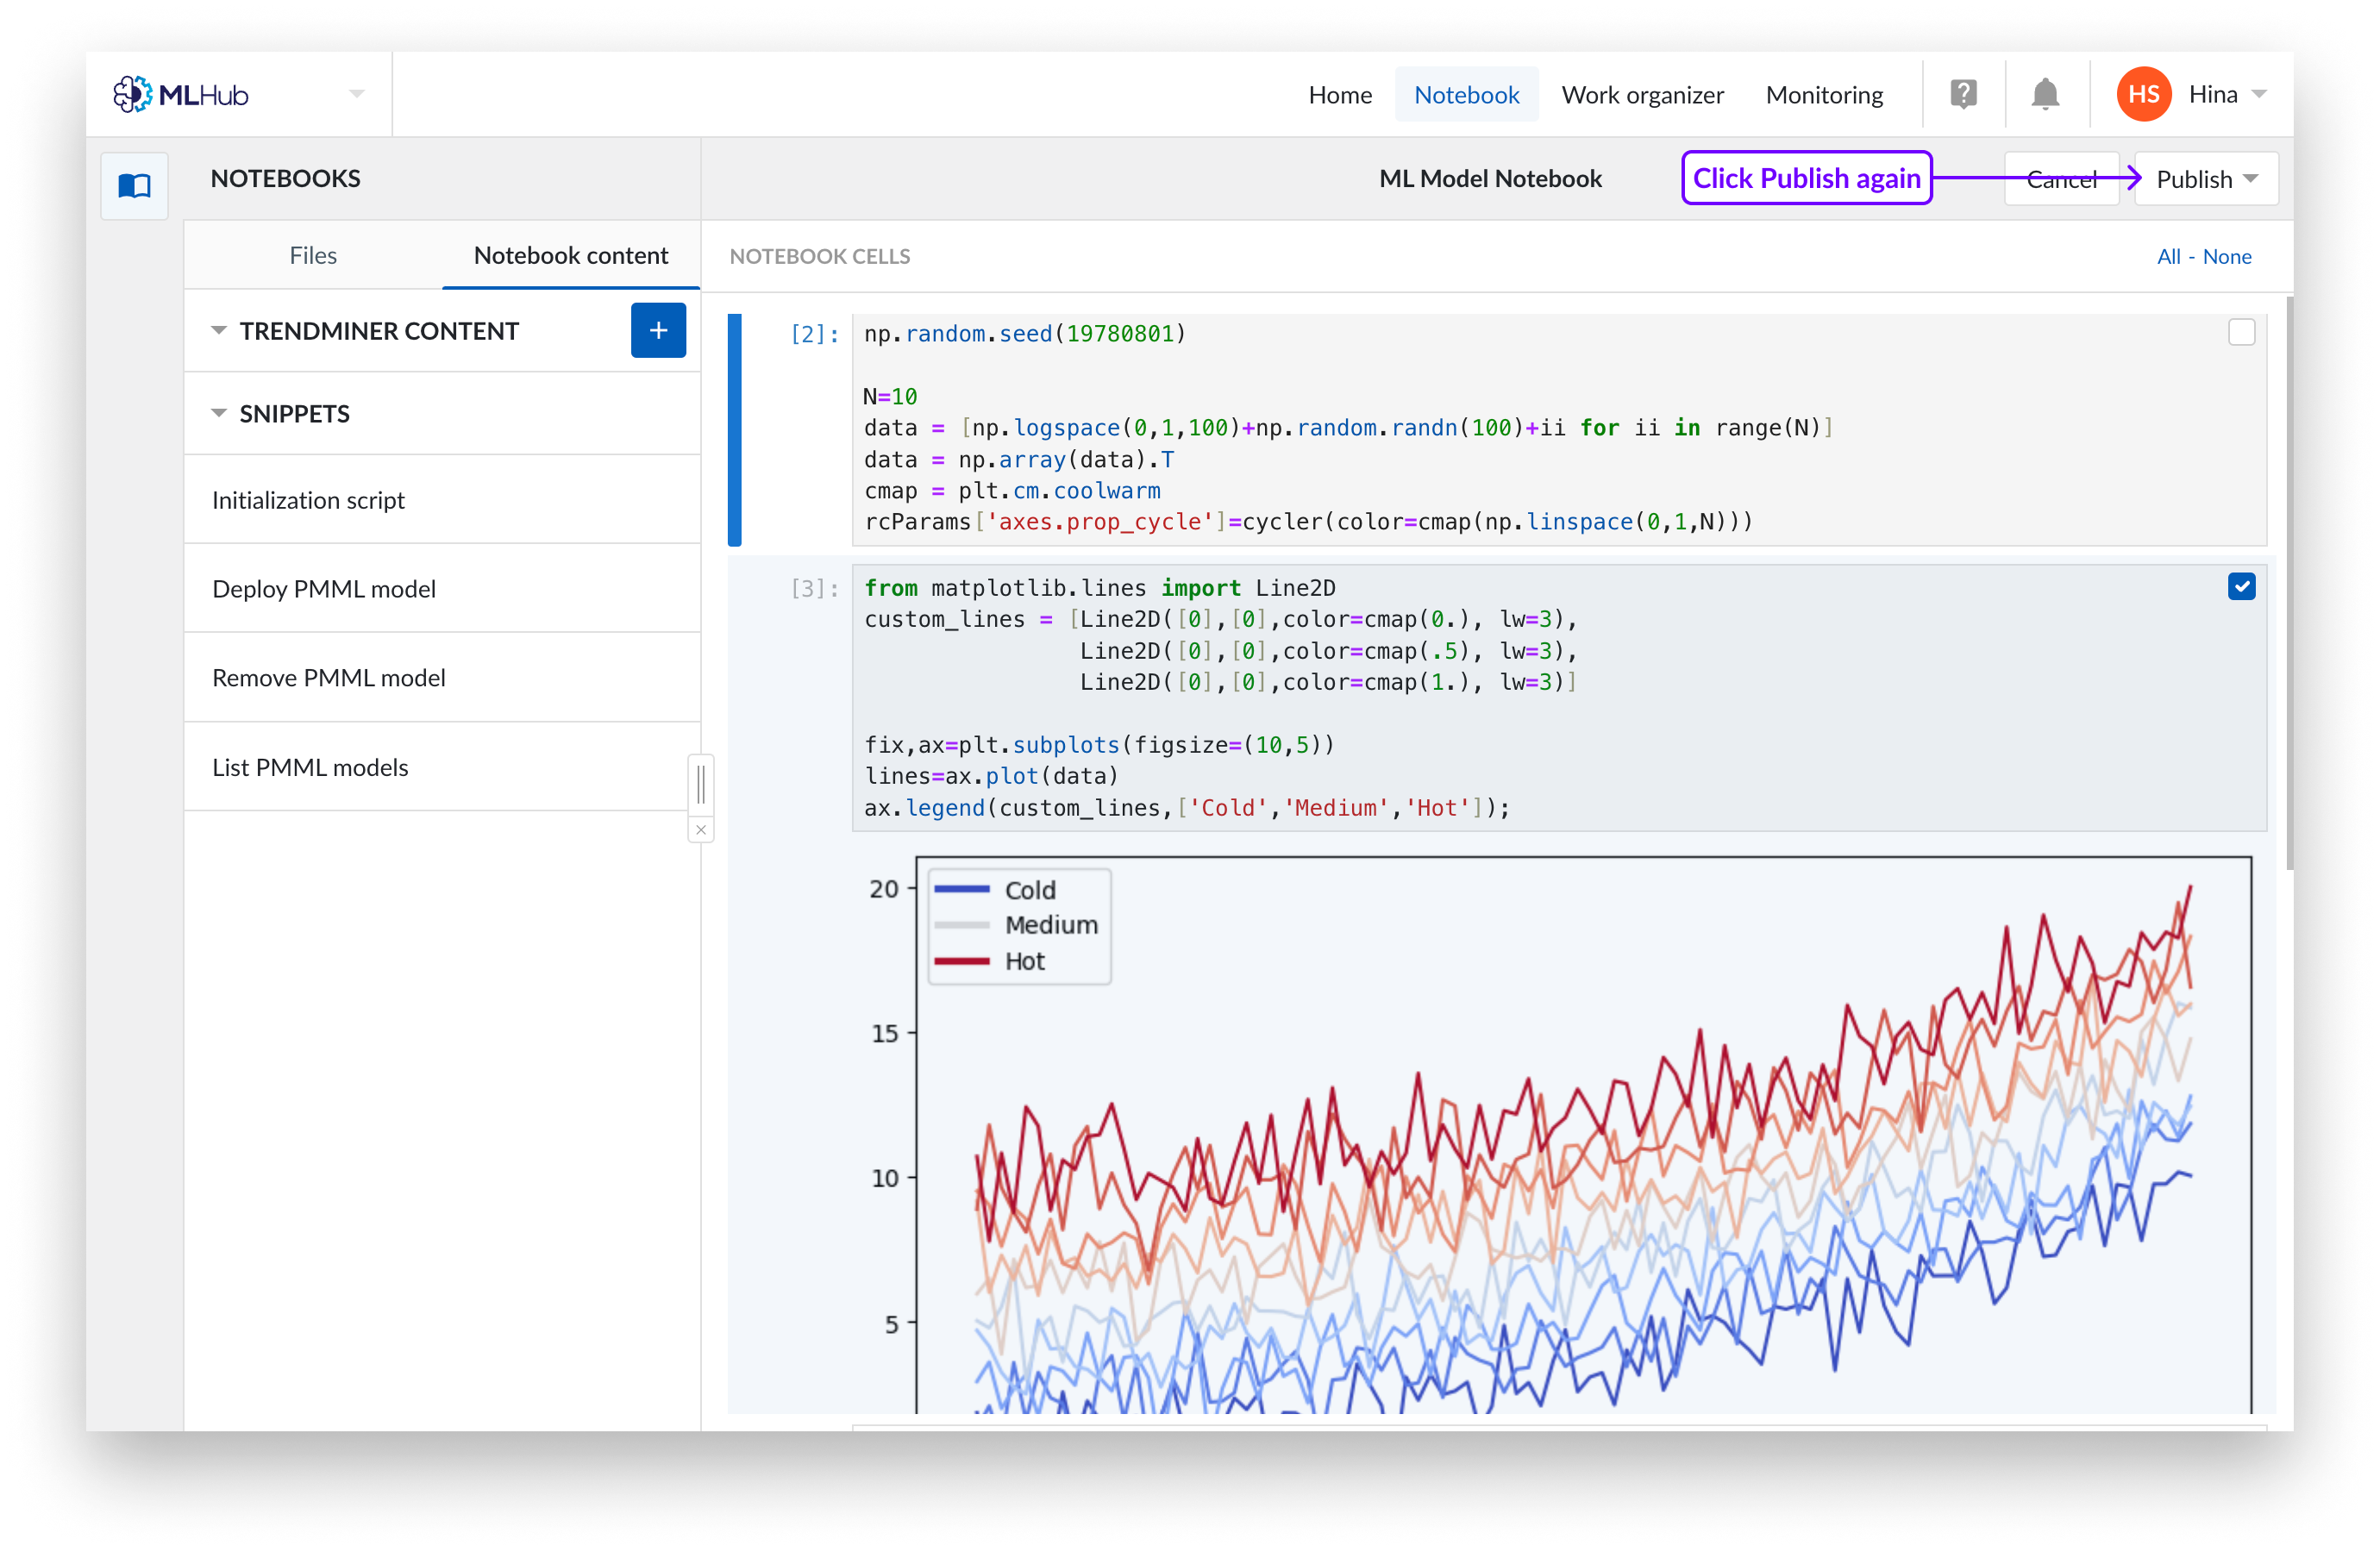
Click ‘Publish’ again. You will see a dropdown to publish the notebook on a new pipeline or overwrite on an existing pipeline.
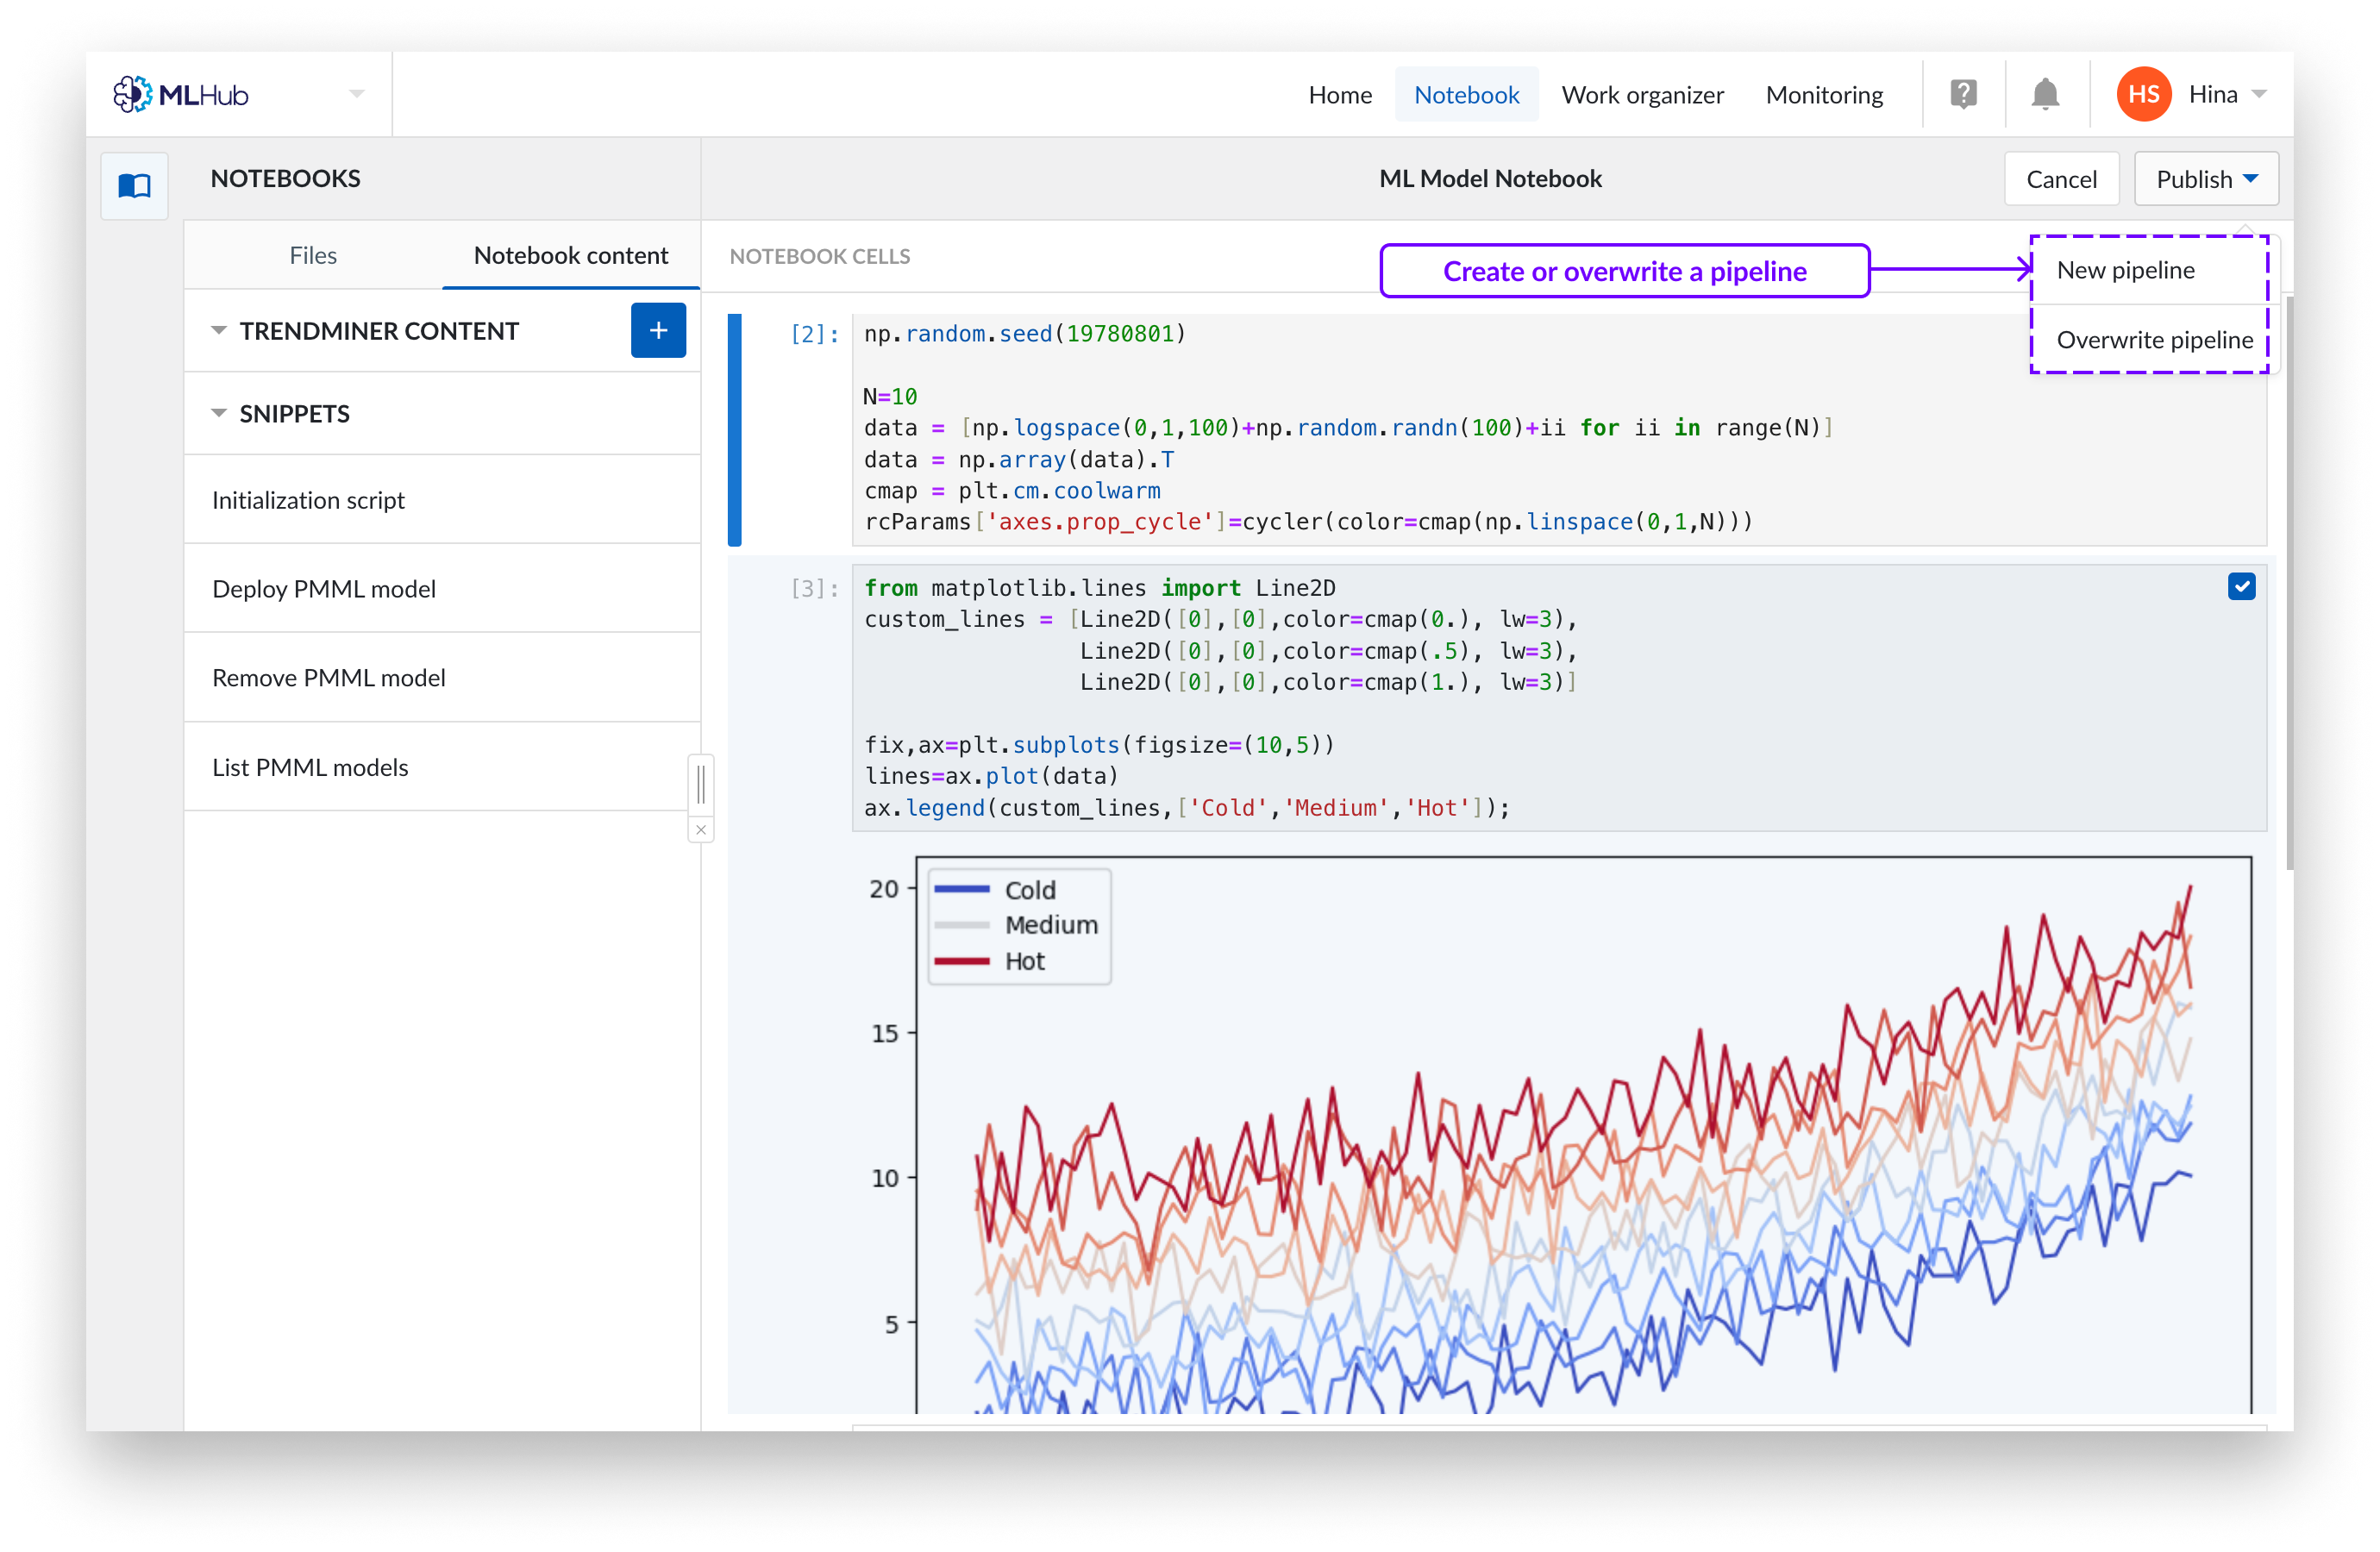
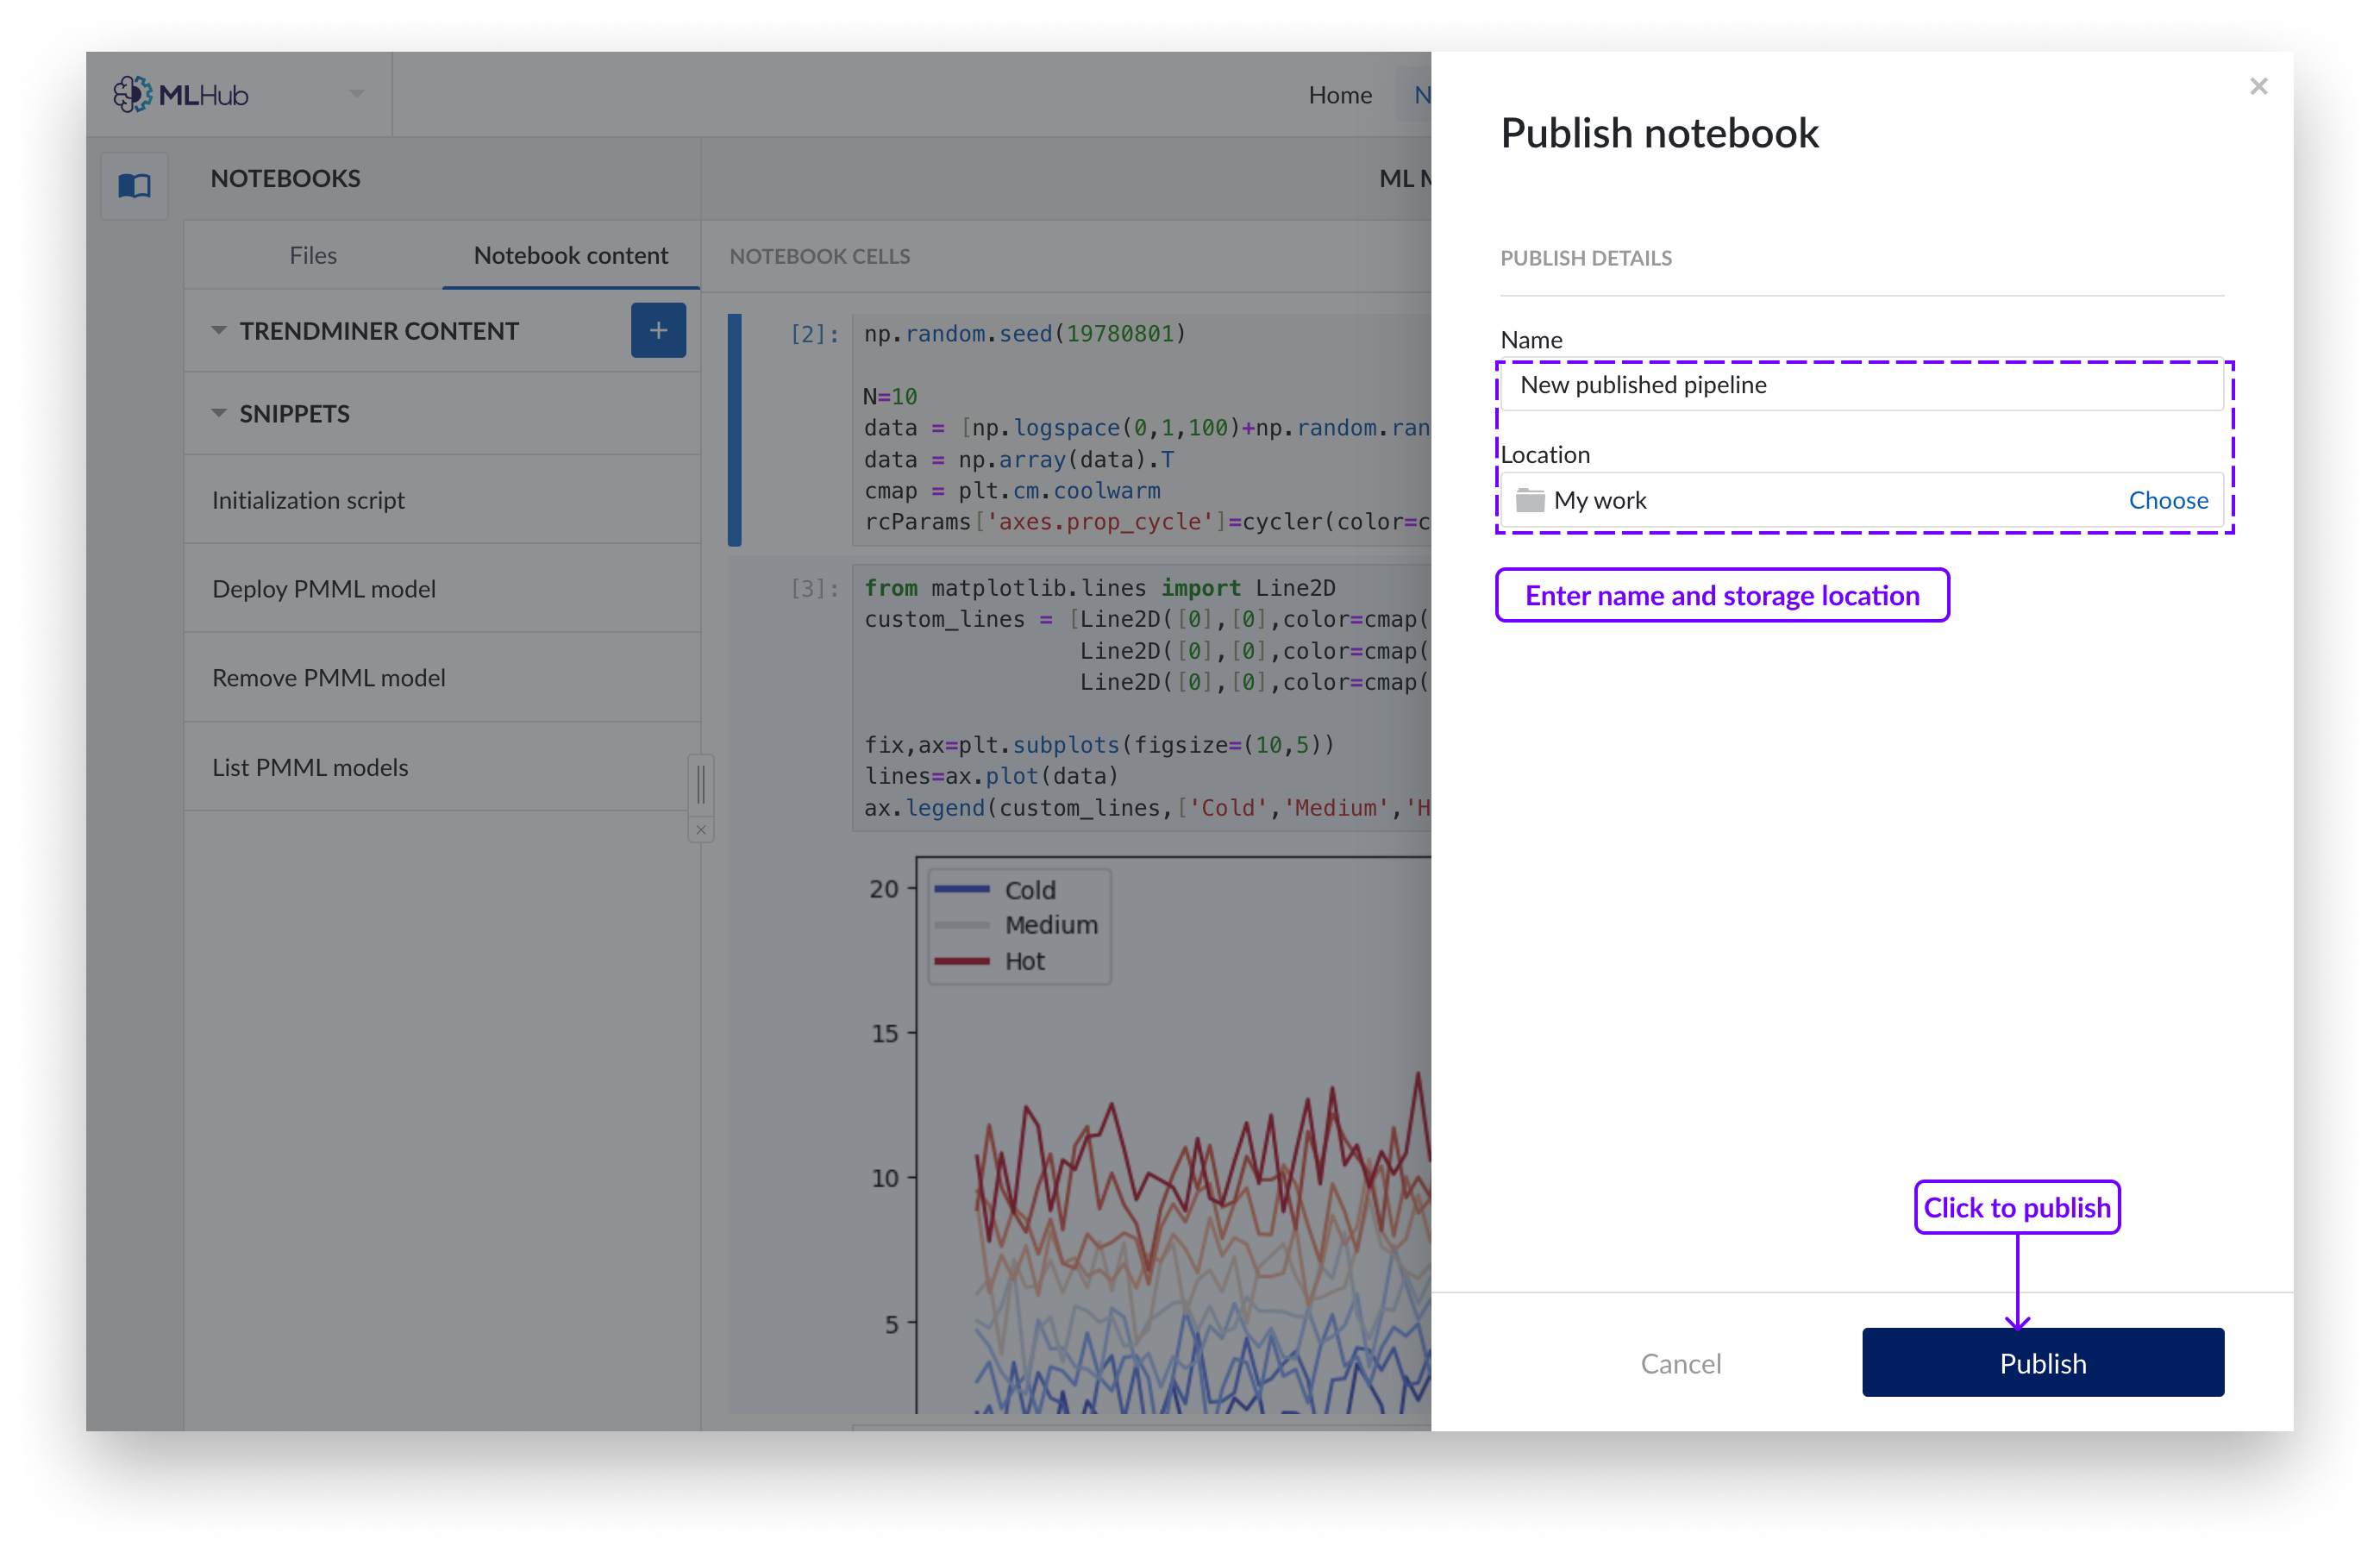
To publish notebook on a new pipeline, fill in the name and specify storage location in the Work Organizer. Click “Publish” to confirm selection. This will create a ‘pipeline’ object, which is a mini notebook containing only the selected cells. Pipelines have no relation to their original notebooks, they are a separate entity.
Note
If you update a notebook, you will have to create a new pipeline object as well.
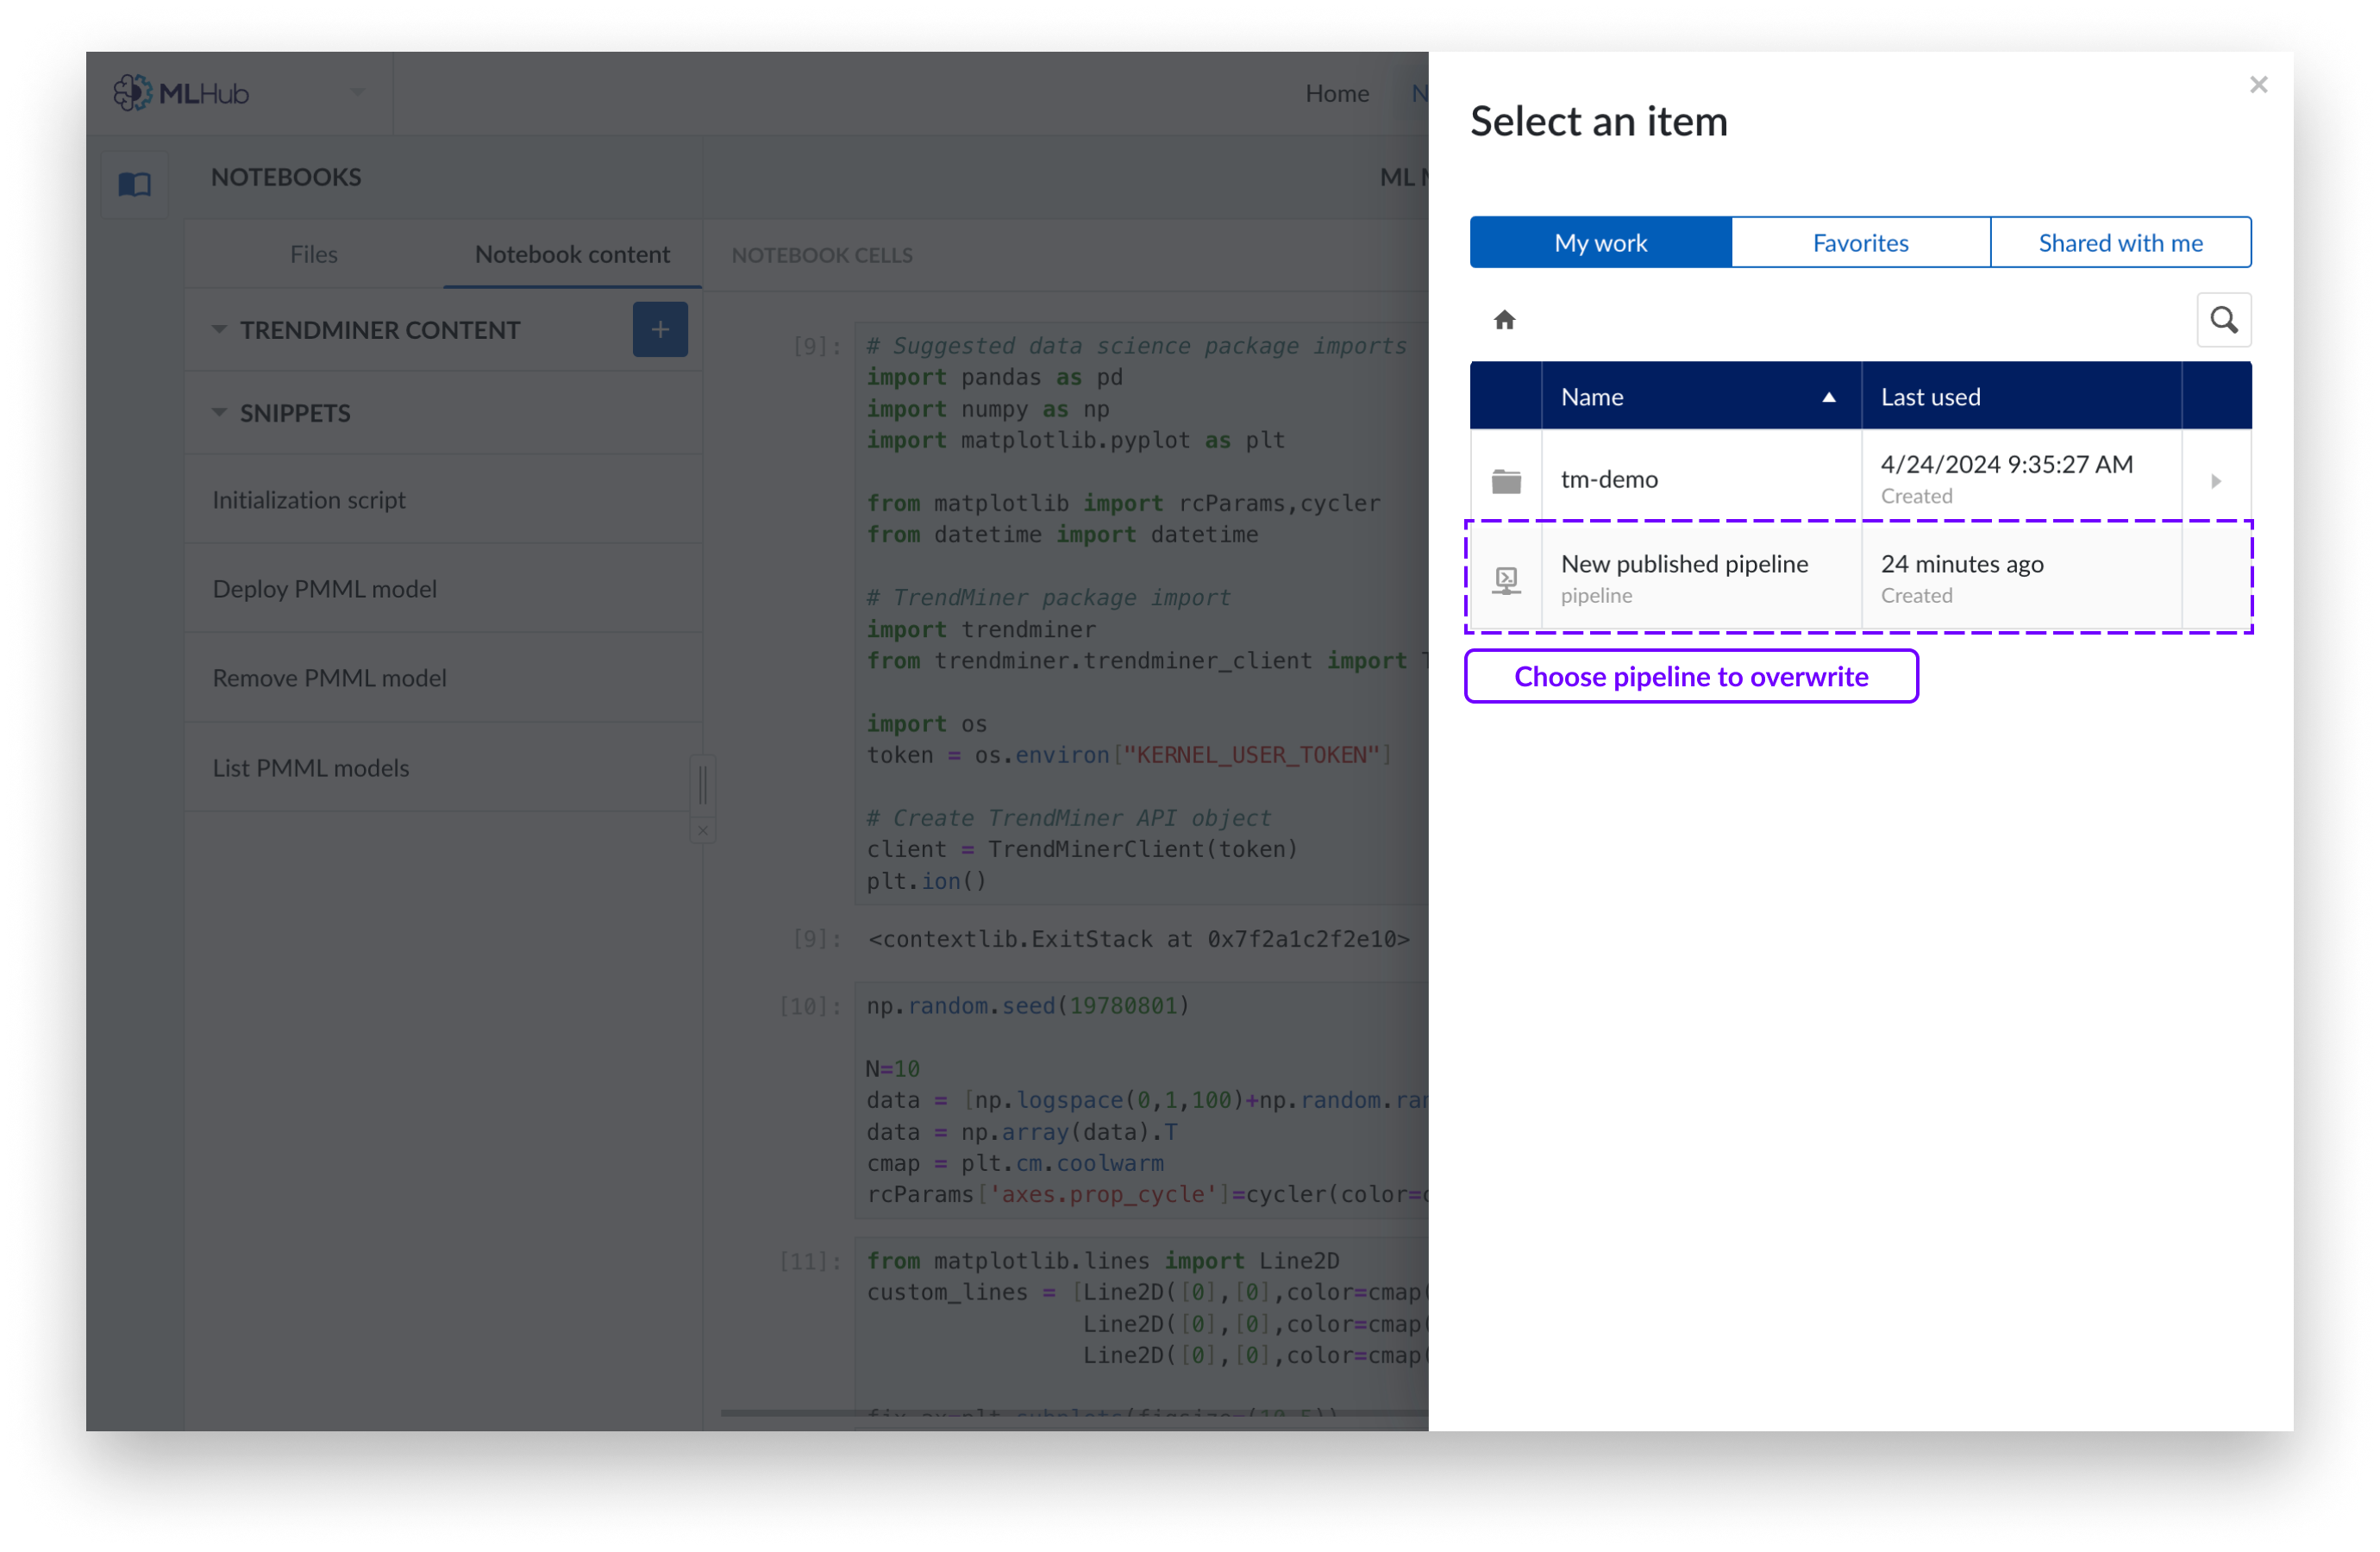
If you want to overwrite an existing pipeline choose the pipeline from the Work Organizer that you wish to overwrite and click ‘Publish’.
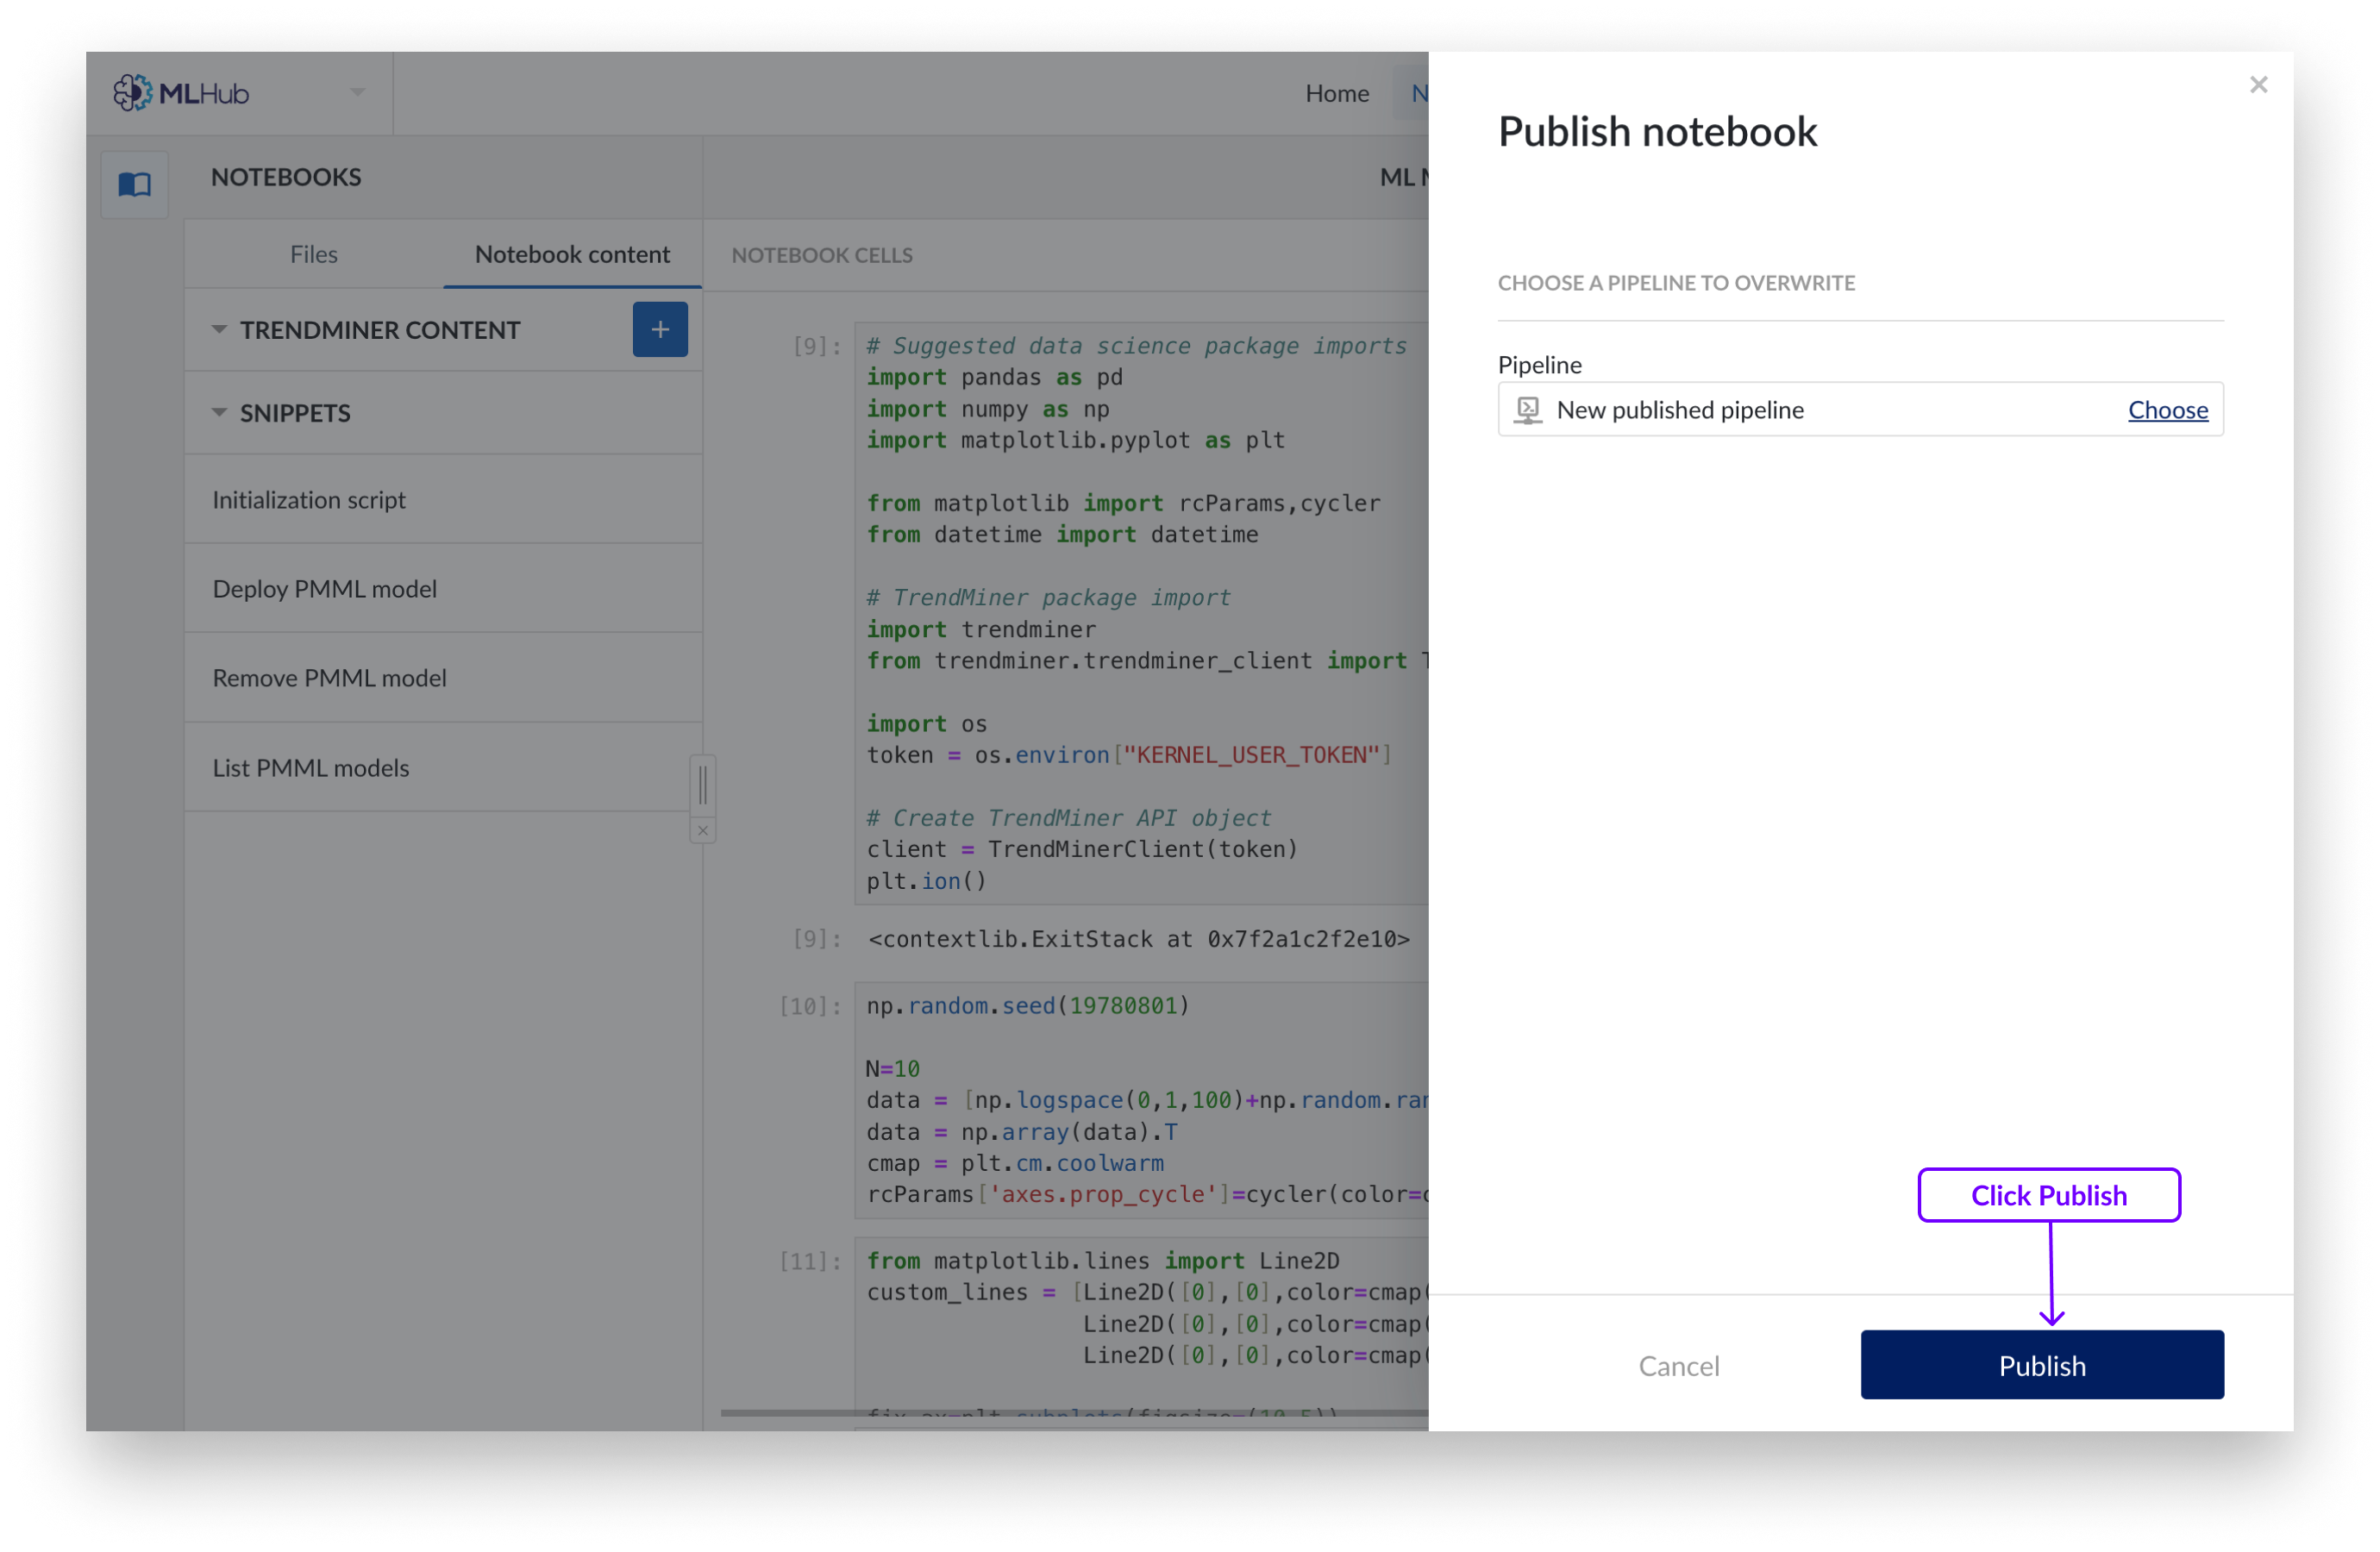
You will now have a pipeline object containing the code of the cells you have selected.
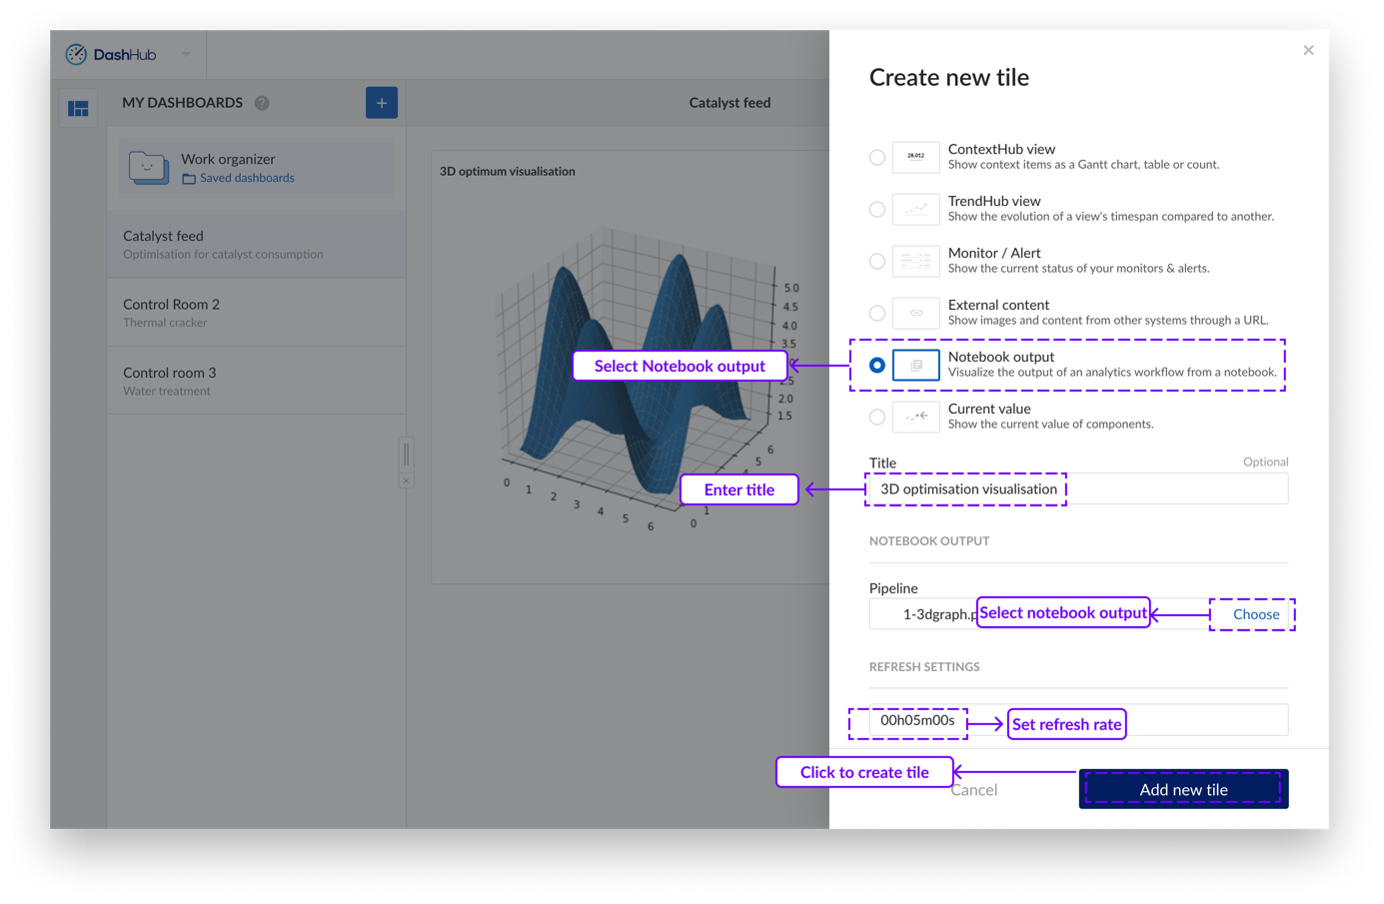
DashHub allows any output of a Notebook Paragraph to be shown in a dashboard Notebook Tile.
Creating a Notebook Tile
Goto DashHub and create a new dashboard or open a previously created dashboard.
Click on the "Actions" button. A dropdown menu will appear.
Click on "Add new tile". A side panel will appear from the right.
Click on the "Notebook output" option.
Provide a title for the dashboard tile.
Select the pipeline object from Work Organizer.
Adjust the refresh setting if necessary.
Click "Add new tile".
Note
When sharing a DashHub tile, the underlying views and notebook pipeline objects need to be shared as well.
Sharing a notebook will result in a symbolic link to the original notebook. This means that the creator remains the owner of the master data of the notebook. Changes that are made to cells are saved on a FIFO principle and will only be updated upon screen refresh.
The published pipeline objects output objects are not linked to the original notebooks anymore. Once published, changes on the notebook will not be automatically impact the existing notebook pipeline object. This allows users to fine-tune notebook cell outputs, without impacting other user/viewers.
The notebooks and visualizations of notebook outputs are run, relative to your permissions and privileges. That means that some data sources might be blocked, and you only get to process data based on your role.