Context views
A context view in ContextHub is a list of context items filtered based on user-defined conditions. It can display all context items or a subset that meets the filter criteria.
For more details, see the filters section below.
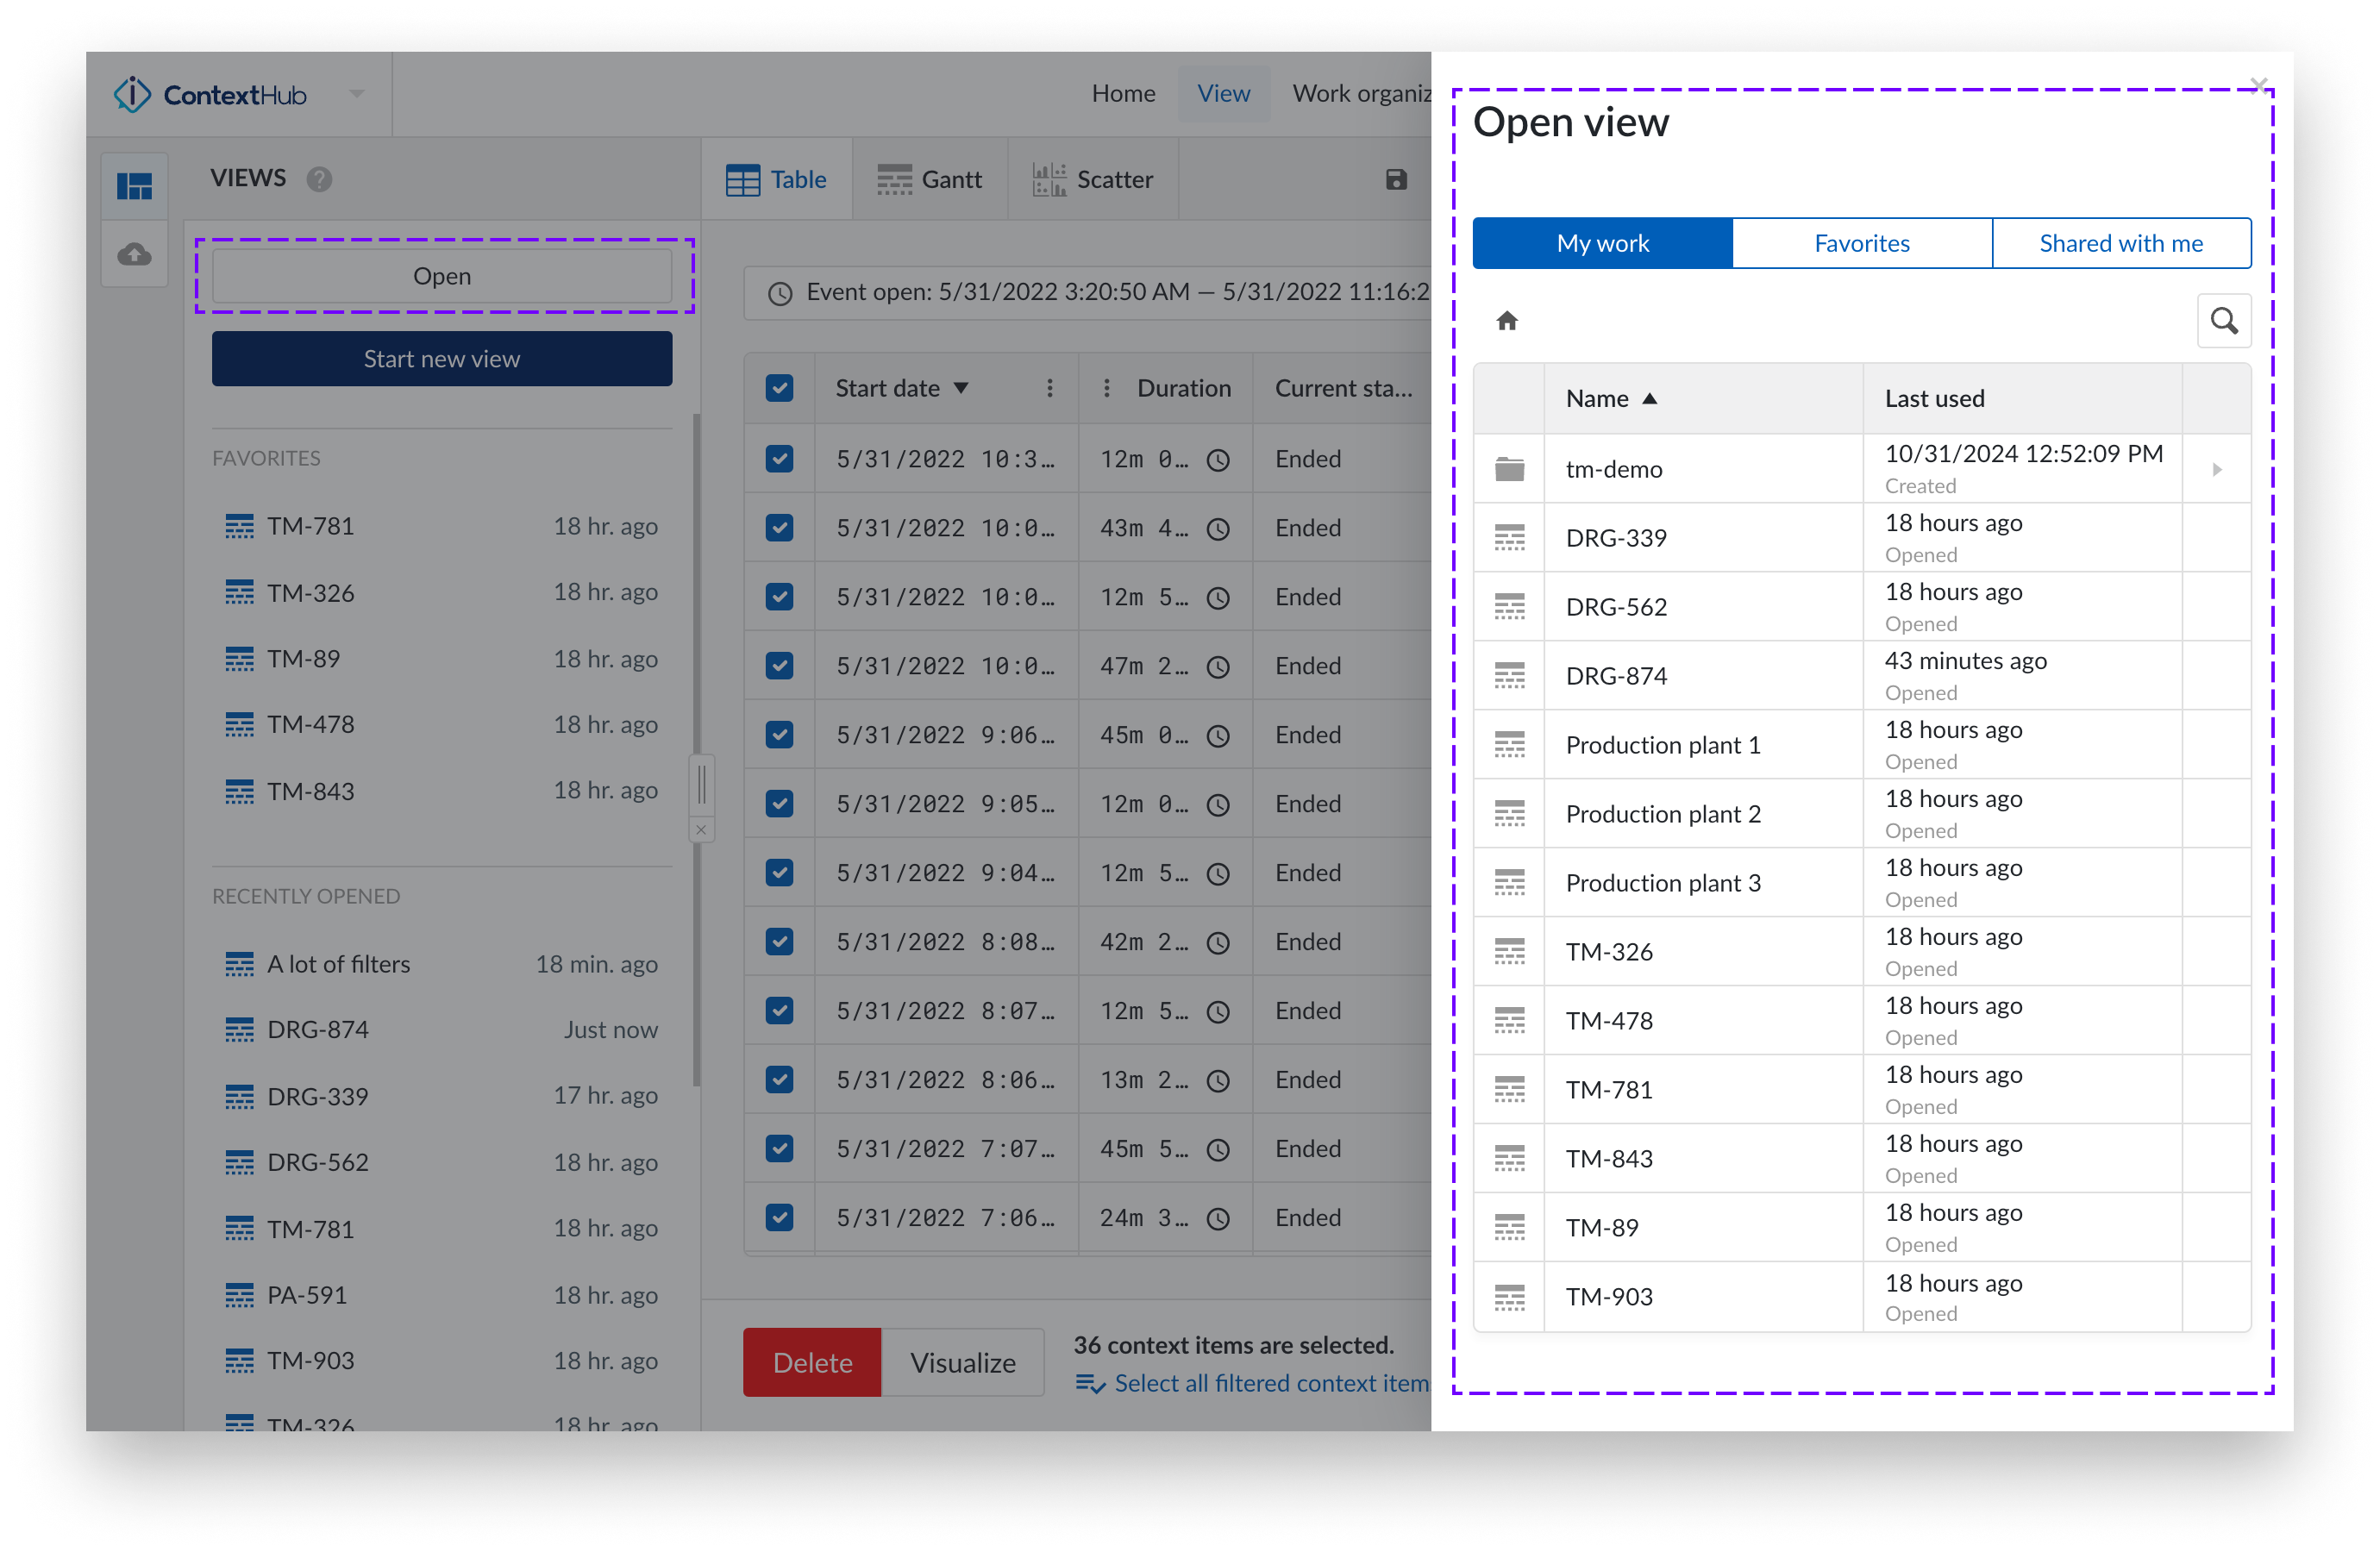
To open a context view, click the views icon in the left bar. This will open the work organizer panel, allowing you to browse for a view and access your recent and favorite items.

While the “Favorites” list shows up to five of your favorited items, the “Recently Opened” list shows your most recently accessed items. This provides quick access to your most used context views.
To browse for other context views, click "Open." The work organizer browse panel will appear, allowing you to find and select the context view you need.
Filter your context views to create a more focused view. A view can be created by applying specific filters to context items. First, determine what you want to examine within your view’s content, then create a filter query. You can filter based on any of the available fields in the context items.
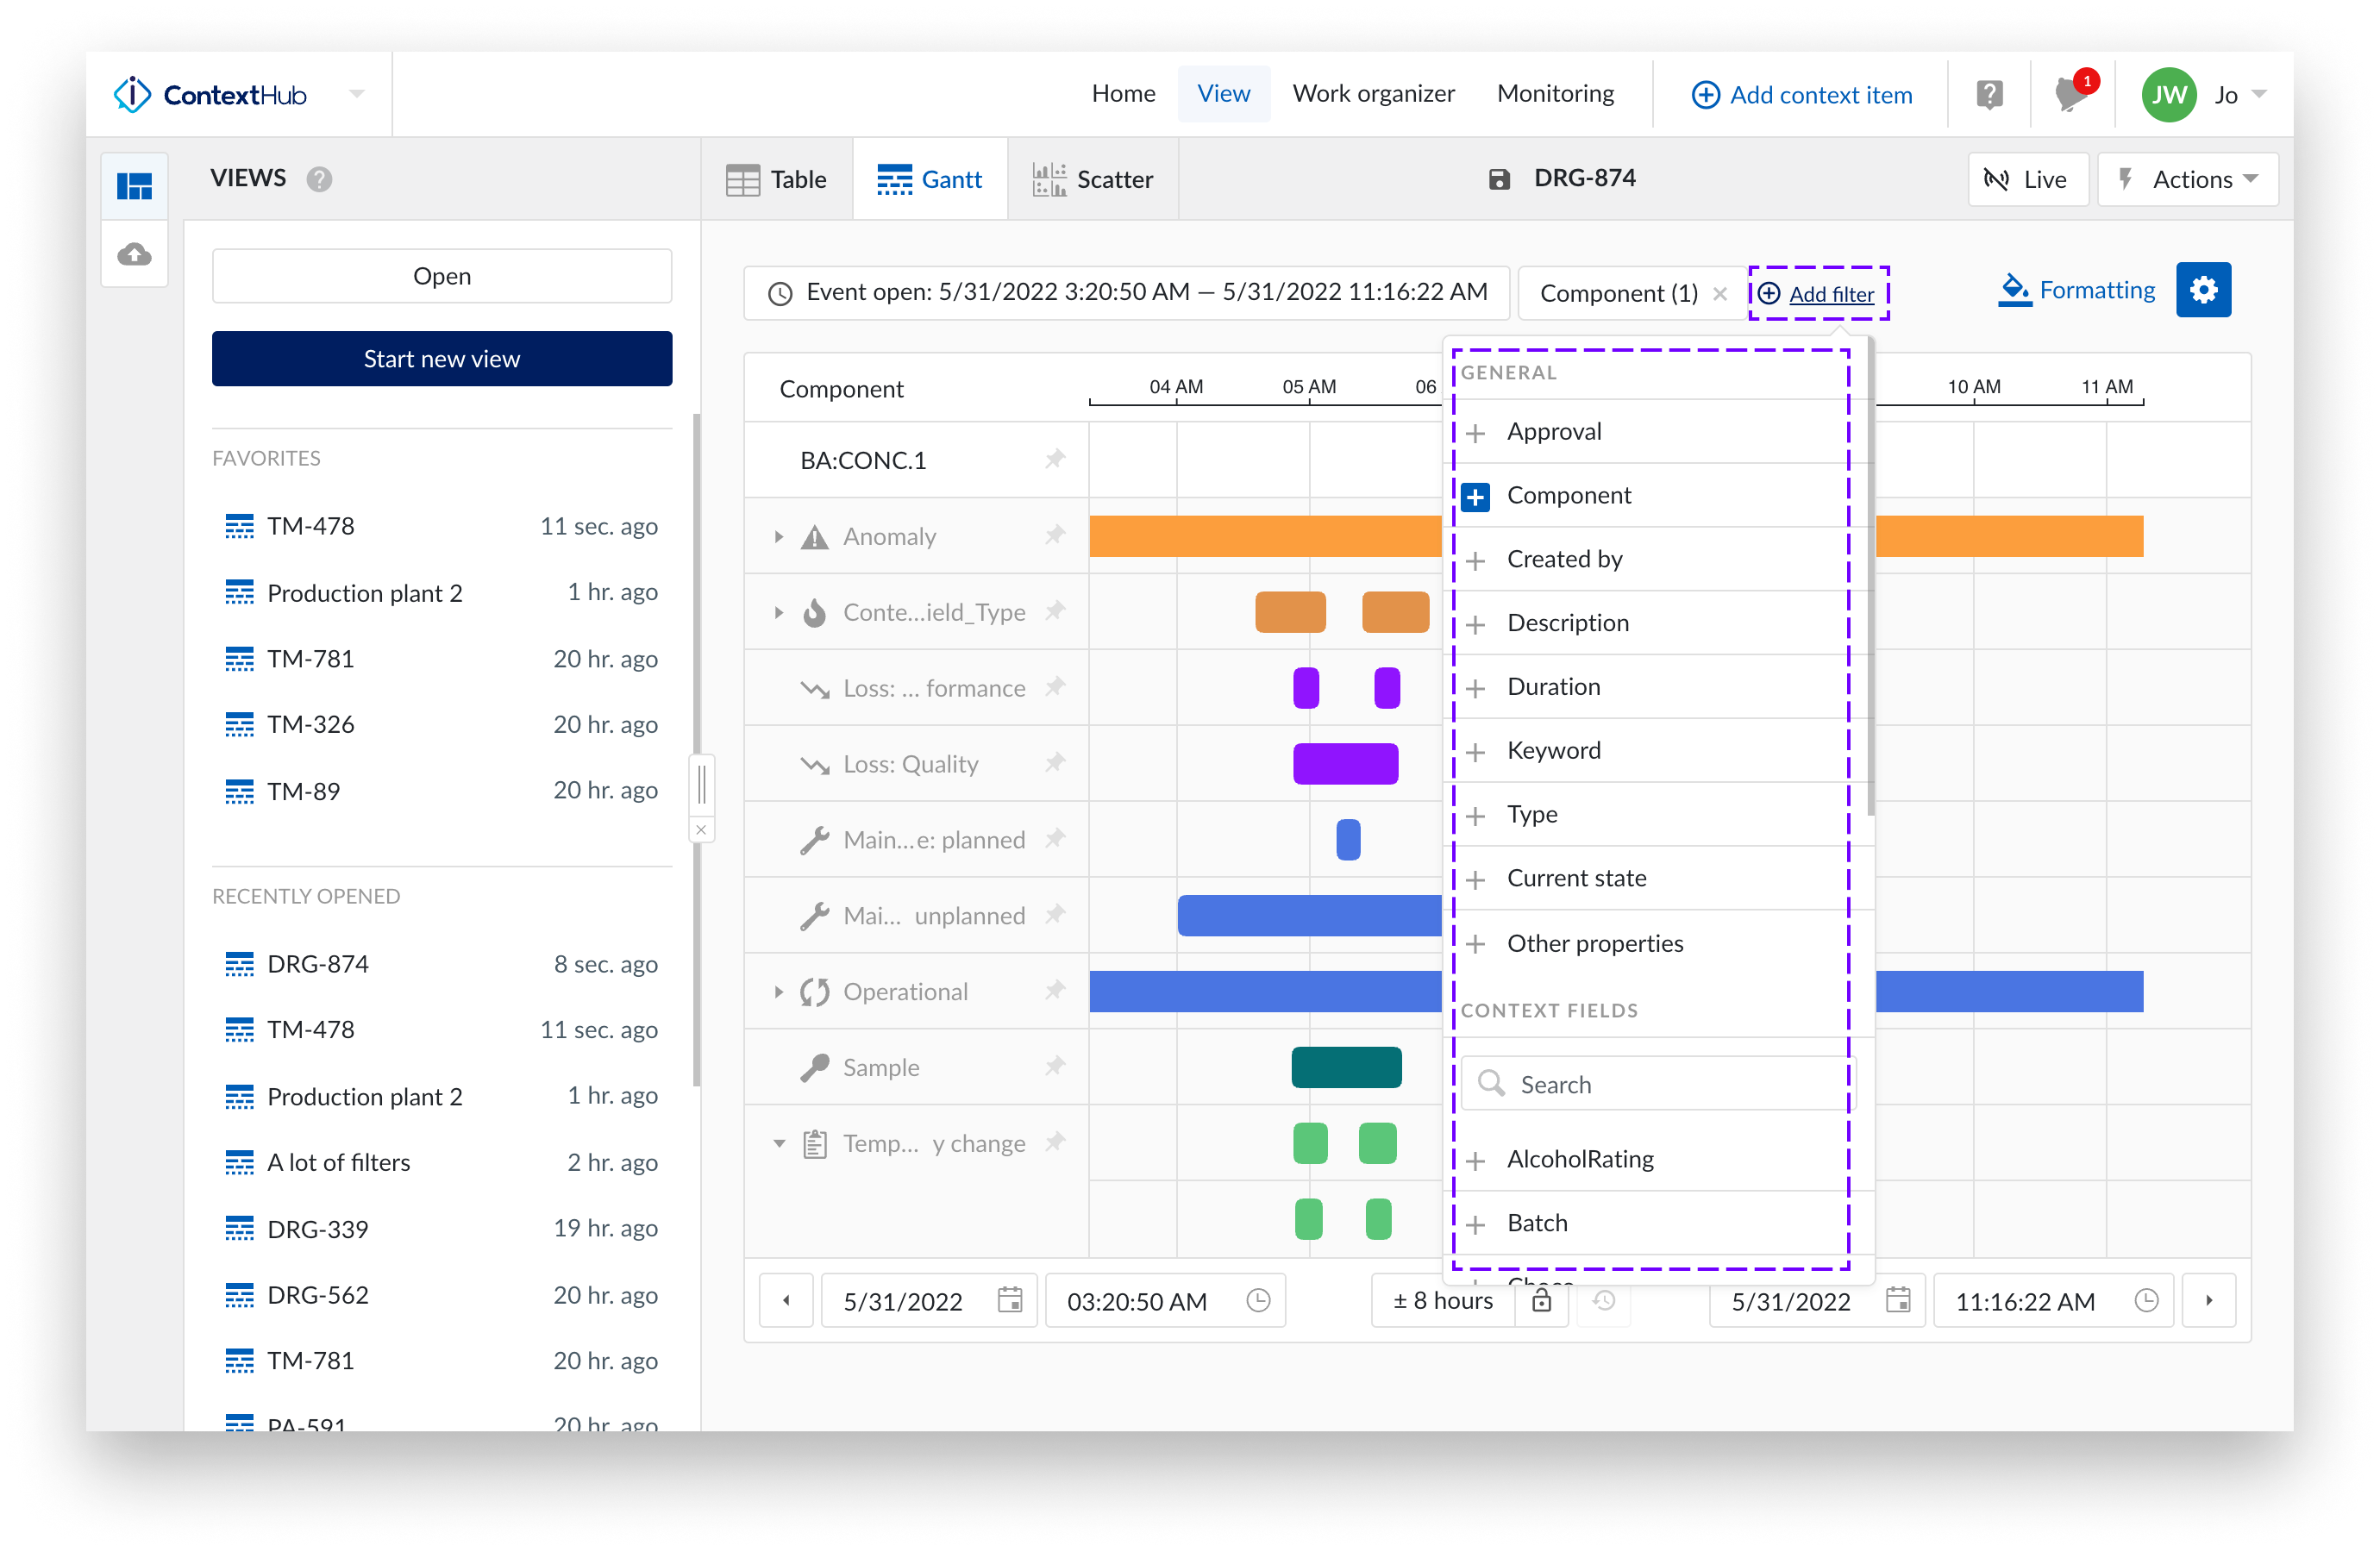
Open or create a new view, then click on the "+Add filter" function. Choose from a variety of filter types, including Approval, Component (with Hierarchy filter), Created by, Description, Duration, Keyword, Type, Current state, Other properties, and Context fields.
By using the component filter, you can refine your view by selecting a tag or an asset.
Click on the "Add Filter" button.
Select “Component”
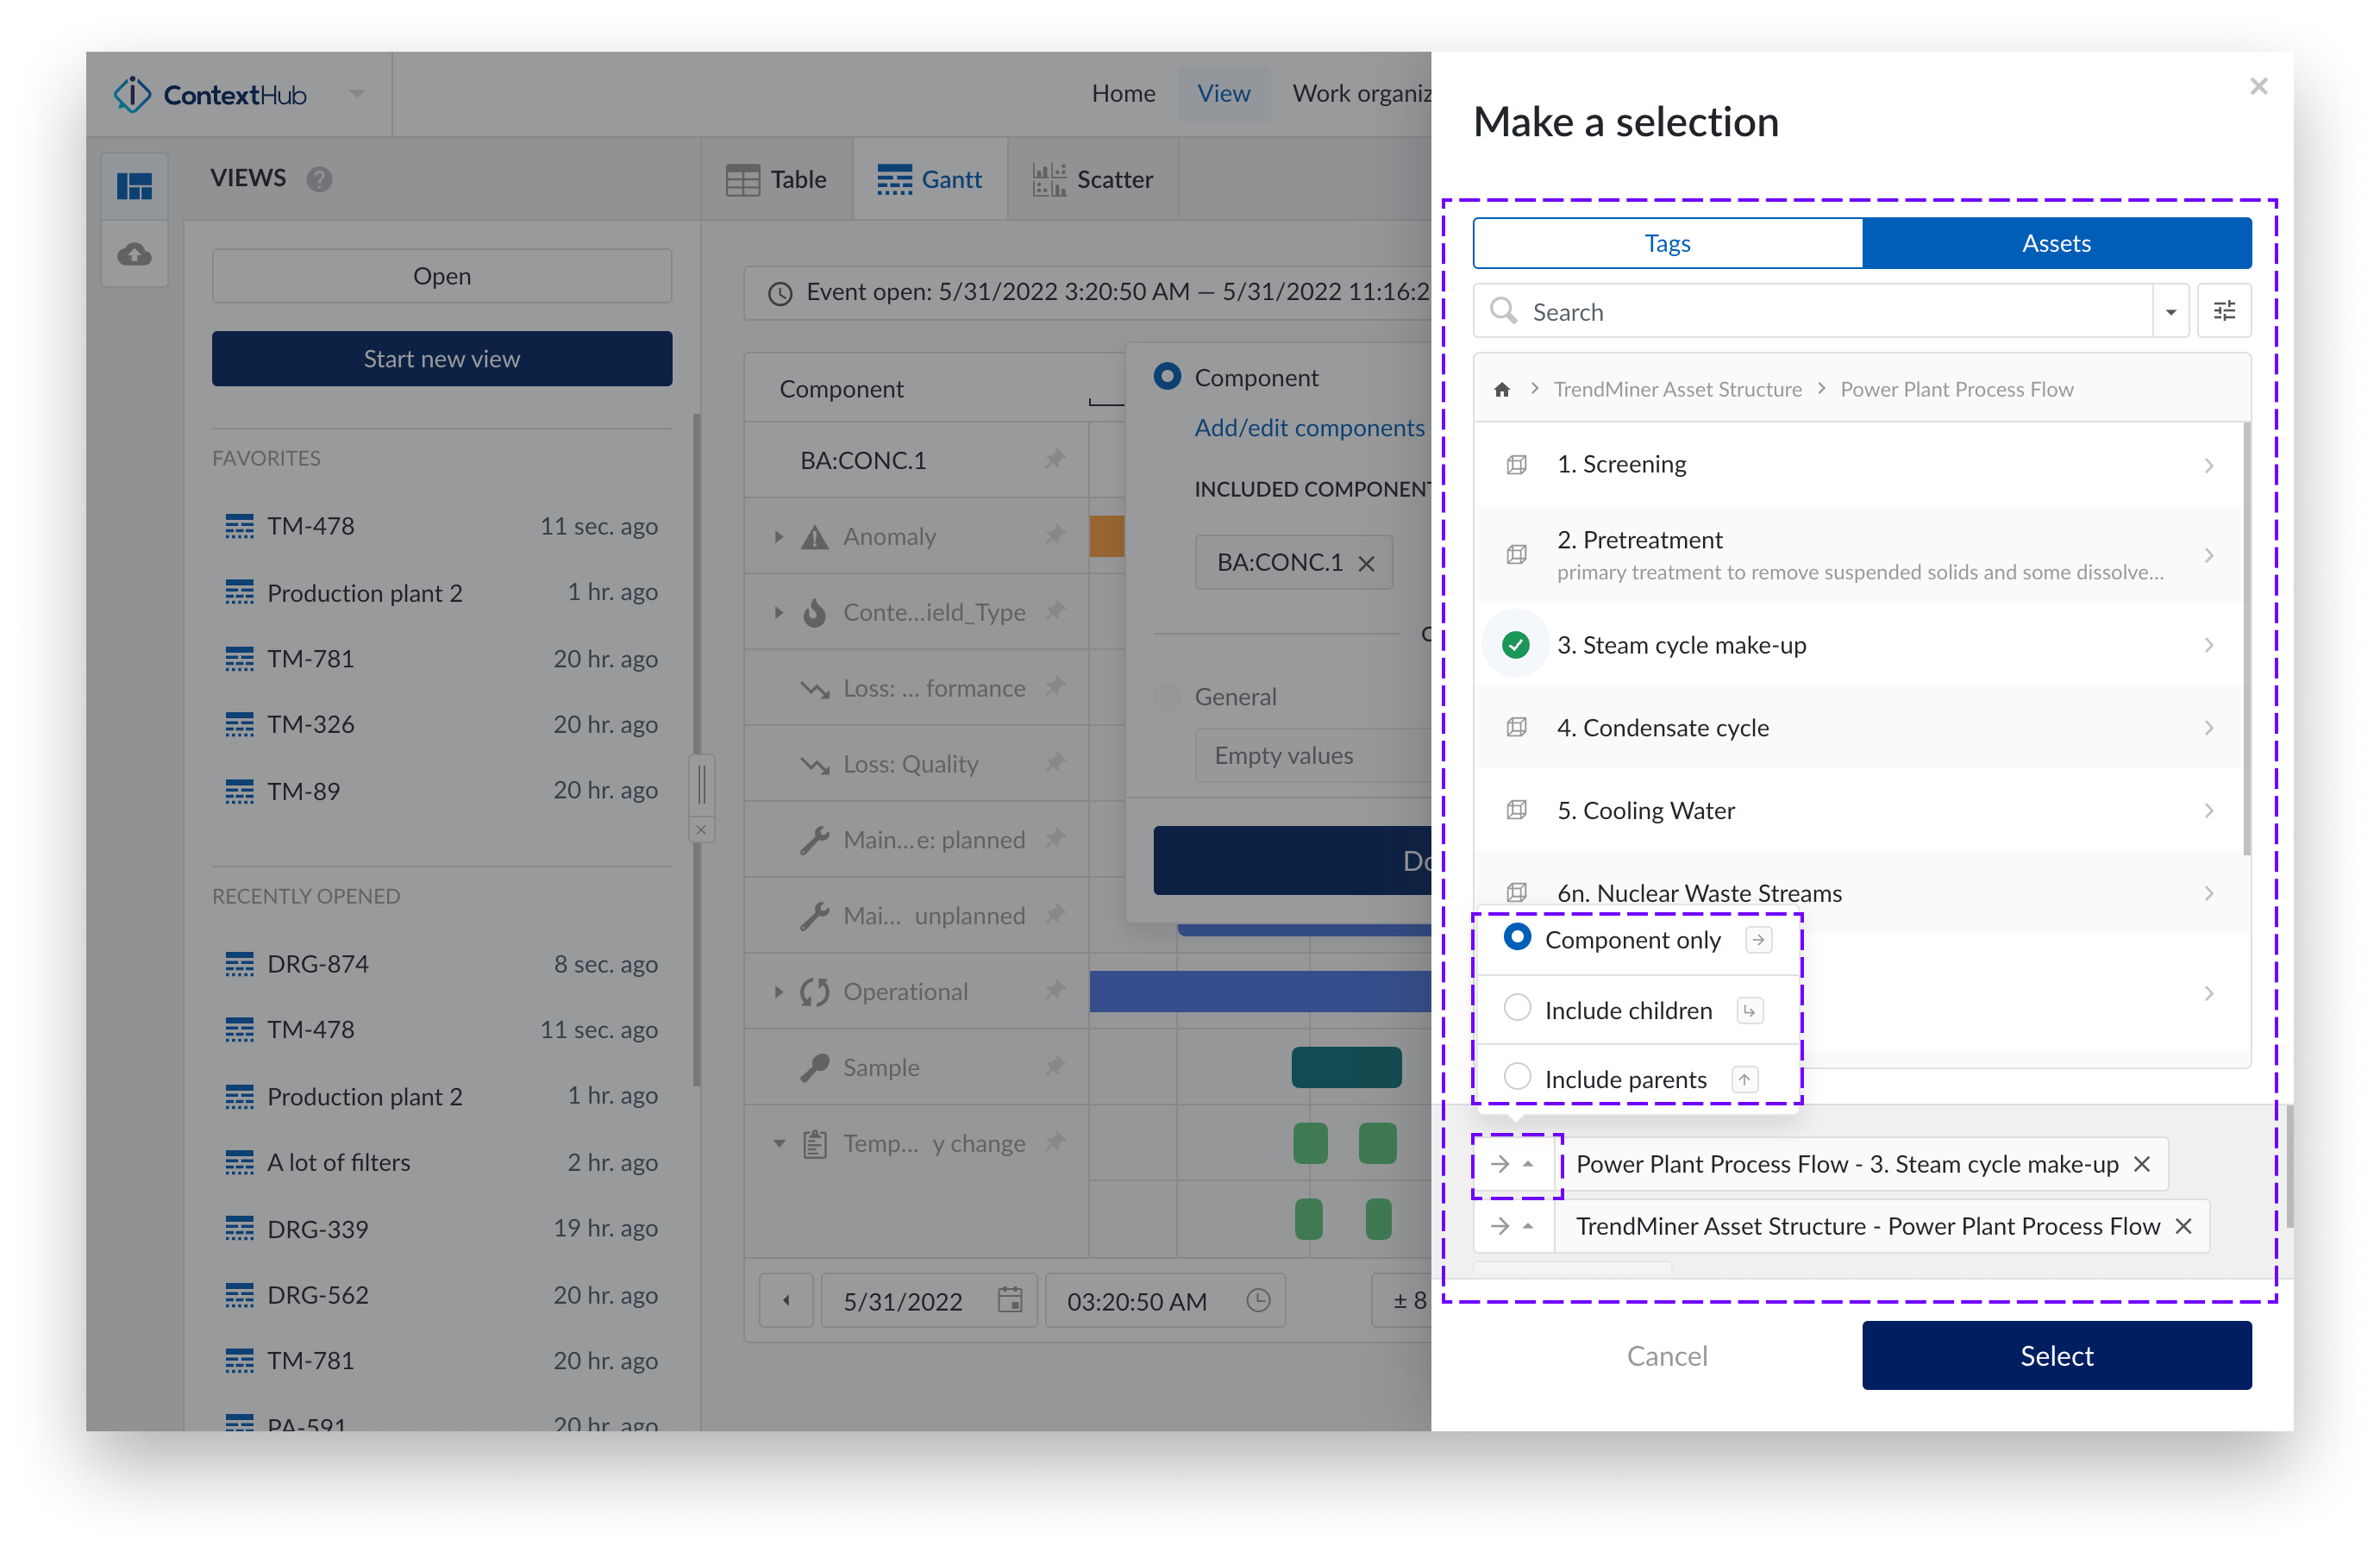
Click on "Add/edit components".
Choose your component from the component menu. The selected component label will appear in the bottom bar of the side panel.
Optionally, click the arrow button to reveal a dropdown menu with the following options:
Component only (default)
Include children
Include parents
Select one of the options and click the "Select" button.
Once selected, your chosen components will appear in the filtered selection.
Note
The maximum number of components that can be included in a filtered view is 10'000.
You can filter context items by their "Current state." For example, to view all context items that are currently "In Progress," select the "Current state" filter and choose the "In Progress" option. This filter allows you to focus specifically on active context items.
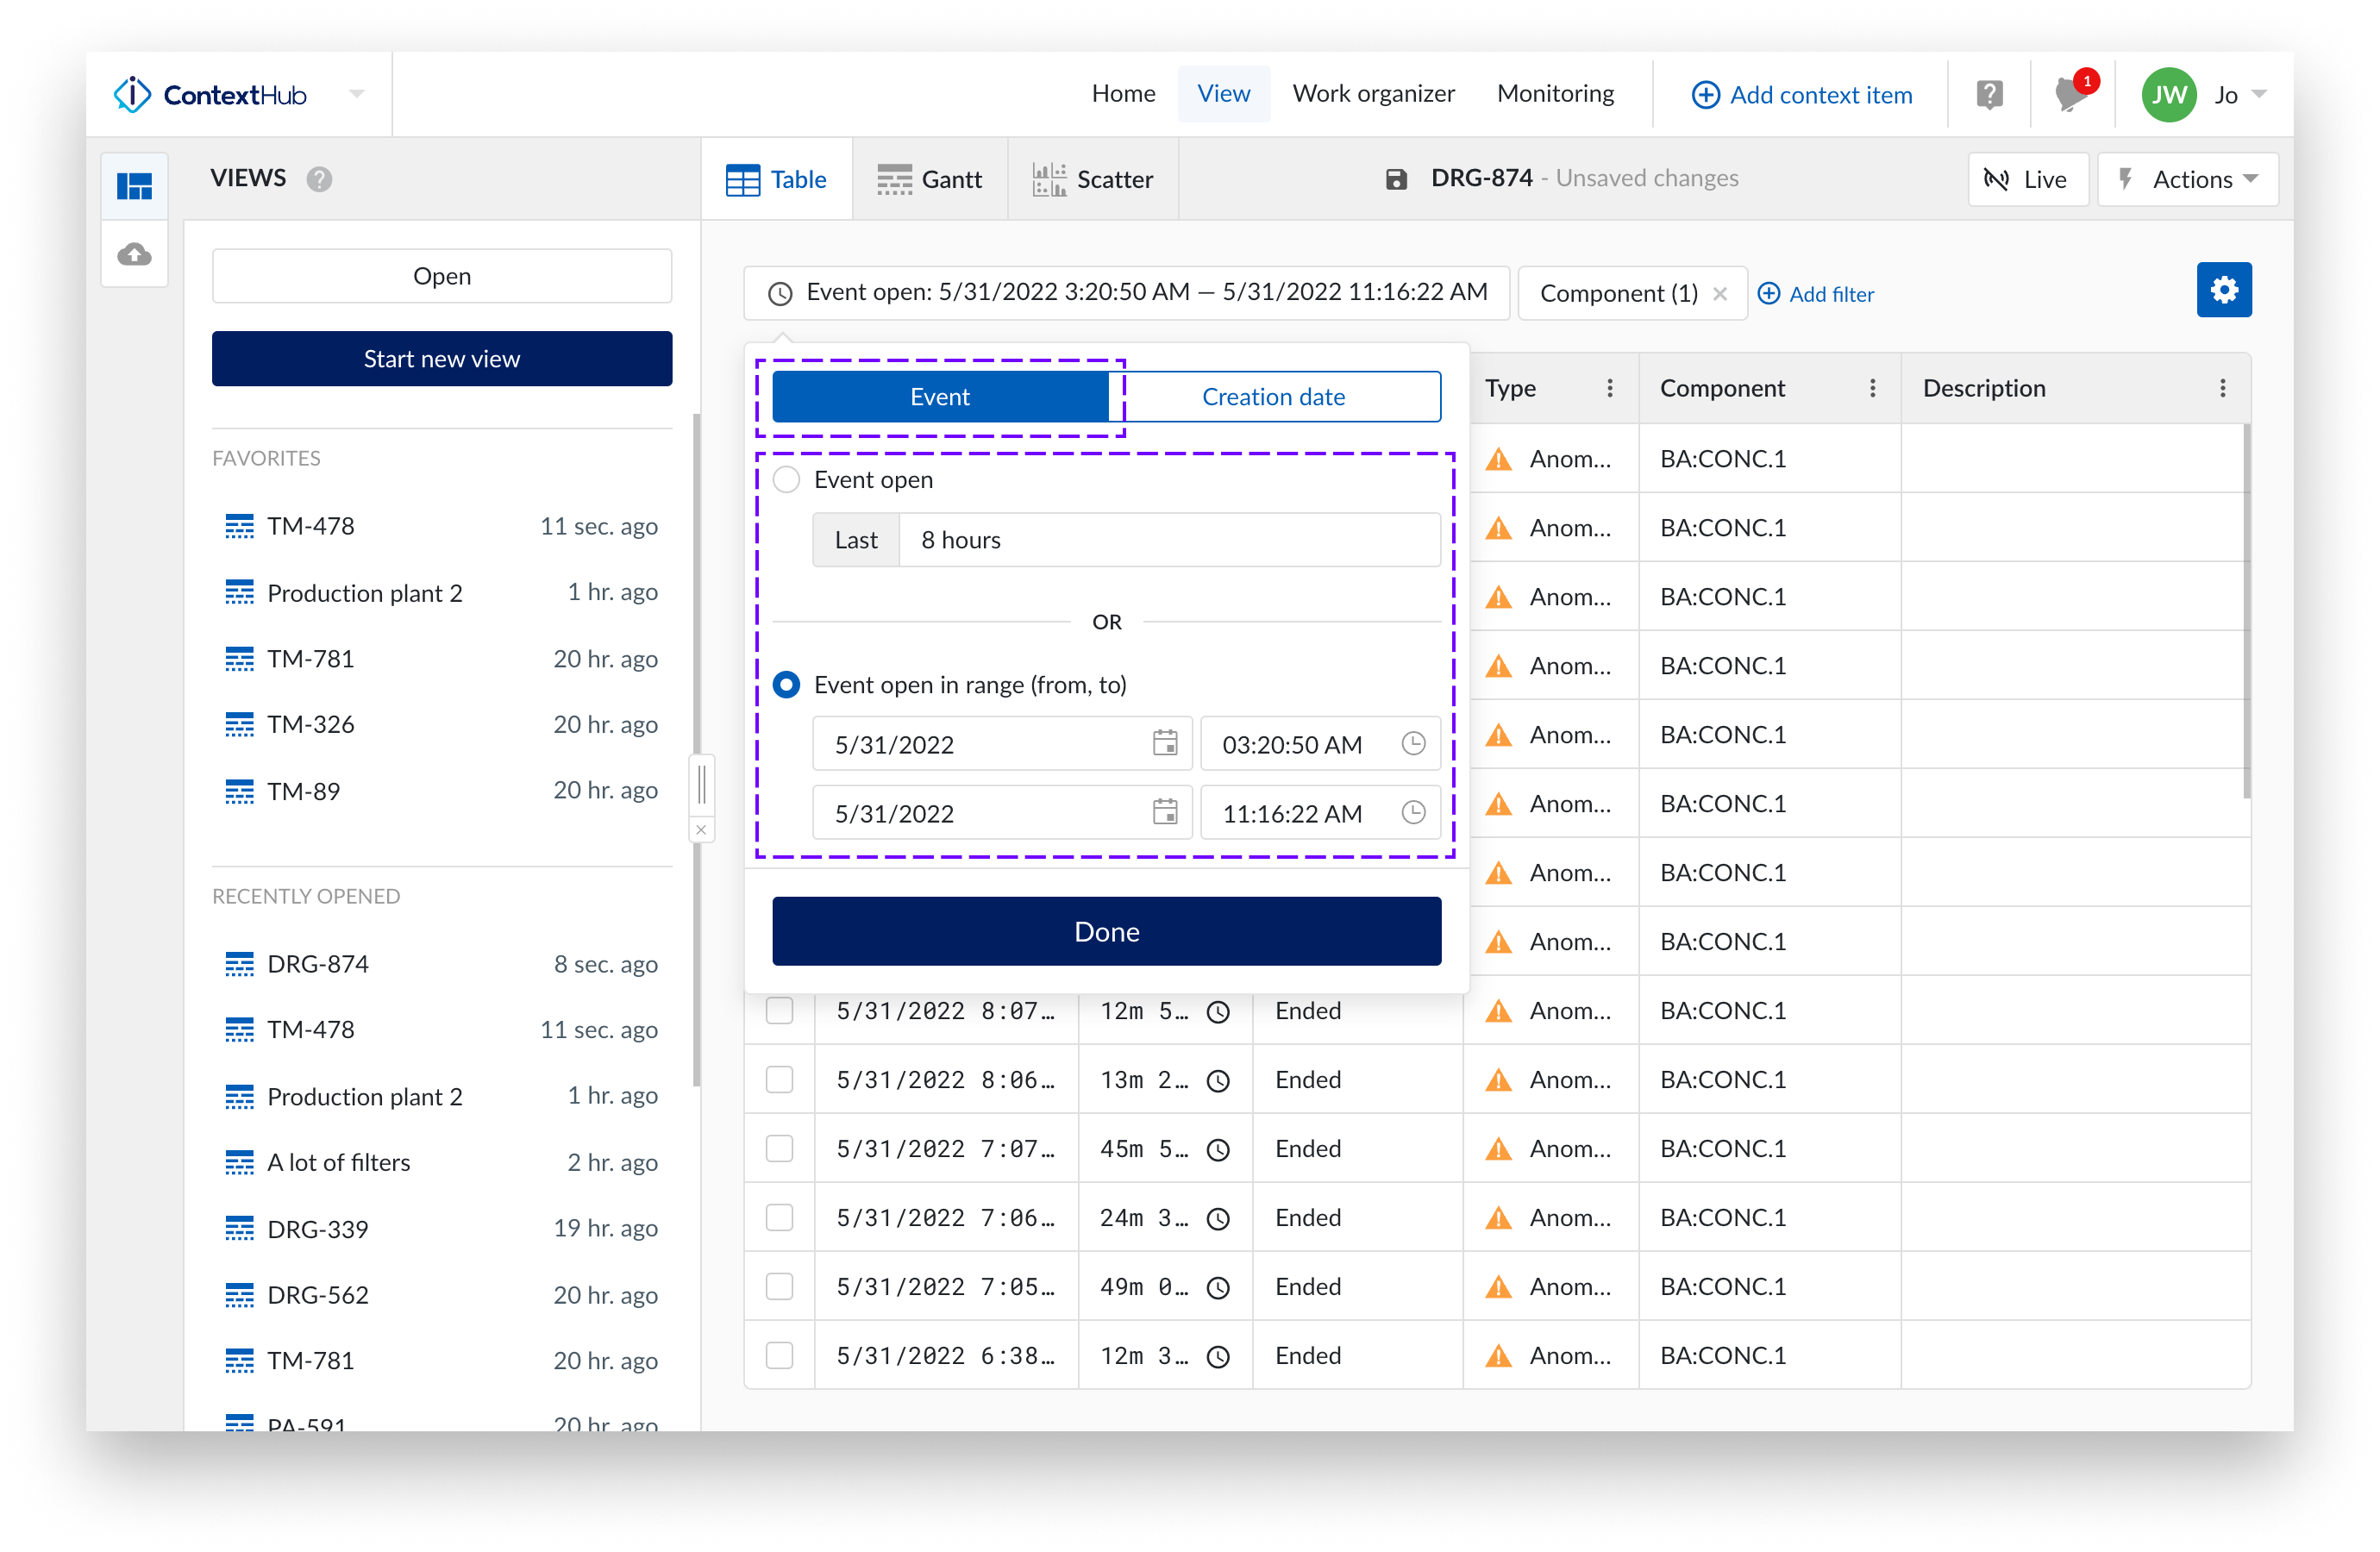
You can filter a view by timeframes, such as:
Event start date
Creation date of the context items
To filter by timeframe, you can either:
Select a preset period (e.g., "8 hours") for an event.
Choose a specific timeframe for an event.
Use the "Creation date" button to filter by item creation date, with options for "before" and "after."
Choose a specific timeframe for a creation date.
Additionally, you can enable "Live mode" to automatically refresh the grid chart and display new items as they are added.
Once you've made your selection, click "Done" to apply the filter and focus on context items within the chosen period.
Filter by Event start date
Filter by Creation date

Note
Creation date filter is not available on the Gantt chart.
You can filter not only by specific values but also by empty or non-empty values for certain property or field types. A value is considered empty if it is either null or an empty string. This option is available for the following filters:
Component filter
Description filter
Keyword filter
Current state filter
Custom numeric context field filter
Custom string context field filter
Custom dropdown context field filter
Tip
Filtering on empty or non-empty values for the Component filter is currently not supported in Gantt view.