Context Types
Workflow Configuration
This option enables you to provide the "workflows/states" that are used when creating new Context Types.
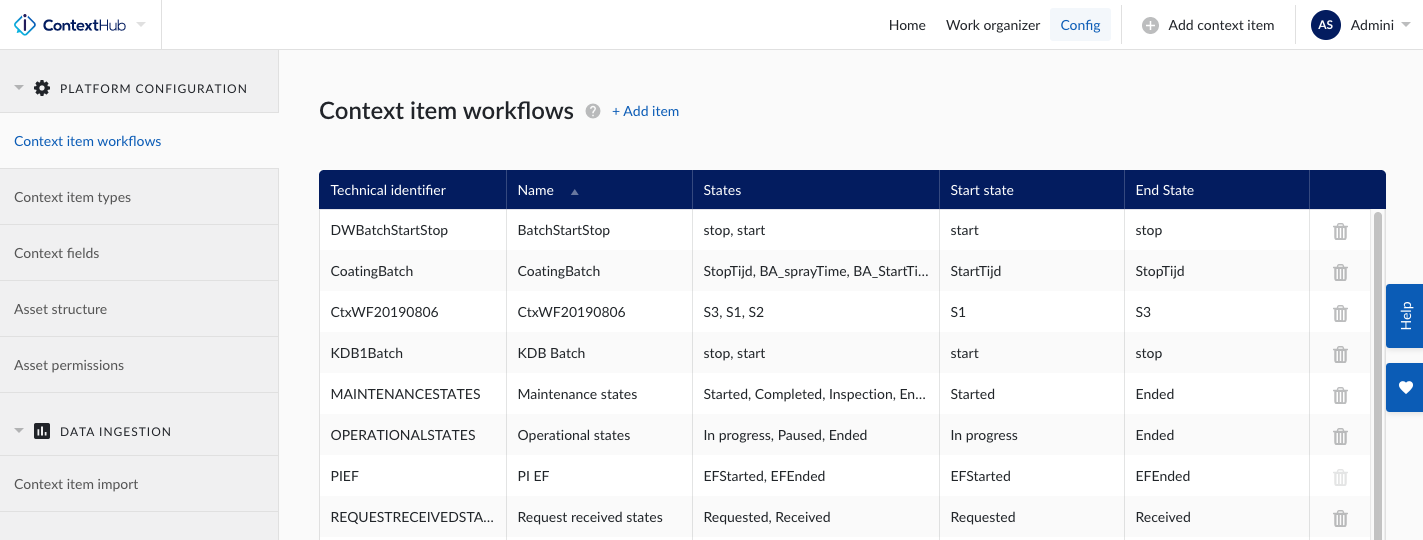
You will be led to the State Configuration page where you will see a table that lists your states.
Click on "Config" located in the top bar of ContextHub.
Go to the PLATFORM CONFIGURATION menu.
Select "context item workflow".
Note
Your new workflow will be added to the workflow configuration table.
Note
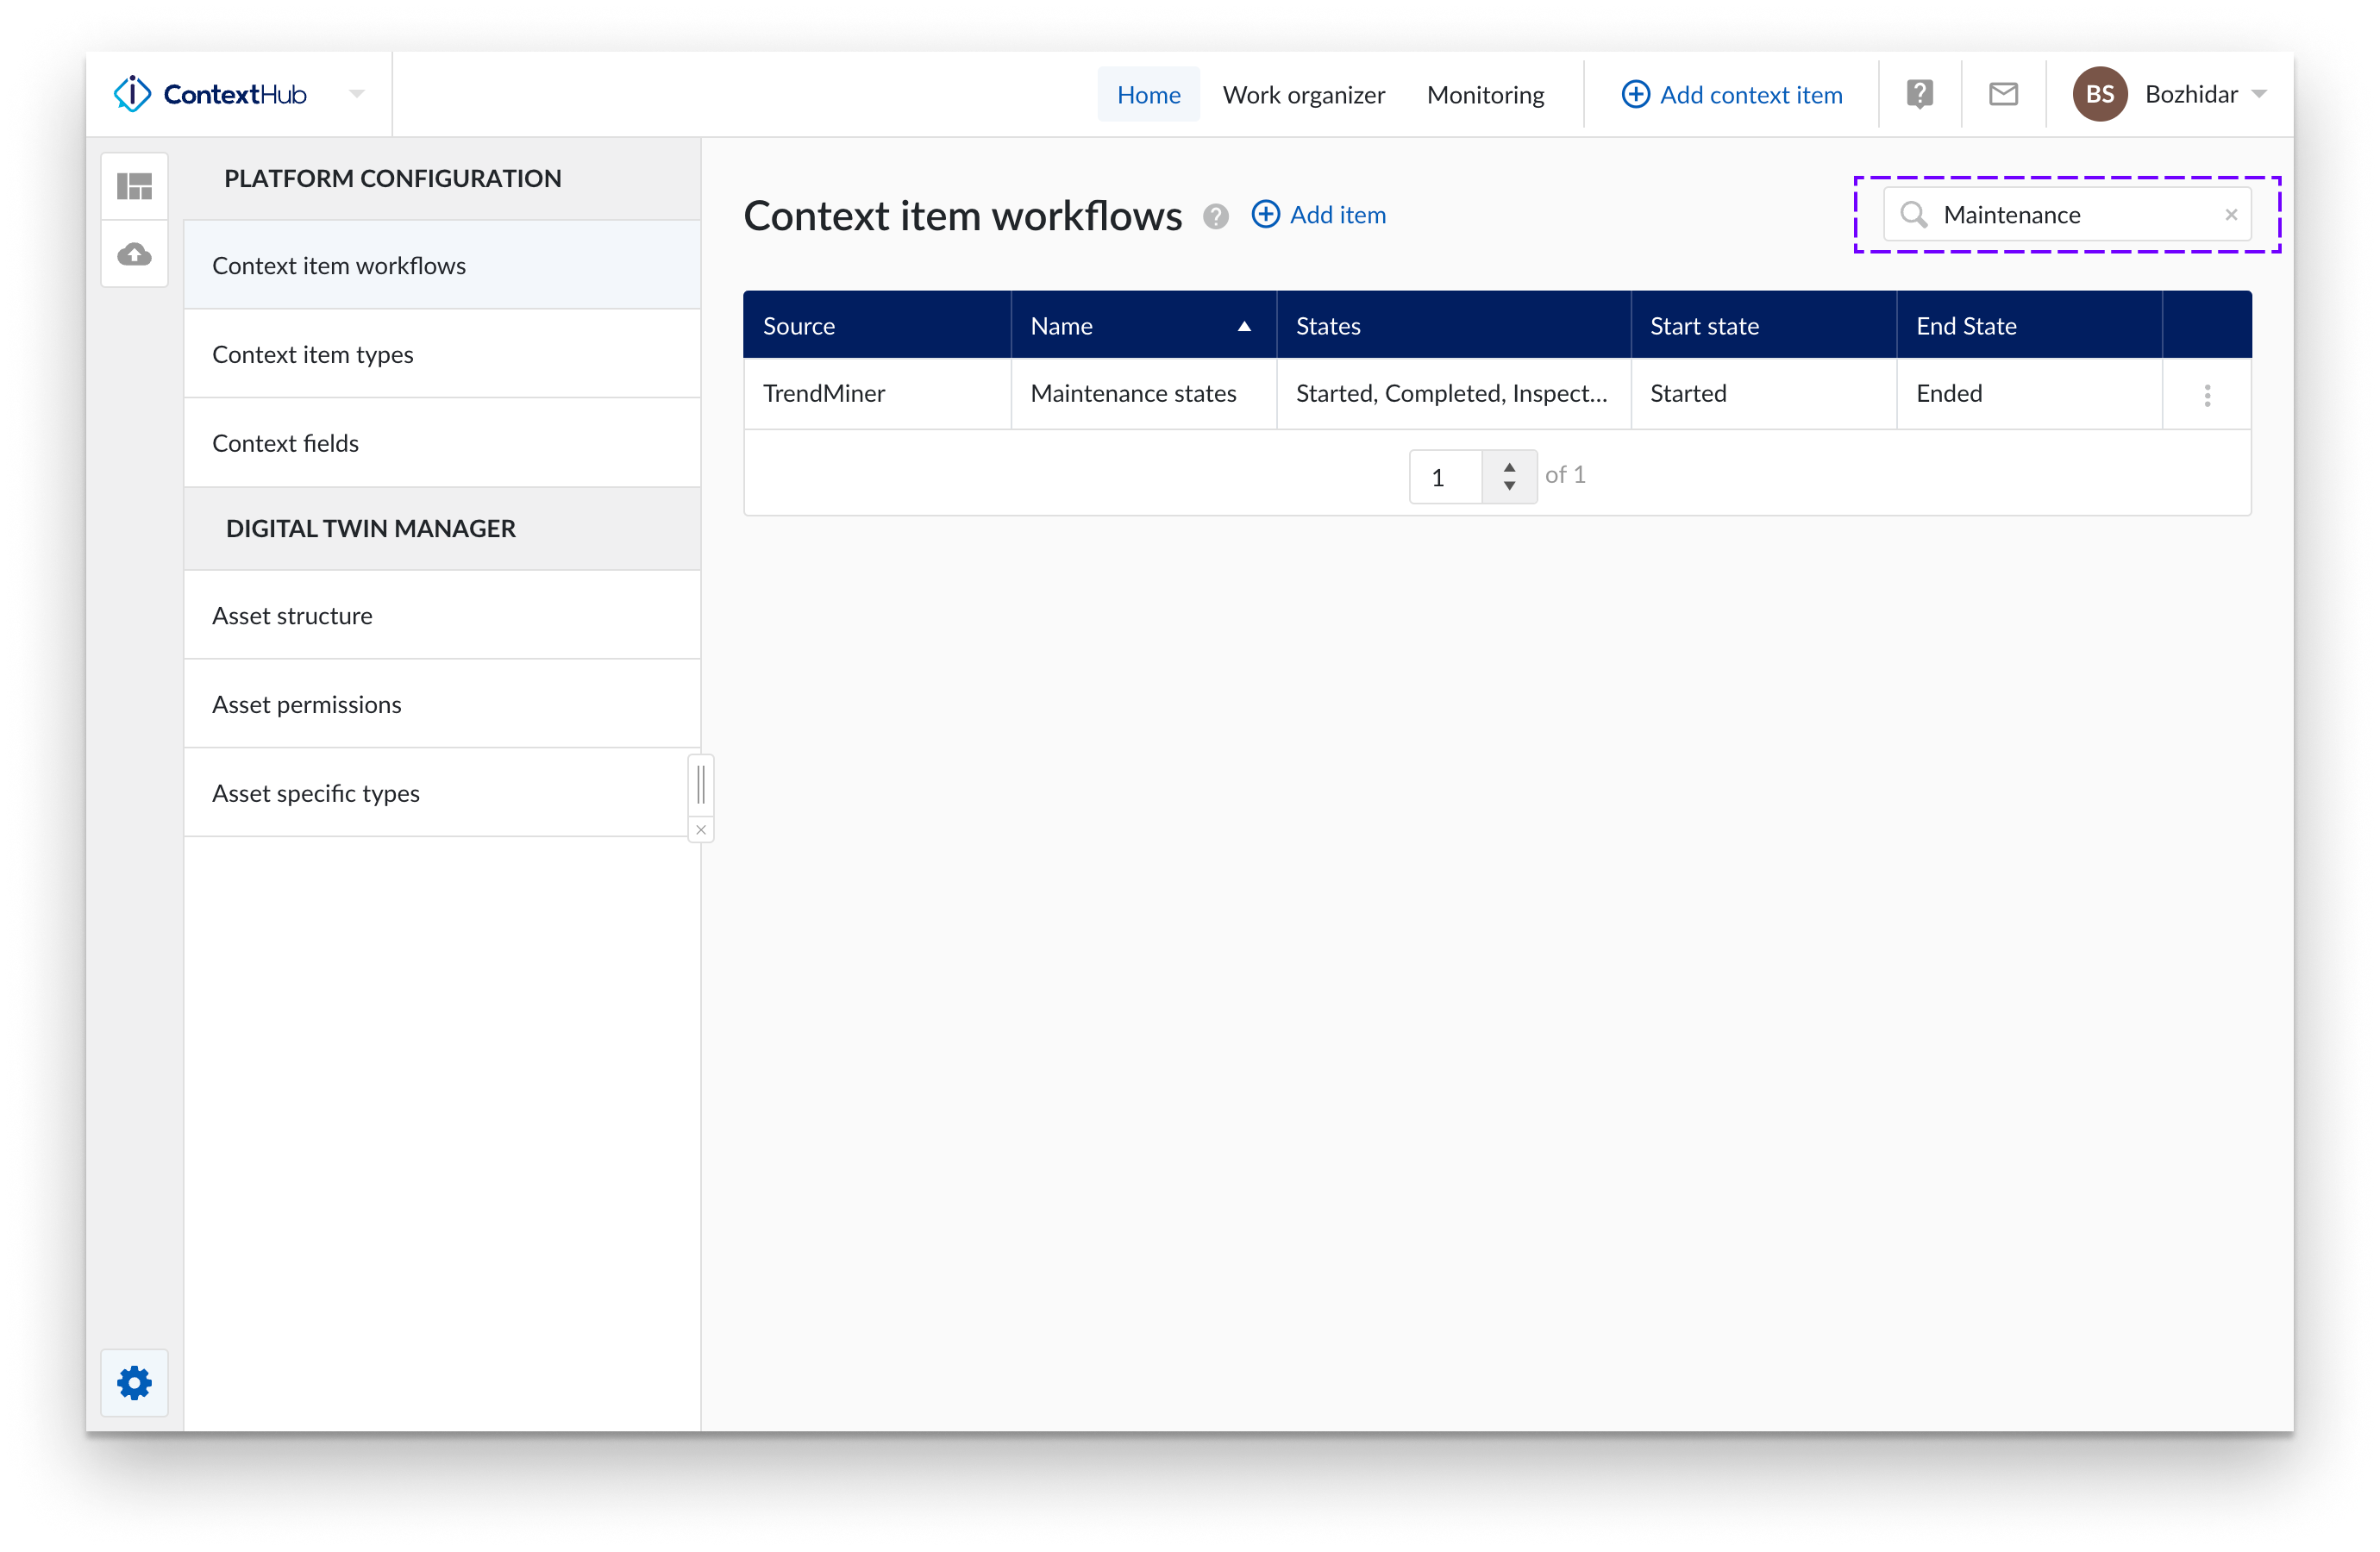
Search for a specific Context Item Workflow using the search bar located at the top right of the screen.
Click on the "+Add item" option highlighted in blue above the configuration table.
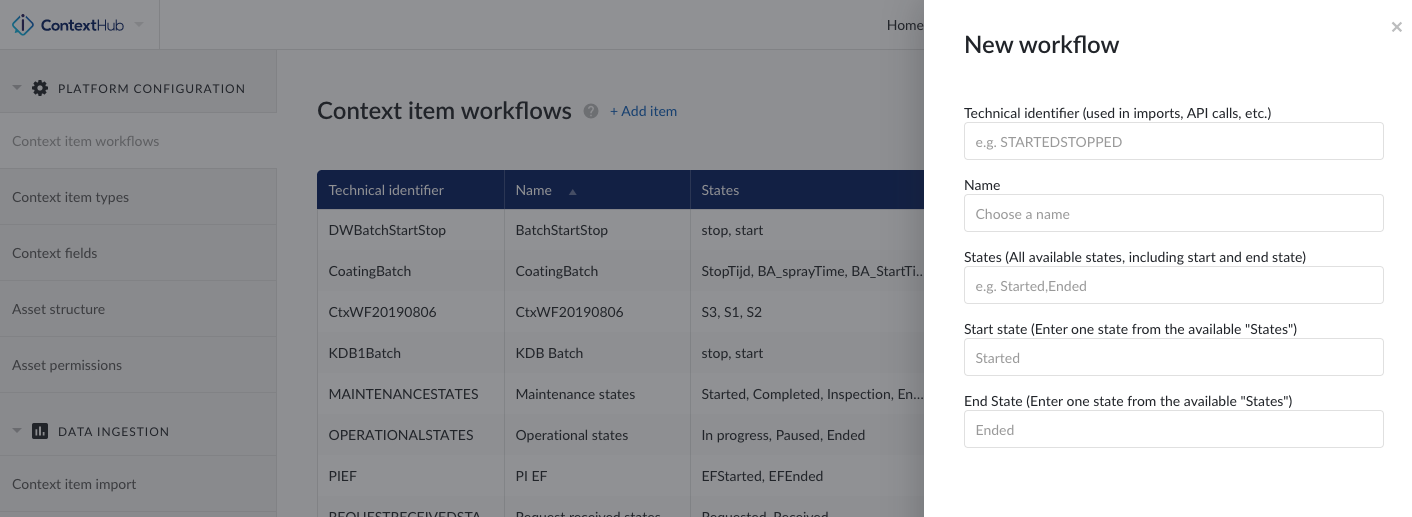
A new workflow config side panel opens. Fill in the fields of this panel. In this panel you can enter the states and substates of your workflow. However, the states list must include a start and end state.
Enter the start and end state where requested in the panel.
Once the panel requirements are completed, click on the "Save" button.
Note
The search bar only accounts for the “Name” column.
Select "Context Item Workflows" in the PLATFORM CONFIGURATION menu.
Identify the workflow you wish to delete, and click on the three vertical dots at the end of the selected row.
Click on delete.
You can reorder the workflows by clicking on the title of each column. To refine your workflow order further you need to reconfigure your workflows.
Select "Context Item Workflows" in the PLATFORM CONFIGURATION menu.
Identify the workflow you wish to reorder, and click on the three vertical dots at the end of the selected row.
Click on Configure workflow.
Rename the workflow or add a state as required.
Click on save
Click on the column head that you wish to reorder.
Note
New workflows can be reordered as needed. But once the workflow is created its start and end items will be fixed in place and only the inner items can be reordered.
Context Type Configuration
Context Item Types are elements that can be used to add salient detail to your context data. Types also act as classifiers that can be used as a target for search. For example, you are interested in a particular process, specifically the maintenance history of your plant. With the creation and use of the Context Item Type "Maintenance" you will be able to find maintenance details of your process.
Click on the gear icon present in the top bar of ContextHub
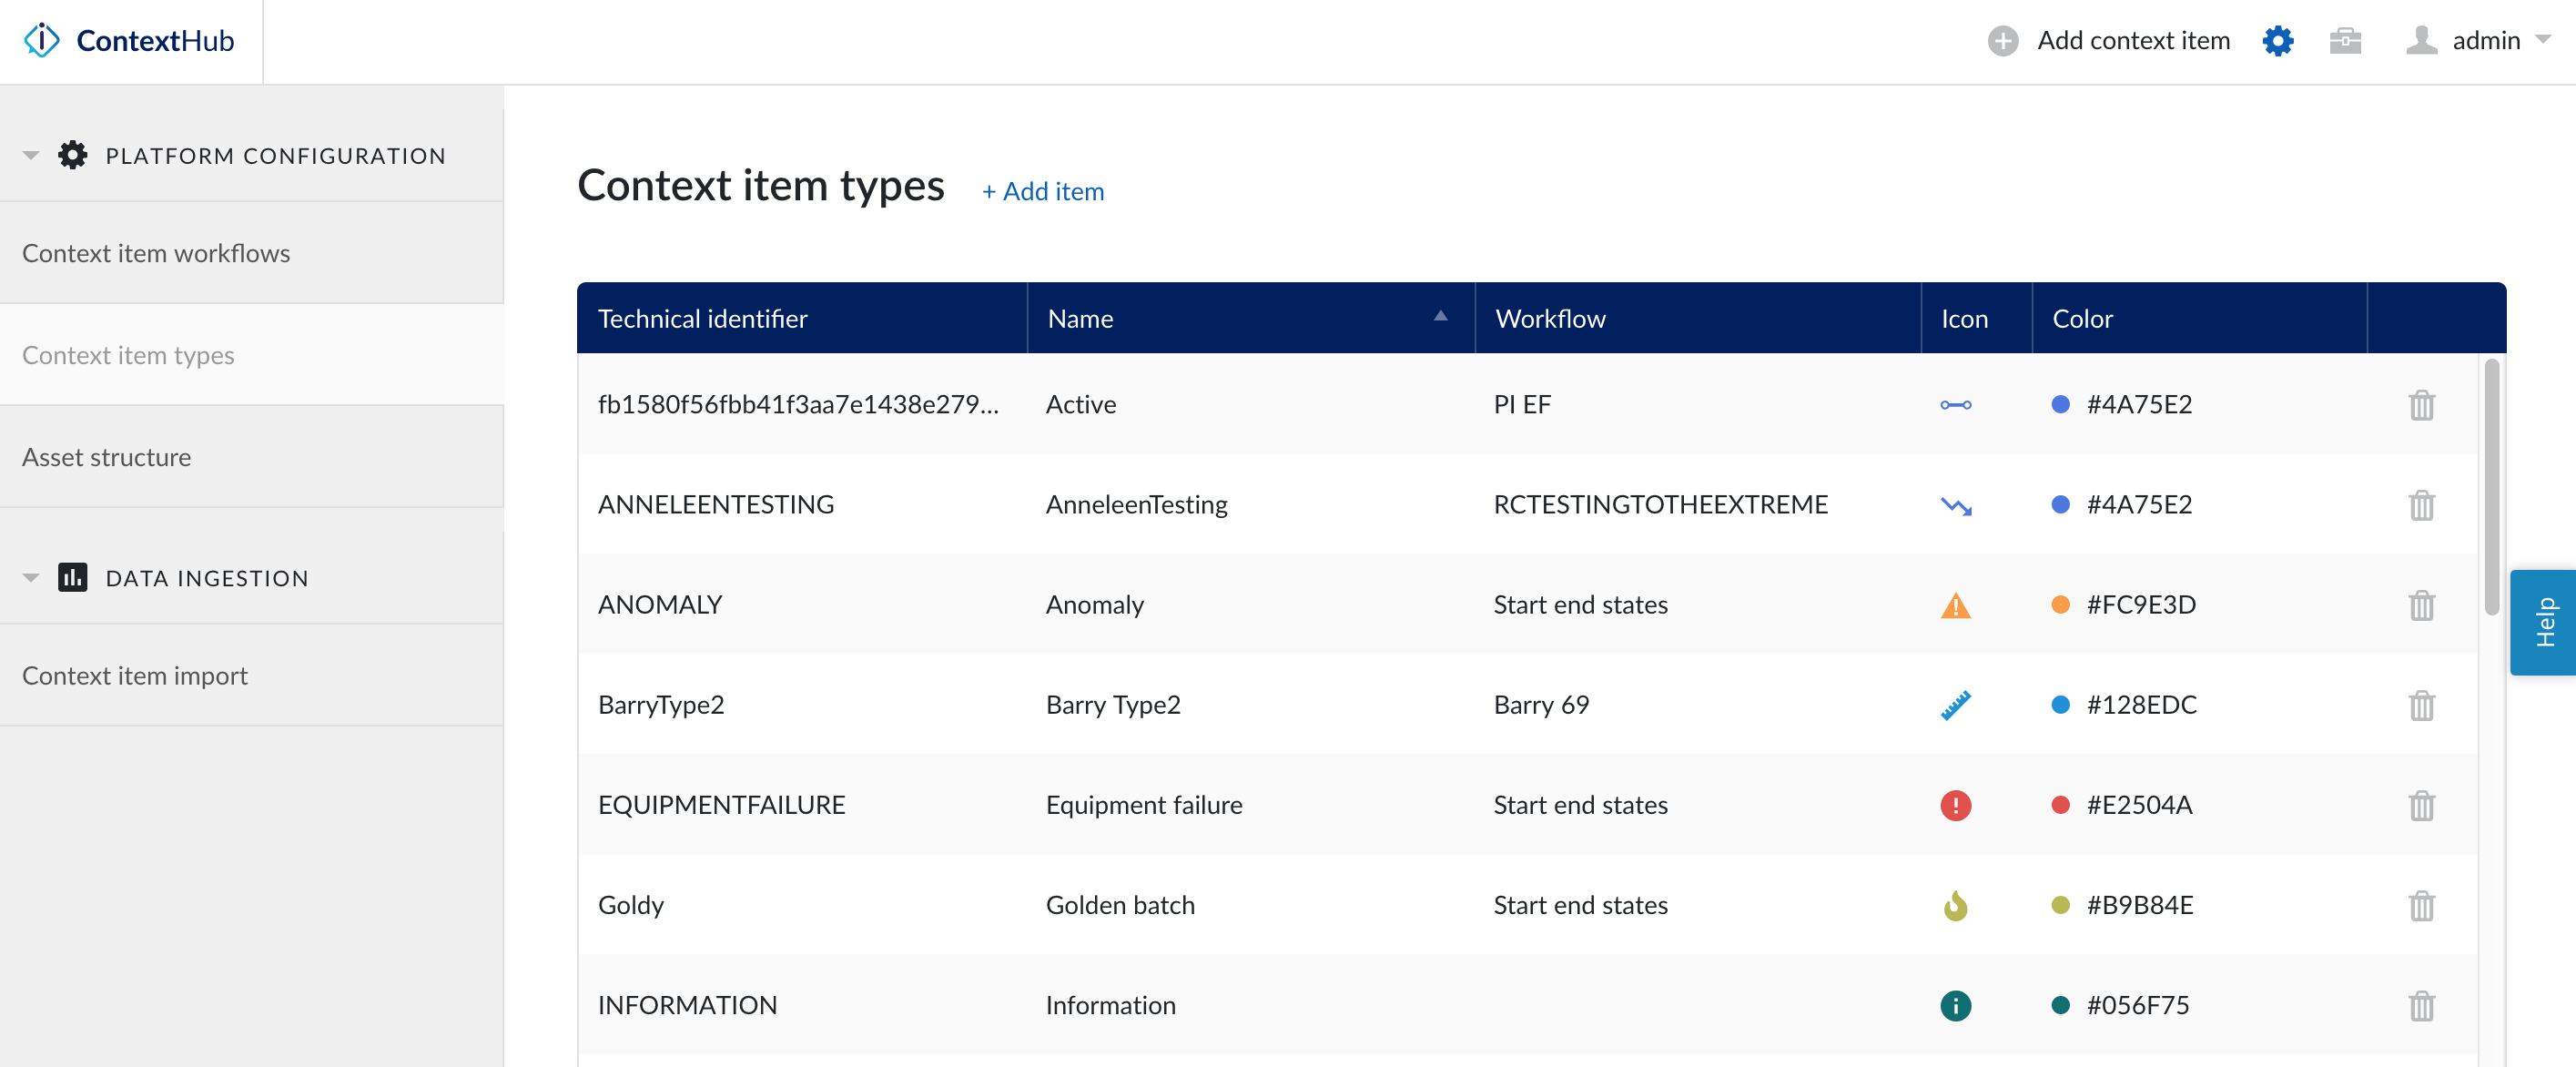
Click on "context item type" in left panel. A table view of all context item types available is shown.
Select the context item of interest. A panel will open from the right of the screen, providing detail of the context item type selected.
Edit context type fields within the panel. These fields include: the identifier, name, states, icon and color.
Click on the gear icon present in the top bar of ContextHub.
Opens the context item types config page.
Click on the "Add new Context Item Type" option to create new context item type. A panel will appear from the right of the screen.
Populate the panel with a name, workflow (A-Z), icon and color.
Click save.
Note
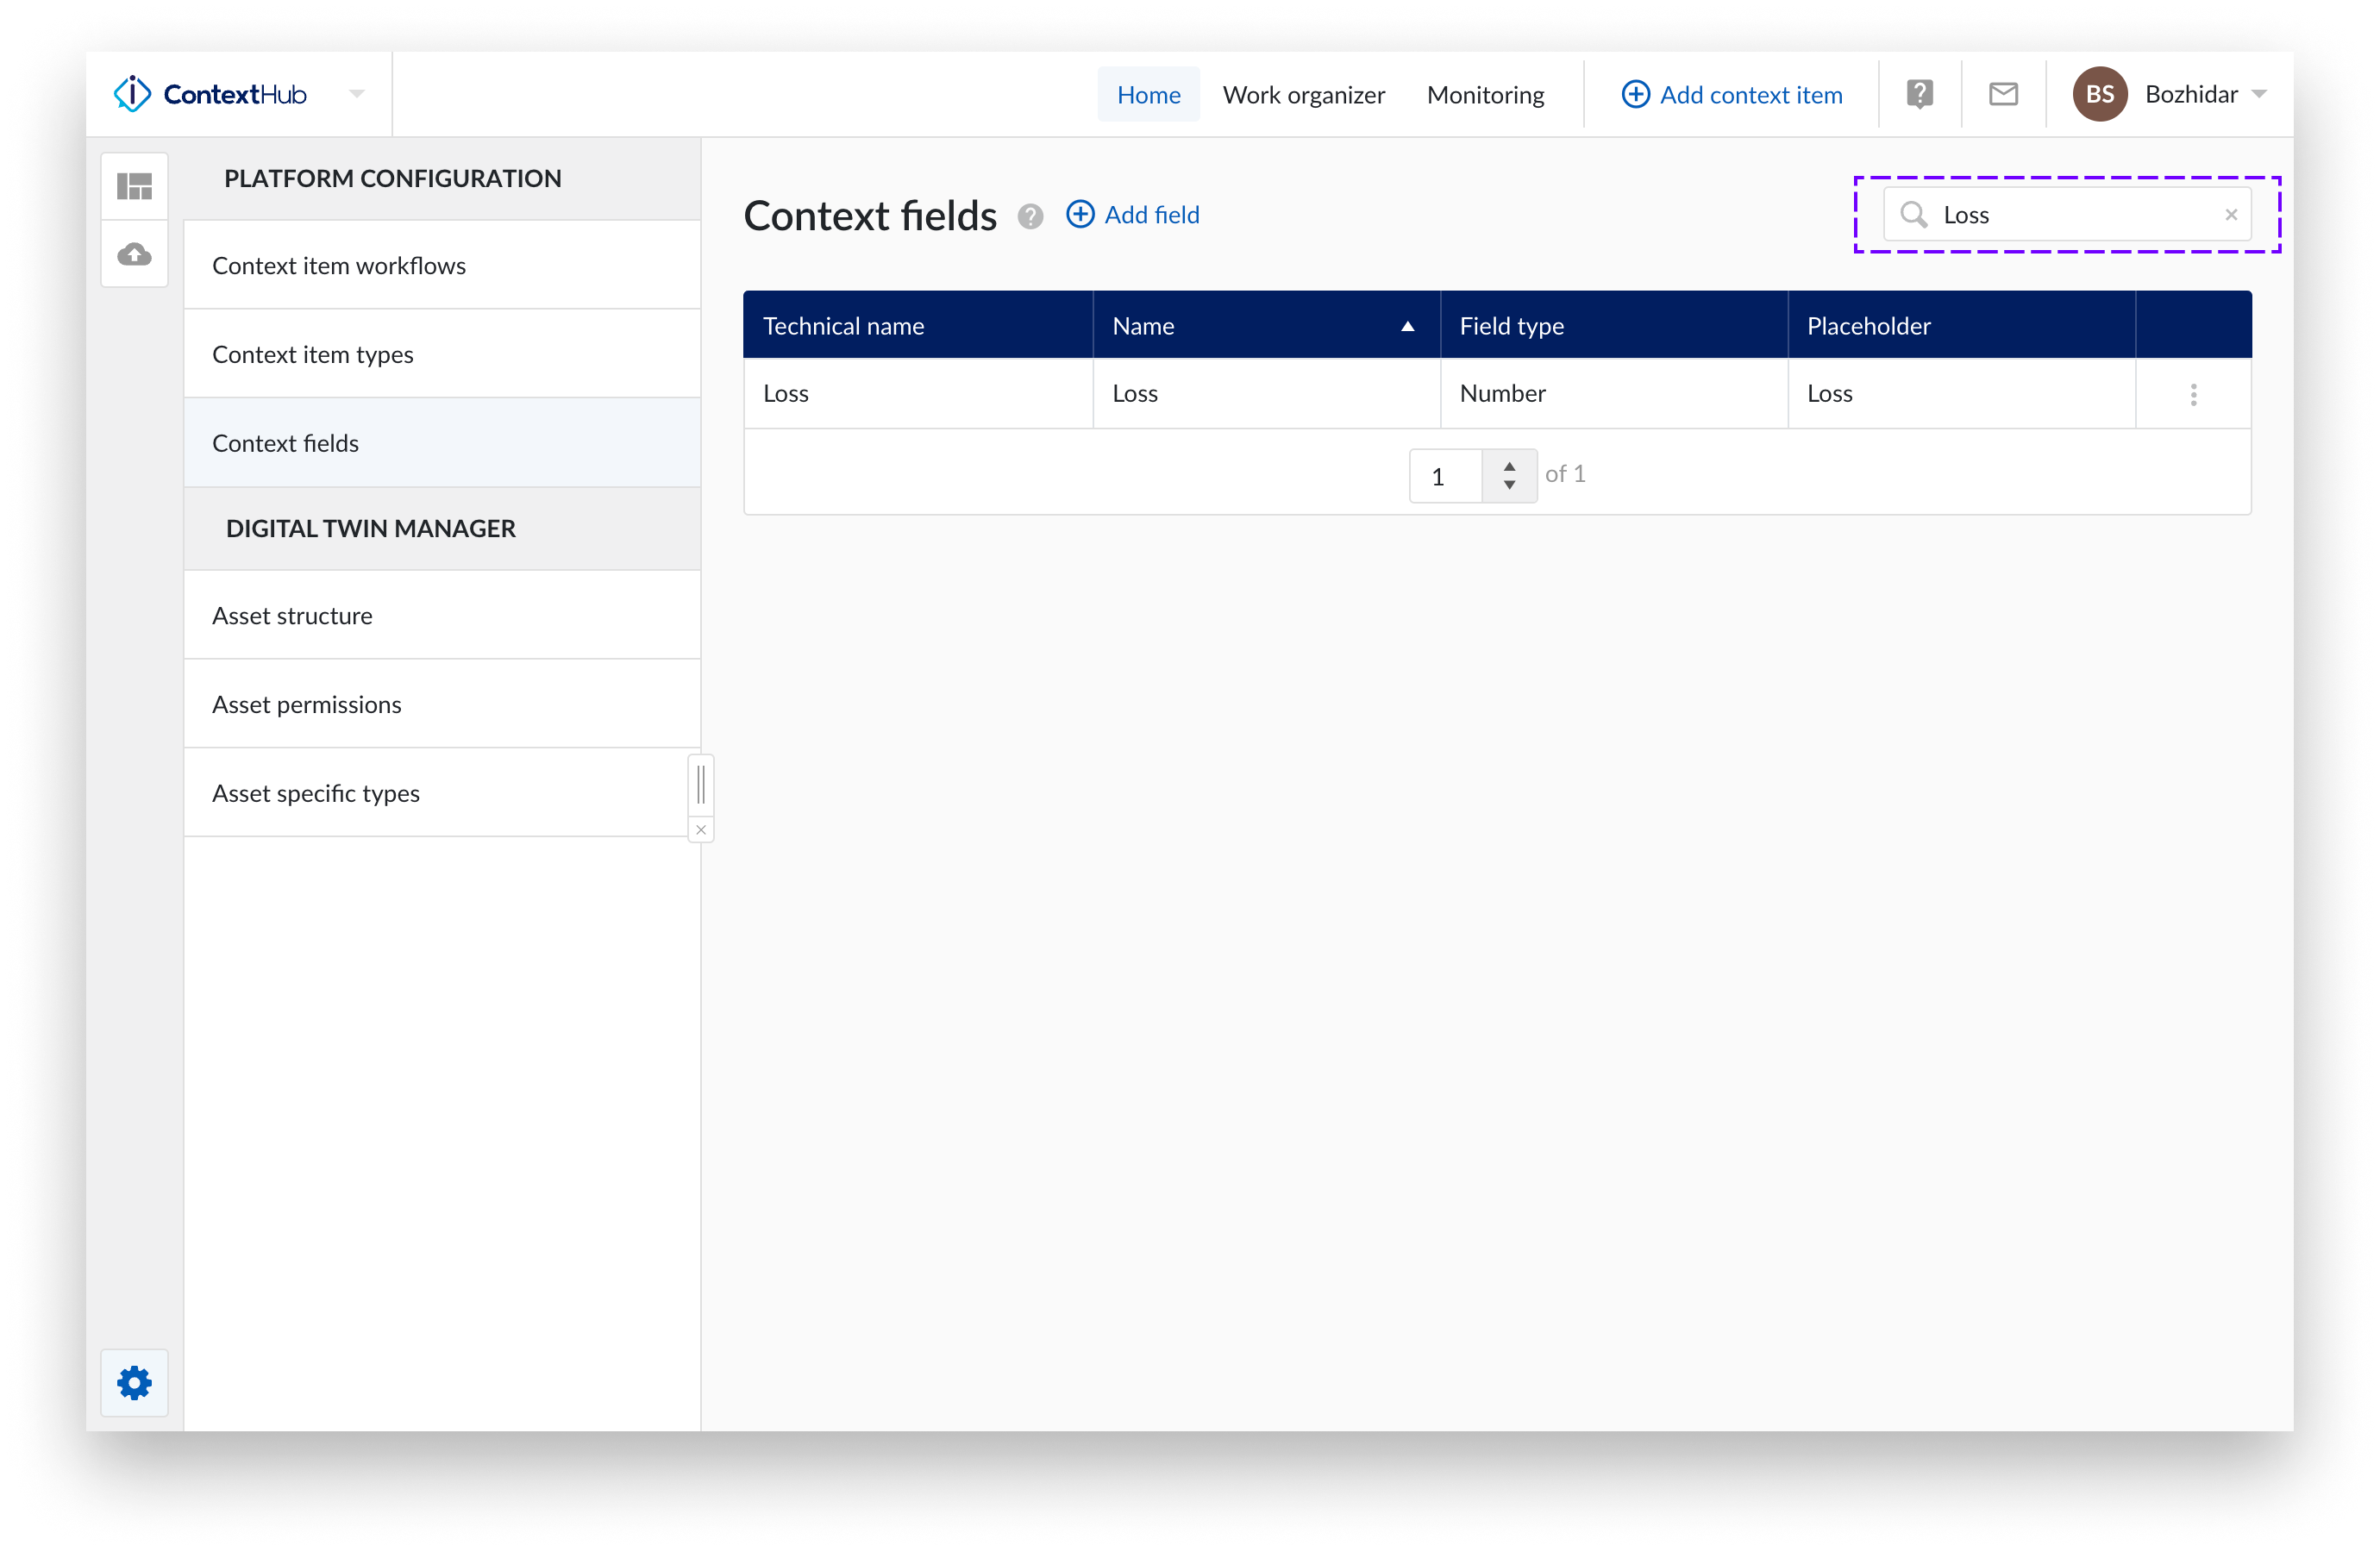
Search for a specific context item type by using the search bar located in the top right of the screen.
Note
Creating Context Item types requires administration rights.
Note
The search bar only accounts for the “Name” and the “Technical identifier” columns.
Open the context item types config page.
Identify the context item type of interest, and click on the trash can icon located in the far right column of the configuration table, in the row your context item type sits.
A confirmation popup appears, click "Yes delete".
If you change your mind, select "Don't delete".
Note
If a Context Item Type is in use, the delete function will not carry out the request.
Note
You cannot recreate a TYPE with the same name even after deletion. Deletions are soft deleted only.
Note
Context Items can only be deleted by their owner or an administrator.
Component selector
The component selector is an option available that enables you to select your tags and assets in a number of locations in TrendMiner, for example; context item create, the component filter in ContextHub, the context item visualization panel and the context import screen.
The procedure is the same wherever you employ it, in this instance we add a component while we create a new context item:
Goto ContextHub.
Select "Add context item" located in the top right hand side of the screen.
Populate the newly opened side panel as normal.
Click on the "Add a component" button.
Note
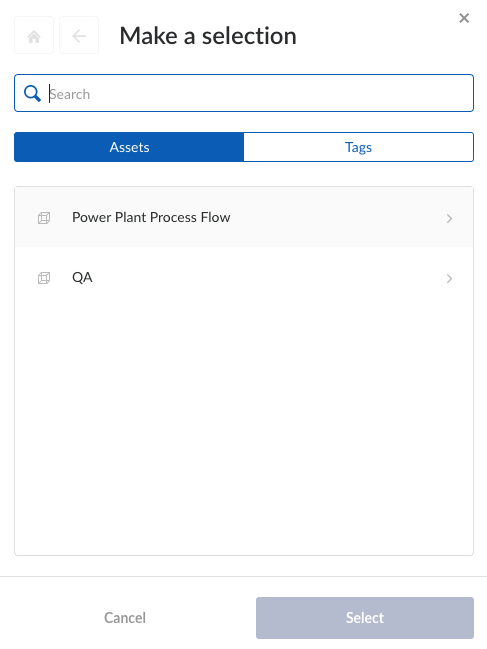
When you select the "Add a component" option, a mini asset browser appears.
Search for or identify a component from the list.
Click on the icon directly to the left of the component name so that a green tick appears.
Click on the "Select" button.
The component is now added to your components list as a bubble. You are free to add more components as you wish.
Note
When selecting a component, parent information is included.
Note
If an asset framework is not available, contact your system administrator to set one up.
Permission on Types
This option lets administrators define permission levels for each context type.
Different context types are required by different users depending on departments and processes. This leads to the need for context types to become accessible dependent on role within the company.
When creating new types in ContextHub everyone gets Permission (Read/Write) to the type by default. There are two types of access rights; write and delete. Write gives someone the ability to create or update context items of the selected type. Delete provides the user the option to delete a type, whilst maintaining the right to create and update the context item type.
The principle is that end users will have the right to read and maintain types, but only managers or team leads can delete a type.
Note
Without any permission on the type you can not create or update context items based on it.
Note
With permission to write on the type you can edit previous items (i.e. all content on the item). You will not be able to delete the item.
Create a new context type in the normal way.
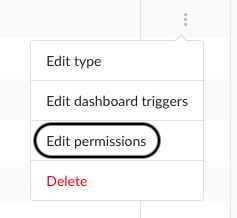
Identify your type row on the ContextHub grid, and click the three vertical dots situated far right of the row.
Click on "Edit permissions".
Type in the name of user under "ITEM PERMISSIONS".
Select between "Write" or "Delete" options.
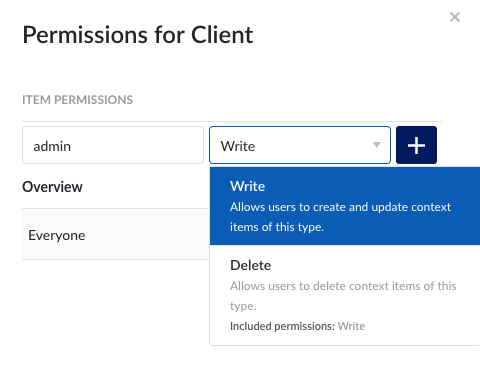
Click on the plus button.
Note
Deleting a type means a soft delete. ie a new type with the same name will not be possible.
In addition to permission rights, approval rights on content can also be managed. Look to this document for further information.